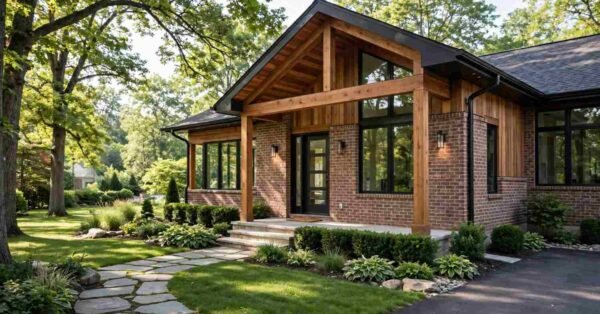
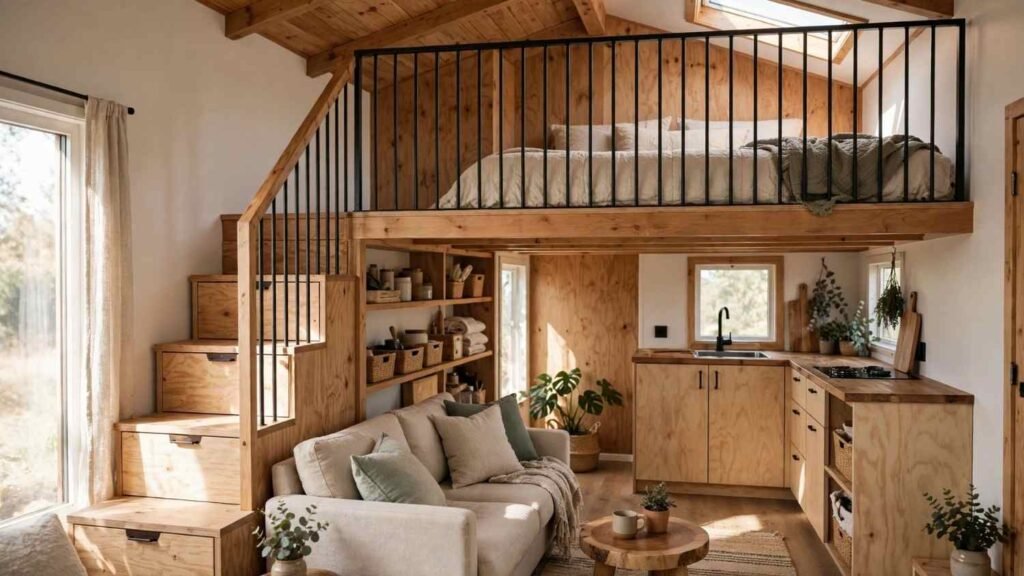
A sleeping loft is an elevated sleeping platform built above the main floor of a tiny home, using vertical space instead of square footage. I have seen it become the single most debated feature in small-home design, and for good reason. It affects safety, comfort, and resale value.
Loft decisions shape everything below them. A poorly framed or badly ventilated loft creates heat problems, fall hazards, and code failures that cost far more to fix later.
In this guide I cover loft types, dimensions, codes, framing, access, guardrails, egress, ventilation, insulation, electrical, storage, accessibility, costs, maintenance, and hiring the right professionals.
What a Sleeping Loft Is and Why It Defines Tiny Home Living
A sleeping loft is a partial upper level that sits above the main living area and holds a bed, storage, or both. It exists because tiny homes trade floor area for vertical volume. And that trade defines the entire interior.
I treat the loft as a structural decision first and a bedroom second. Everything about the roofline, the trailer height, the stair placement, and the heating system flows from it.
The Core Function of a Loft in a Small Footprint
The loft recovers usable area that would otherwise be lost to open ceiling. In a 24-foot tiny home, that recovery adds roughly 100 to 140 square feet of sleeping and storage space.
That extra area lets the main floor stay open for a kitchen, bathroom, and living zone. Without it, most owners give up a full bedroom.
Loft Types: Full-Width, Partial, Cantilevered, and Split-Level
Full-width lofts span the entire trailer width and deliver the most floor area. Partial lofts leave one side open to preserve headroom below and create a more spacious feel.
Cantilevered lofts extend past the trailer frame over a gooseneck or bump-out. Split-level lofts stagger two platforms at different heights, which works well when one person wants a workspace and the other wants a bed.
Where Lofts Fit in the Overall Tiny Home Layout
I place lofts over the lowest-ceiling zones first, which usually means above the bathroom or kitchen. Those rooms need the least standing height.
The living area keeps the full ceiling. That single decision preserves the open feeling buyers and renters respond to most.
Loft Dimensions, Headroom, and Ceiling Height Standards
Loft dimensions decide whether the space feels restful or claustrophobic. I plan headroom before I plan the mattress, because headroom is the constraint that never moves.
The total stack is fixed. Road-legal towable tiny homes in the USA face a 13 feet 6 inches maximum height in most states, and every inch of floor, framing, insulation, and roofing eats into what the loft gets.
Minimum Headroom and Sitting Clearance
I target a minimum of 36 inches from loft floor to the peak, and 42 to 48 inches makes the space genuinely comfortable. Below 30 inches, most adults cannot sit upright.
Sitting clearance matters more than standing clearance. People sit up to read, dress, and get out of bed, so I measure at the mattress edge rather than the ridge.
Loft Floor Area and Mattress Sizing
A queen mattress needs 60 by 80 inches of clear platform, plus circulation space on at least one side. A full needs 54 by 75 inches, which fits far more comfortably in a standard 8-foot-6-inch wide build.
I add 18 to 24 inches beyond the mattress for a landing zone at the access point. That strip prevents the awkward crawl-directly-onto-the-bed entry that owners complain about most.
Ceiling Height Trade-Offs Against Trailer Height Limits
Every design choice below the loft steals height from it. A 12-inch floor system, a 10-inch loft joist, and a 6-inch roof assembly consume more than two feet before anyone lies down.
I recommend shallow-profile framing, dropped-axle trailers, and gable or shed roofs with steep pitch. Those three moves recover the most usable loft headroom on a road-legal build.
Building Codes, Appendix Q, and Tiny Home Loft Compliance
Codes for tiny home lofts changed substantially over the last decade, and compliance now depends heavily on whether the home is a permanent structure or a towable unit. I always confirm classification before drawing anything.
The distinction drives inspection, insurance, and financing. Get it wrong and the loft becomes the reason a certificate of occupancy stalls.
Appendix Q and the IRC Tiny House Provisions
Appendix Q of the International Residential Code sets relaxed provisions for homes of 400 square feet or less, covering loft ceiling height, loft access, and emergency escape. It permits loft headroom below standard bedroom minimums when other conditions are met.
Appendix Q is not automatically active. A jurisdiction has to formally adopt it, and many still have not.
RVIA, ANSI, and Certification Paths for Towable Units
Towable tiny homes often certify under ANSI 119.5 for park model RVs or through RVIA inspection programs. Those standards govern loft egress, ladder attachment, and alarm placement differently than the IRC does.
Certification affects where the home can legally park. RV parks, campgrounds, and many municipalities accept certified units far more readily than uncertified builds.
State and Local Variation Across the USA
Adoption varies widely by state and even by county. Some states adopted Appendix Q statewide, others left it to local amendment, and a few restrict tiny homes through zoning rather than building code.
I call the local building department before finalizing loft height. One phone call prevents the most expensive rework in the entire project.
Structural Design: Framing, Load Capacity, and Support
Loft framing carries people, mattresses, storage, and dynamic movement. I size it for real occupancy loads, not for the lightest possible build.
A loft that flexes underfoot feels unsafe even when it is structurally adequate. Stiffness matters as much as strength.
Joist Sizing, Spans, and Live Load Requirements
Residential sleeping areas are designed for a 30 pounds per square foot live load under IRC Table R301.5, and I use that figure as the floor rather than the ceiling. Storage lofts and shared sleeping areas justify higher.
For an 8-foot-6-inch clear span, 2×6 joists at 16 inches on center handle the load in most builds. I move to 2×8 or reduce spacing to 12 inches when the loft also carries heavy storage.
Ledger Boards, Beams, and Attachment Methods
The ledger board transfers loft load into the wall framing. I fasten it into studs with structural screws or through-bolts, never into sheathing alone.
Beams handle spans that joists cannot cross. A single flush beam under a full-width loft removes bounce and keeps the ceiling below clean.
Deflection, Bounce, and Long-Term Structural Performance
Deflection limits control how much the loft sags under load. The common residential target is L/360, meaning a 102-inch span deflects no more than about a quarter inch.
Towable homes add road vibration to the equation. I check ledger fasteners and joist hangers after the first few tows, then annually.
Loft Access: Stairs, Ladders, and Hybrid Systems
Access is where design meets daily reality. I have watched more owners regret their access choice than any other loft decision.
Falls from height are a genuine hazard. The CDC reports that falls send roughly 3 million older adults to emergency departments each year, and loft access concentrates that risk in a small space.
Ladders: Fixed, Removable, and Alternating Tread
Fixed ladders cost the least and occupy the smallest footprint. Removable ladders free floor space during the day but introduce the risk of a poorly seated hook.
Alternating tread ladders split the difference. They climb at a steeper angle than stairs while giving each foot a real tread, which makes descent far safer than a straight ladder.
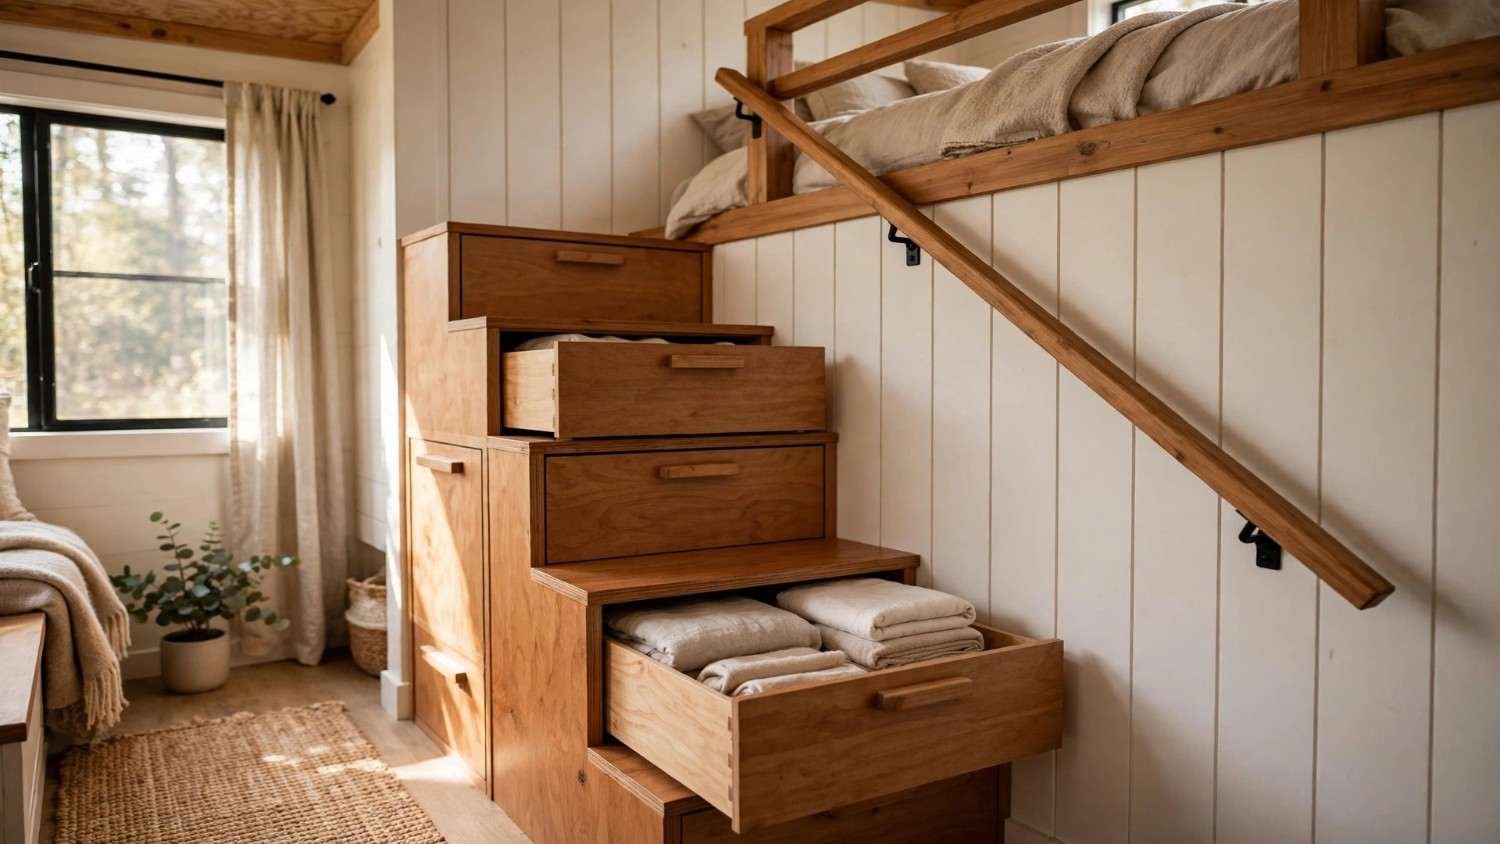
Storage Stairs and Space-Saving Staircase Design
Storage stairs turn the access system into a closet, pantry, or drawer bank. They consume 15 to 25 square feet of floor, which is significant in a 200-square-foot home.
I specify them when the household includes children, older adults, or anyone carrying items up regularly. The storage recovery often justifies the footprint on its own, and a skilled carpentry contractor can build the treads and drawer boxes as one integrated unit.
Handrails, Tread Depth, and Riser Height Guidance
Appendix Q allows stair treads of at least 20 inches wide with a minimum tread depth of 8 inches and riser height up to 12 inches. Standard residential stairs require deeper treads and shorter risers.
I install a graspable handrail on at least one side regardless of what the code permits. That single component prevents the majority of loft stair incidents.
Fall Protection: Guardrails, Barriers, and Edge Safety
Every open loft edge is a fall hazard. I treat guardrails as non-negotiable, even in lofts occupied only by adults.
The edge is most dangerous at night. People sit up, swing their legs, and misjudge the boundary in low light.
Guardrail Height and Opening Limits
Appendix Q permits loft guards at a minimum of 36 inches high, or half the clear height to the ceiling, whichever is less. Standard residential guards run 36 inches with openings that reject a 4-inch sphere.
I hold the 4-inch opening rule in every build. It costs almost nothing and eliminates head-entrapment risk entirely.
Cable, Netting, and Glass Barrier Options
Horizontal cable rails look clean but create a climbable ladder for children. Vertical balusters or tensioned netting solve that problem without blocking light.
Tempered glass panels preserve sightlines and make small lofts feel open. They add weight, which matters on a towable build.
Child and Older-Adult Safety Considerations
Children need full-height barriers and a gate at the access opening. I specify netting across the entire open edge when a toddler sleeps in the loft.
Older adults benefit from grab bars at the top landing and continuous handrails. Those safety and mobility upgrades extend how long a loft stays practical.
Fire Safety and Emergency Egress from a Loft

A loft is the hardest place in a tiny home to escape from. Smoke rises, and the loft sits directly in its path.
I design egress before I design comfort. Every loft gets a second way out.
Egress Window Sizing and Placement
The IRC requires emergency escape openings of 5.7 square feet net clear area with a minimum 20-inch width and 24-inch height, though Appendix Q permits reduced dimensions in tiny house lofts. I aim for a full-size opening whenever the roofline allows.
Placement matters as much as size. The window sits within reach of the mattress, opens without tools, and clears to a safe drop or roof surface.
Smoke and Carbon Monoxide Alarm Placement
Smoke alarms belong inside the loft, not only on the main floor. The NFPA recommends alarms in every sleeping area and on every level.
Carbon monoxide alarms go near sleeping areas when the home has any fuel-burning appliance. I interconnect all alarms so one trigger sounds everything.
Escape Planning and Secondary Exit Routes
I walk every client through the loft escape route before move-in. That means opening the window, checking the drop, and confirming a ladder or landing point.
Two exits beat one. The access opening counts as primary, and the egress window counts as secondary.
Ventilation, Temperature, and Air Quality in Loft Spaces
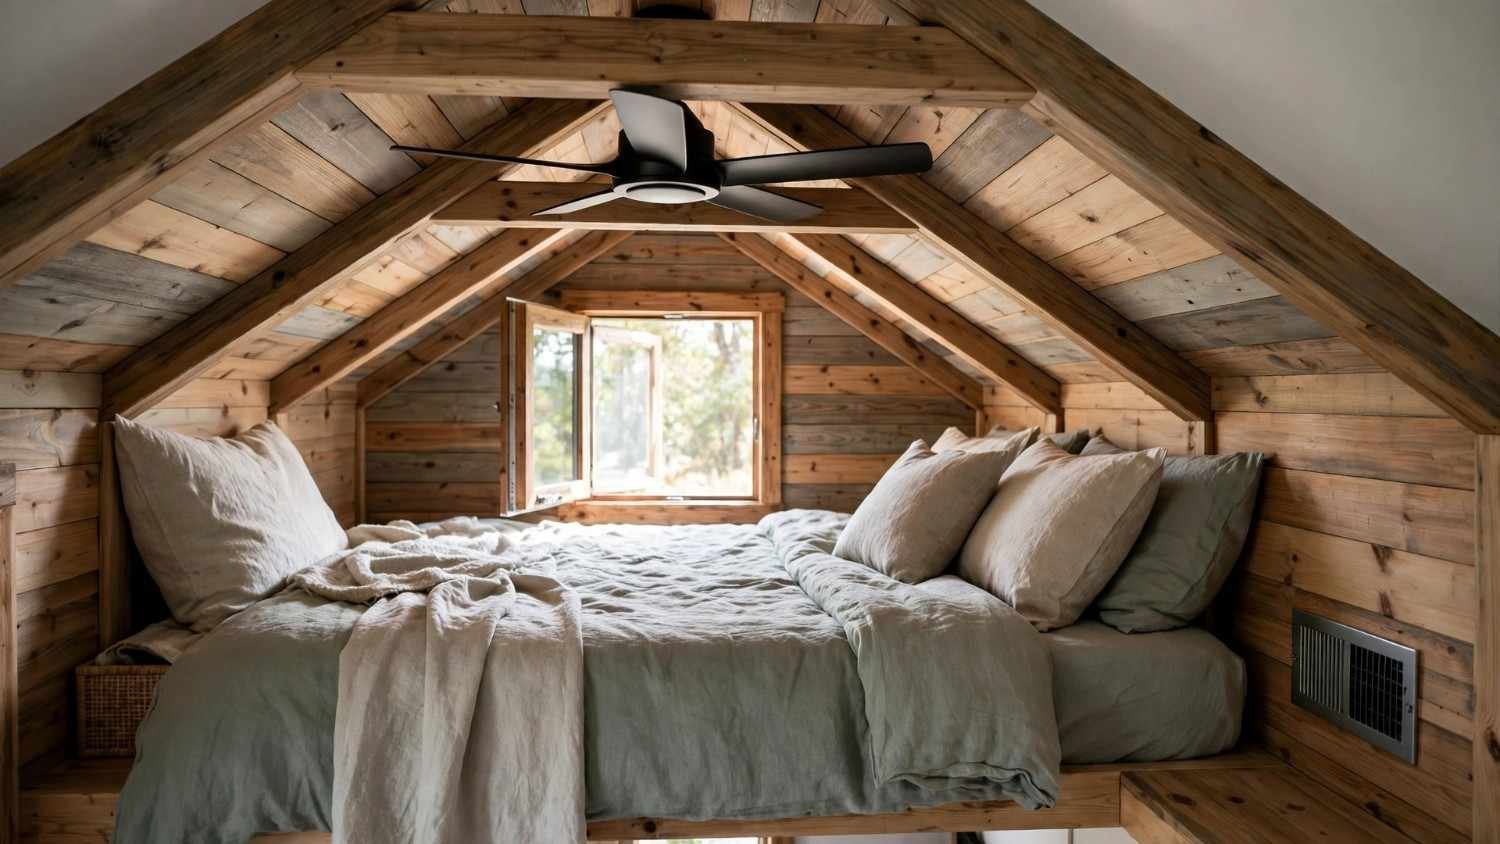
Lofts get hot. Heat rises into the highest, tightest space in the home, and the loft sits directly under the roof.
I solve this with airflow, insulation, and equipment placement working together. Fixing it after the fact costs three times more.
Heat Stratification and the Stack Effect
Warm air collects at the ceiling and creates a temperature difference of 10 to 15 degrees Fahrenheit between floor and loft in an unmitigated tiny home. That gap makes summer sleeping miserable.
Ceiling fans, reversible in winter, break up the stratification. A single low-profile fan moves more comfort per dollar than any other loft upgrade.
Mechanical Ventilation, Fans, and Mini-Split Placement
A mini-split head mounted low on the main floor cools the whole home but starves the loft. I add a dedicated loft vent, a transfer fan, or a second head when budget allows.
Exhaust ventilation matters too. An HVAC specialist sizes the system for the vertical volume rather than the floor area, which is where most tiny home installs go wrong.
Condensation, Humidity, and Mold Prevention
Two sleeping adults release a significant amount of moisture overnight, and the loft traps it against a cold roof. Condensation forms, then mold follows.
I run continuous low-level ventilation and keep relative humidity between 30 and 50 percent. A small energy recovery ventilator handles this in most builds.
Insulation, Moisture Control, and Roof Assembly Above the Loft
The roof assembly above a loft has less cavity depth than any other surface in the home. That constraint drives every insulation decision.
I prioritize R-value per inch here. Thickness is the enemy of headroom.
Roof Insulation Types for Shallow Cavities
Closed-cell spray foam delivers roughly R-6 to R-7 per inch and doubles as an air and vapor barrier. Rigid polyiso boards perform similarly and install cleanly over the rafters.
Batt insulation costs less but needs more depth for the same performance. In a loft ceiling, that depth rarely exists.
Vapor Barriers and Air Sealing at the Ridge
Air leaks at the ridge carry warm, moist indoor air into the roof assembly. That is where hidden rot begins.
I seal every penetration, tape every seam, and use a continuous barrier appropriate to the climate zone. Sealing beats adding R-value when the budget is tight.
Roof Leaks, Water Damage, and Early Warning Signs
Stains on the loft ceiling, a musty smell, and soft spots near fasteners all point to a roof problem. I inspect after every heavy storm and after every long tow.
Small leaks become structural failures fast in a shallow assembly. Bringing in water damage restoration early keeps a minor repair from turning into a full roof rebuild.
Electrical, Lighting, and Outlet Planning for Lofts
Loft electrical work gets planned last and regretted first. I run circuits before insulation goes in, because retrofitting a finished loft means opening the ceiling.
The loft needs power for lighting, charging, alarms, and a fan. That is four distinct needs in a space with almost no wall area.
Outlet Placement and Bedside Circuits
I place at least two outlets at mattress height on opposite sides of the bed. USB-integrated receptacles remove the need for bulky adapters in a tight space.
One outlet serves the fan and stays separate from the bedside circuit. A licensed electrical contractor confirms the loads match the panel capacity before finish work starts.
Low-Profile and Recessed Lighting Choices
Surface-mounted fixtures steal headroom. Recessed LED pucks and linear strips under the ridge deliver light without intruding into the sleeping zone.
I add a switch at the loft and another at the base of the stairs. Climbing to a dark loft is how falls happen.
Alarm Wiring and Interconnection
Hardwired, interconnected alarms outperform battery units in a multi-level home. Wiring them during framing costs a fraction of retrofitting later.
Battery backup remains essential. Power loss and fire arrive together more often than people expect.
Storage, Built-Ins, and Loft Interior Finishing
The loft holds more than a bed. Smart built-ins turn dead space under the eaves into genuinely useful storage.
I design storage into the framing rather than adding furniture. Furniture in a loft blocks movement and creates trip hazards.
Under-Eave Storage and Integrated Shelving
The triangle where the roof meets the loft floor is unusable for sleeping and perfect for storage. Shallow drawers, cubbies, and hinged panels recover that volume.
I keep every storage face flush with the wall plane. Protruding hardware catches clothing and skin in a low-clearance space.
Flooring, Wall Finishes, and Weight Considerations
Loft finishes add weight directly to the framing and to the trailer’s payload. I choose thin plywood, lightweight vinyl plank, or engineered panels over tile and solid hardwood.
Light colors expand the perceived space. A fresh coat from a professional painting service makes a 42-inch loft feel considerably taller than a dark finish does.
Bedding Logistics and Mattress Handling
Getting a mattress into a loft is a real problem. I confirm the mattress fits through the access opening before anyone buys one.
Roll-up foam mattresses solve this cleanly. Fitted sheets with deep pockets and a lightweight duvet make changing bedding possible without standing room.
Accessibility, Aging in Place, and Loft Alternatives
Lofts work beautifully at 35 and become a problem at 70. I plan the exit strategy at the design stage, not after an injury.
Knees, hips, balance, and vision all change. The loft should not be the reason someone leaves their home.
When a Loft Stops Working for the Occupant
Warning signs show up gradually. Avoiding the loft during illness, hesitating at the top step, or sleeping on the couch all signal that the access no longer works.
I recommend reassessing loft use every few years. That conversation happens far more easily before a fall than after one.
Main-Floor Beds, Murphy Beds, and Convertible Layouts
A main-floor Murphy bed converts the living area into a bedroom at night. Convertible sofas and platform beds with drawer bases serve the same role.
Those layouts leave the loft for storage or guests. The home stays functional without a major remodel.
Mobility Upgrades and Retrofit Options
Replacing a ladder with storage stairs is the single highest-impact retrofit. Adding handrails, brighter lighting, and a landing platform follows close behind.
Some owners convert the loft entirely and rebuild the main floor around a ground-level bed. A remodeling contractor handles that conversion without compromising the structure.
What does it cost to build or upgrade a tiny home sleeping loft, and who should I hire to do it safely?
Cost Factors for Building or Upgrading a Sleeping Loft
Loft costs vary more than any other tiny home component. The access system alone swings the total by several thousand dollars.
I break the budget into structure, access, finishes, and systems. Each one carries different risk if it is done cheaply.
Materials, Labor, and Access-System Costs
A basic framed loft with a fixed ladder runs at the low end. Storage stairs, custom guardrails, and integrated built-ins push the figure several times higher.
Labor dominates the total on retrofit work. Cutting into a finished home costs more than building right the first time.
Retrofit Versus New-Build Cost Differences
New-build lofts integrate with the wall framing and roof assembly from day one. Retrofits require opening finishes, verifying load paths, and often reinforcing existing walls.
I budget a meaningful premium for retrofit work. The structural verification alone justifies bringing in a professional handyman service for the assessment.
Inspection, Maintenance, and Seasonal Loft Checks
A loft needs the same attention as any structural element. I set an annual schedule and stick to it.
Towable homes need more frequent checks. Road vibration loosens what a stationary home keeps tight.
Annual Structural and Fastener Inspection
I check ledger fasteners, joist hangers, and guardrail anchors once a year. Any movement, gap, or squeak gets investigated immediately.
Deflection under load is the clearest early warning. Standing at the loft center and feeling noticeable flex means calling a professional.
Alarm Testing and Ventilation Servicing
Smoke and carbon monoxide alarms get tested monthly and replaced on the manufacturer schedule. Most units expire at 10 years regardless of battery condition.
Fans, vents, and mini-split filters need seasonal cleaning. Dust in a small volume degrades air quality far faster than it does in a full-size home.
Choosing the Right Professionals for Loft Work
Loft work sits at the intersection of framing, code compliance, and finish carpentry. Not every contractor handles all three well.
I look for tiny home experience specifically. Standard residential habits do not always translate to a 200-square-foot structure on a trailer.
Carpenters, Framers, and Tiny Home Specialists
Framers handle the structural work, and finish carpenters handle stairs, guardrails, and built-ins. Tiny home specialists understand weight limits, road loads, and Appendix Q.
I ask for photos of previous loft builds. Completed work reveals more than any certification list.
Verifying Licensing, Insurance, and Code Knowledge
I confirm licensing, general liability coverage, and workers compensation before work starts. Loft work happens at height, and that raises the stakes on insurance.
Code knowledge is the differentiator. A contractor who names the local adoption status of Appendix Q without hesitation is the one I hire.
Conclusion
Sleeping loft design connects structure, access, egress, ventilation, and accessibility into one system. Each decision affects the others directly.
Lofts sit inside a broader tiny home knowledge base covering framing, HVAC, electrical, and remodeling. Deeper resources exist for every subtopic here.
We help you plan, build, and inspect a safe loft. Connect with Mr. Local Services and get matched with qualified professionals today.
Frequently Asked Questions
How much headroom does a tiny house sleeping loft need?
Aim for at least 36 inches from loft floor to peak. Comfortable lofts run 42 to 48 inches, which lets most adults sit upright at the mattress edge.
Are sleeping lofts required to have guardrails?
Yes, open loft edges need guards. Appendix Q allows 36 inches minimum or half the clear ceiling height, whichever is less, with openings under 4 inches.
Do tiny house lofts need an egress window?
Emergency escape openings apply to sleeping areas. Appendix Q permits reduced dimensions in lofts, but a reachable, tool-free opening remains essential for safety.
Are stairs or ladders better for a tiny home loft?
Stairs offer safer footing and add storage but consume floor space. Ladders save room and cost less. Households with children or older adults benefit from stairs.
Why does my tiny home loft get so hot?
Warm air rises and collects under the roof. Unmitigated lofts run 10 to 15 degrees warmer than the main floor. Fans and dedicated ventilation fix it.
How much weight can a tiny house loft hold?
Sleeping lofts are typically designed for a 30 pounds per square foot live load. Storage-heavy lofts need larger joists or tighter spacing to stay safe.
Can a sleeping loft be converted to something else later?
Yes. Many owners convert lofts to storage or office space and move the bed to a main-floor Murphy bed. Structural framing usually stays unchanged.