
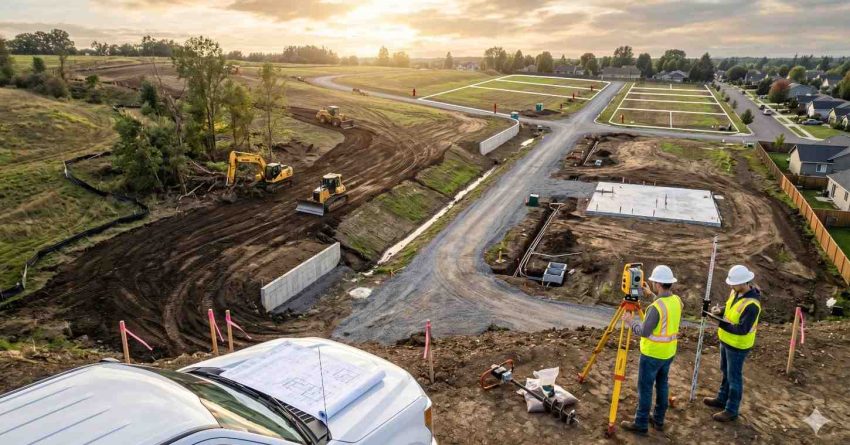
Land buying, site selection, and site preparation are the foundational decisions that determine whether a home build succeeds before construction ever begins. Every project starts with land, finding the right parcel, confirming it is buildable, and transforming raw terrain into a construction-ready platform.
Skip proper due diligence on land and hidden problems become very expensive surprises during construction. Choosing the right site reduces building costs, avoids permit failures, and protects long-term property value.
This guide covers site selection criteria, types of land, due diligence steps, surveys, soil testing, legal restrictions, utility access, flood zones, land financing, site-specific challenges, clearing, grading, and driveway preparation.
What Is Land Buying and Site Preparation?
Land buying is the process of identifying, evaluating, negotiating, and purchasing a parcel for the purpose of home construction. Site selection refers to the systematic evaluation of a property’s physical, legal, financial, and environmental characteristics before committing to a purchase. Site preparation is the physical work performed after purchase to ready the land for construction, including clearing, grading, drainage, and utility connections.
Together, these three stages form the foundation of every home building project. According to the National Association of Home Builders, land costs represent approximately 18 to 25 percent of the total cost of a new home depending on region, making site selection one of the highest-leverage financial decisions in any build.
The sequence matters significantly. Buyers who select land without proper due diligence frequently discover that the site cannot support the intended foundation type, utilities will cost far more to connect than anticipated, environmental restrictions prevent certain building configurations, or title defects create legal complications at closing. Each discovery after purchase can represent tens of thousands of dollars in unanticipated costs or, in the worst cases, a parcel that simply cannot be built upon.
Site preparation costs vary dramatically based on existing conditions. A flat, graded suburban lot within an established utility district may require minimal site work before construction. A heavily wooded rural parcel with steep slopes, poor drainage, and no utilities at the road may require extensive clearing, engineered grading, fill, drainage infrastructure, a long driveway, a septic system, and a private well before any foundation work can begin.
Understanding what these three stages entail and in what sequence is the starting point for every homeowner, investor, and builder planning a new construction project. Our complete guide to buying land for a home build walks through every step from initial property search through closing and pre-construction planning, with actionable checklists and real cost benchmarks for every phase.
Site Selection: How to Choose the Right Land
Site selection is a systematic evaluation process, not just a search for the parcel with the most appealing view or the lowest price. The best site for a home balances location, physical characteristics, legal buildability, utility infrastructure, and total development cost.
Location factors affect daily life, resale value, emergency service access, school quality, and long-term neighborhood trajectory. Urban infill lots offer walkability and existing infrastructure but typically command premium prices and face strict zoning requirements. Suburban lots provide infrastructure at moderate cost with broader availability. Rural acreage offers freedom and space but demands independent utility installation and greater site development investment.
Physical site characteristics include topography, natural drainage patterns, sun orientation, prevailing wind direction, existing vegetation, soil composition, and proximity to floodplains or wetlands. A south-facing site in a cold climate benefits from passive solar gain and reduced heating costs. A site with natural drainage away from the intended building pad simplifies waterproofing design. A flat, well-drained site with no vegetation adds nothing to development cost. These factors directly affect construction cost, long-term energy performance, and livability.
Utility access is one of the most significant cost variables in land evaluation. A lot with city water, sewer, electricity, gas, and broadband already stubbed to the property line costs far less to develop than a raw rural parcel where each utility must be installed independently. The gap between these scenarios can exceed $100,000 in total site development cost.
Zoning compatibility must be verified before any purchase offer is written. Confirm that the parcel is zoned for residential use, that setbacks and lot coverage requirements permit your planned footprint, and that no special permits or variances will be required before building can begin.
For a comprehensive framework covering every factor to evaluate before committing to a site, our site selection criteria guide for custom home builds breaks down each dimension with practical evaluation tools and a decision matrix to compare multiple properties with precision.

Types of Land and Lots for Home Building
Not all land is equal when it comes to home building feasibility, cost, or timeline. Understanding the distinctions between land categories helps buyers set realistic expectations from the beginning.
Raw land is unimproved property with no utilities, graded roads, or site infrastructure. It typically costs less per acre than improved land but requires substantial investment to bring utilities to the site, obtain permits, clear and grade the terrain, and install a driveway, drainage, and possibly a septic system and well. Raw land is common in rural and semi-rural settings and is most often purchased by buyers who prioritize control over the build location, orientation, and site layout.
Improved lots have utilities already stubbed to or near the property line. In most cases this includes water, sewer or septic, electricity, and sometimes natural gas. Improved lots in planned subdivisions are the most common choice for suburban new construction because site development costs are lower, permit timelines are more predictable, and infrastructure conflicts are rare.
In-fill lots are vacant parcels within established urban or suburban neighborhoods where surrounding development is already complete. In-fill lots benefit from existing infrastructure but may present challenging dimensions, limited vehicle access, complex zoning histories, or neighboring property constraints that add to design and permitting complexity.
Rural acreage provides privacy, space, and lower per-acre cost but demands the most investment in site development. Water access, septic feasibility, road access quality, utility hookup distances, and emergency service response times all require careful evaluation on rural parcels before purchase.
Choosing between these categories is one of the first and most consequential decisions in any new build. Our detailed raw land vs. improved lots comparison examines the true cost differences, timeline implications, and risk profiles of each land type so you can choose the option that best fits your budget, timeline, and build goals.
The Land Buying Process: Due Diligence Step by Step
The land buying process follows a specific sequence designed to protect buyers from purchasing property with hidden problems. Skipping steps in this sequence is the primary reason first-time land buyers experience costly surprises after closing.
Step 1: Initial site visit and evaluation. Visit the property at different times of day and in different weather conditions when possible. Look for surface drainage patterns, nearby land uses, road access quality, noise sources, and any visible signs of prior environmental use or contamination.
Step 2: Offer and due diligence period. Once a viable parcel is identified, submit a contingent offer. The due diligence period for land transactions typically runs 30 to 60 days, giving buyers the time to complete all required investigations before the purchase becomes non-contingent.
Step 3: Title search and title insurance. A title company searches recorded county documents for liens, easements, encroachments, deed restrictions, and ownership history. An owner’s title insurance policy protects against title defects discovered after closing.
Step 4: Surveys and physical inspections. During the due diligence window, order the surveys, soil tests, and environmental assessments that the build will require. The specific assessments needed depend on the site type and intended improvements.
Step 5: Utility and zoning verification. Contact local utility providers and the planning and zoning department to confirm what utilities are available, how far connection points are from the property line, and what connection fees and permitting are required.
Step 6: Negotiation adjustment and closing. Use findings from due diligence to negotiate price adjustments or seller concessions where warranted. Then proceed to closing with a clear picture of what you are buying.
The timeline from first site visit through closing can span 45 to 120 days depending on due diligence complexity, lender requirements, and seller responsiveness — our land buyer’s acquisition timeline breaks down every milestone with realistic timeframes and the most common causes of closing delays.
A complete, step-by-step land buying checklist covering every due diligence item organized by phase, with estimated timelines and the most common mistakes buyers make, is an essential tool for any land purchaser moving from initial search through to ownership.

Surveys, Soil Tests, and Environmental Assessments
Professional assessments of the physical and environmental characteristics of land are not optional extras. They are the tools that tell you exactly what you are buying and what it will cost to build on.
Land surveys you will need include:
- Boundary survey: Confirms the exact legal boundaries of the parcel, locates corners, and identifies encroachments from neighboring properties or structures.
- ALTA/NSPS land title survey: The most comprehensive land survey type, required by most lenders; combines boundary survey data with title research to show all easements, rights of way, and encumbrances.
- Topographic survey: Maps elevation changes across the site; essential for drainage planning, retaining wall design, and foundation engineering on any site with grade variation.
Soil tests evaluate whether the ground can support your intended foundation and whether the soil absorbs water at the rate required for a septic drain field. The geotechnical report assesses bearing capacity, compaction characteristics, and the presence of expansive, organic, or unstable soils that would require engineered foundation solutions. Our guide to soil tests explained covers both geotechnical bearing capacity tests and percolation tests for septic systems, explaining what each test measures, how results are interpreted, and what a failed perc test actually means for your build options.
The percolation test (perc test) measures how quickly water drains through the soil. Passing is required before a septic system permit can be issued. Failing a perc test on a parcel without access to municipal sewer can mean the land requires a significantly more expensive engineered alternative septic system or cannot accommodate a residence at all.
A Phase I Environmental Site Assessment (ESA) investigates the historical use of a property to identify signs of prior contamination, underground storage tanks, or hazardous materials that would require remediation before building could begin.
Our complete breakdown of survey types and when each is required covers cost ranges, typical turnaround times, and exactly what each survey result means for your build, helping you understand which assessments to order and in what sequence.
Legal Considerations: Easements, Covenants, and Restrictions
Land is never purchased without legal obligations attached. Every parcel carries a history of recorded documents that affect how the land can be used, what can be built, and who has rights to portions of the property. Failing to understand these obligations before purchase is a common and expensive mistake.
Easements are legally recorded rights that allow third parties, including utility companies, neighboring landowners, drainage districts, and government entities, to use defined portions of your property for specific purposes. Utility easements grant access for power, gas, and telecommunications infrastructure. Drainage easements restrict grading and construction in areas needed for water flow. Access easements grant neighboring property owners the right to cross your land. Easements restrict where you can build and what activities are permitted within easement boundaries.
Deed restrictions and restrictive covenants are recorded limitations on property use established by prior owners or developers. Common restrictions include minimum home size requirements, prohibited exterior materials, setback requirements that exceed local code, and prohibitions on certain accessory structures or commercial activities. In HOA-governed subdivisions, CC&Rs (Covenants, Conditions, and Restrictions) can impose significant design requirements beyond standard zoning rules.
Mineral rights and water rights may be severed from the surface rights to a property. A prior owner may have sold the rights to extract subsurface minerals or use groundwater from your property to a third party, who retains those rights even after you purchase the surface. In many Western states, water rights are a major variable in land valuation and buildability.
Title insurance protects buyers from financial loss caused by title defects discovered after closing, including undisclosed liens, forged deeds, or competing legal claims to ownership. An owner’s title insurance policy is a standard component of any land purchase.
For a detailed walkthrough of how to find, read, and negotiate every type of easement on any parcel you are considering, our easements guide for land buyers covers every easement category, how to locate recorded easements in public records, and which situations should affect your purchase price or terms.
Water, Sewer, and Utility Availability
Utility access is one of the most consequential variables in land evaluation, and it is one that many first-time buyers underestimate until they receive contractor estimates. Costs to connect to, or install alternatives for, municipal water, sewer, electricity, gas, and communications infrastructure can range from a few thousand dollars to well over $100,000 depending on the site.
City water vs. private well. Properties within established utility districts have access to municipal water at a connection fee. Rural properties without access must drill a private well. Well costs depend on depth to groundwater, typically ranging from $15 to $30 per foot for drilling plus pump, pressure tank, and water quality testing. Well productivity and water quality vary significantly by geography, and both should be verified through testing before closing.
Municipal sewer vs. septic system. In areas served by municipal sewer, a connection fee grants access to the public treatment system. On sites without sewer access, a private septic system must be designed, engineered, permitted, and installed. According to industry benchmarks, conventional septic systems typically cost $15,000 to $30,000, while engineered alternative systems in difficult soil conditions can exceed $50,000. The perc test results determine which system types are permittable.
Electric, gas, and telecom hookups. Power hookup costs depend on distance from the nearest distribution line. A lot adjacent to an existing overhead line may cost only a few hundred dollars to connect. A rural parcel requiring new line extension can cost $20 to $60 per foot, making a half-mile extension prohibitively expensive and creating a case for solar-plus-battery as an alternative. Natural gas availability is geographically limited. Many rural properties use propane as an alternative.
Our utility availability verification guide shows exactly how to research the utility status for any parcel, which questions to ask each provider, and how to estimate realistic connection costs before making an offer.
For the septic vs. sewer decision specifically, including cost comparisons, maintenance obligations, and how soil conditions determine which system types are permittable, our sewer vs. septic decision framework covers every factor that determines which option applies to your specific site.
Flood Zones, Wetlands, and Environmental Overlays
Environmental restrictions can significantly limit what can be built on a property, and in some cases can make a parcel completely unbuildable for residential use. Identifying these constraints before purchase is a non-negotiable part of land due diligence.
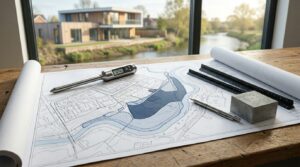
FEMA flood zones are mapped areas with designated flood risk levels. Zone A and Zone AE parcels fall within the 100-year floodplain. Zone V and Zone VE designate coastal high-velocity flood hazard areas. Building within these zones typically requires elevated construction above the Base Flood Elevation, flood-resistant materials and systems, mandatory flood insurance that can exceed $2,000 to $10,000 annually, and FEMA elevation certificates at each stage of construction. Development costs in high-risk zones increase substantially, and some lenders will not finance construction in the highest-risk designations.
Wetlands are regulated under the Clean Water Act by the U.S. Army Corps of Engineers and by state environmental agencies under their own programs. Development within or near jurisdictional wetlands requires permits and may trigger compensatory mitigation requirements. Even a small wetland area on an otherwise desirable parcel can block building activity on a significant portion of the site. A formal wetlands delineation, conducted by a qualified environmental scientist, identifies the precise boundaries of any regulated areas.
Wildfire Urban Interface (WUI) zones impose defensible space requirements and construction standards that mandate fire-resistant materials, specific vegetation management around the structure, and in some jurisdictions ember-resistant vents and enclosed eaves. Earthquake hazard zones in Categories D through F require engineered foundations and structural reinforcements. High-wind zones require hurricane strapping, engineered roof assemblies, and in coastal areas, impact-resistant windows and doors.
Before purchasing any parcel in a potentially flood-affected area, our flood zone determination guide explains how to read FEMA flood maps, interpret every zone designation, and understand what building in a regulated flood zone actually requires in terms of construction costs, elevation requirements, and mandatory insurance.
Financing Your Land Purchase
Land financing operates differently from home mortgage financing, and buyers who approach it expecting conventional mortgage terms will encounter rate surprises, shorter amortization schedules, and higher down payment requirements than they anticipated.
Raw land loans are available from community banks, credit unions, and a smaller pool of specialty lenders. They typically carry interest rates 1 to 3 percentage points above conventional mortgage rates, loan terms of 5 to 15 years rather than 30, and down payment requirements of 20 to 50 percent. Lenders view raw land as higher-risk because it generates no income, has lower secondary market liquidity, and lacks the collateral certainty of an improved structure.
Improved lot loans are somewhat more accessible than raw land loans because the lot already has utility connections and demonstrated buildability, reducing perceived lender risk. Down payment requirements on improved lots typically fall in the 20 to 30 percent range.
Using land as equity in a construction loan. Buyers who own land free and clear, or who have significant equity in it, can often use the appraised land value as their required down payment contribution when applying for a construction-to-permanent loan. This “land as equity” strategy allows builders who have already secured their site to initiate construction financing without additional cash out of pocket.
Owner financing is more common in land transactions than in residential home sales. When a seller carries the note rather than requiring bank financing, it can offer lower qualification hurdles, more flexible terms, and faster closings. The tradeoff is a higher interest rate than institutional financing and shorter balloon terms that require refinancing or payoff within 3 to 7 years.
Land auctions, including county tax sale auctions, sheriff’s auctions, and online land auction platforms, offer the opportunity to acquire land at below-market prices. However, they require extensive pre-auction due diligence because properties are typically sold “as-is” with limited or no inspection rights, and title issues are more common in auction purchases than in conventional transactions.
For a complete breakdown of every land financing option, including qualification requirements, typical rate ranges, and strategic guidance on when each approach makes sense, our land loan process guide covers every path from initial land loan application through closing, including how to leverage existing land equity in your construction financing.
Site-Specific Challenges: Slopes, Soil, and Special Conditions
No two building sites are identical. Understanding the specific physical challenges of a parcel before purchase is what separates informed land buyers from those who discover problems during construction.
Sloped lots are among the most common challenge types encountered in land searches. Sloped sites can offer dramatic views and strong architectural character, but building on a slope typically adds meaningful cost premiums:
- Engineered foundations adapted to grade changes (stepped footings, pier systems, or daylight basement designs)
- Retaining walls to manage grade transitions
- More complex drainage plans with extended swale and French drain systems
- Longer driveways with engineered grades and retaining structures
The cost premium for building on a moderately sloped site versus a flat one commonly ranges from $20,000 to $100,000 or more depending on slope severity, soil conditions, and the extent of required retaining structures.
Challenging soil types include expansive clay soils, which swell and contract with moisture changes and can damage conventional slab foundations if not properly addressed through moisture barriers, structural slabs, or pier systems. Sandy soils may have insufficient bearing capacity for standard foundations and require geotechnical engineering. Organic soils, peat, or fill materials require removal or deep-foundation solutions. Bedrock is expensive to excavate but provides excellent bearing capacity once reached.
Waterfront and special-condition sites carry their own combination of regulatory requirements and cost premiums. Lakefront lots often have shoreline setbacks, dock restrictions, and septic system setback requirements from the ordinary high-water mark. Coastal lots face wind load requirements, coastal construction codes, elevated foundation requirements, and corrosion-resistant material mandates. Mountain and high-altitude sites carry snow load design requirements, access challenges in winter, and sometimes more complex septic and well scenarios.
Our detailed guide to building on a sloped lot covers every engineering solution, realistic cost premium range, and design strategy for sloped-site construction, including when slope is a valuable asset and when it warrants a lower purchase price in your negotiation.
Site Preparation: Clearing, Grading, and Infrastructure
Once land is purchased, site preparation transforms raw terrain into a ready-to-build platform. The scope and cost of site prep vary enormously based on existing conditions, but every site requires some combination of clearing, grading, erosion control, and utility installation before foundation work can begin.
Land clearing removes trees, stumps, brush, debris, rocks, and any existing structures from the building footprint, driveway corridor, and staging areas. Clearing costs depend on tree density, individual tree diameter and species, stump removal method, and debris disposal. A moderately wooded one-acre building footprint might cost $3,000 to $8,000 to clear. A heavily wooded site with large-diameter trees and stumps can cost significantly more. Trees outside the clearing area should be actively protected during construction to avoid root compaction and long-term destabilization.
Rough grading establishes the basic grade of the site. It creates a level building pad, directs surface drainage away from the structure, and establishes grades for driveway and drainage infrastructure. Rough grading is typically completed before foundation excavation begins and directly influences both foundation placement and drainage system design. In many jurisdictions, rough grading plans must be reviewed and approved as part of the building permit.
Erosion control prevents soil displacement during construction, protecting the site and neighboring properties from sedimentation. Silt fences, straw wattles, rock check dams, perimeter seeding, and temporary erosion control channels are standard measures required by most building permits and by local erosion control ordinances. Erosion control must be maintained throughout the construction period and is typically inspected at multiple stages.
Before committing to site prep costs, a professional site evaluation can identify hidden clearing requirements, drainage challenges, and access constraints that affect your project budget — our pre-build site assessment services connect homeowners and builders with qualified site evaluation professionals across the USA.
Our land clearing cost and process guide covers everything from initial tree assessment and clearing methods through stump grinding, debris removal cost ranges, and best practices for preserving trees in the portions of your lot you intend to keep.
Driveways, Drainage, and Final Site Prep
After rough site work is complete, the final phase of site preparation addresses permanent infrastructure, including driveways, drainage systems, retaining walls, final grading, and initial landscaping establishment.
Driveway construction requires permits in most jurisdictions, adequate grade for drainage and safe vehicle access, sufficient width for construction vehicles during the build phase, and a turning radius at the garage or house approach. Material choices include gravel (lower initial cost, requires periodic maintenance), asphalt (moderate cost, good durability), and concrete (highest initial cost, lowest long-term maintenance). For long rural driveways, total costs can range from $15,000 to $50,000 or more depending on length, terrain, drainage culverts, and material selection.
Drainage planning addresses how water flows across and off the site during and after construction. A drainage plan that directs water away from the foundation, prevents yard ponding, and protects neighboring properties from increased runoff is required by most jurisdictions as part of the building permit. Solutions include positive grading away from the foundation, French drains along foundation perimeters and slopes, swales that direct sheet flow to safe outlets, and dry wells or infiltration basins in areas where runoff must be managed on-site.
Retaining walls are necessary wherever significant grade changes exist between the building pad and the surrounding terrain or between adjacent properties at different elevations. Retaining walls must be engineered for the loads they carry, built with appropriate drainage systems behind them, and permitted in most jurisdictions. Engineered concrete block, boulder walls, and poured concrete walls are common choices depending on required height and aesthetic preference.
Final grading is typically the last site work completed before landscaping establishment. It sets the final elevation of all ground surfaces around the foundation, ties into driveway and drainage features, establishes positive drainage across the entire lot, and prepares soil for seeding or sodding. Final grading is often inspected as part of the building permit close-out.
Our driveway construction guide for new builds covers material selection for every climate and site type, permit requirements, drainage integration strategies, and cost estimates for driveways at every price point and complexity level.
How Land and Site Prep Connect to the Full Build
Land buying and site preparation do not exist in isolation. Every decision made during land selection and site prep ripples through each subsequent phase of construction, from permitting through foundation design to final move-in.
Site conditions directly shape permit requirements. A flood zone designation triggers mandatory elevation requirements and flood zone compliance inspections. Wetlands delineation affects where the building footprint can legally be placed. Soil test results may require the local authority to review and approve an engineered foundation solution. Our permits, zoning, and code compliance guide explains exactly how site conditions translate into permit requirements, code compliance obligations, and special overlay zone standards across different jurisdictions.
Geotechnical findings drive foundation design. The foundation type selected, whether slab-on-grade, crawlspace, basement, or pier system, must match what the soil can structurally support and what the site’s drainage conditions demand. Expansive clay soils require post-tension slabs or structural slabs. High groundwater conditions may rule out basements. Rock at shallow depth may require specialized excavation. Our foundations and structural systems guide explains how geotechnical soil findings drive foundation type selection and what each soil condition means for foundation costs and engineering requirements.
Land ownership and equity affect construction financing. Many construction lenders accept existing land equity as your required down payment, and some construction loan programs require land to be owned free and clear before a loan will be issued. Resolving land acquisition financing before applying for construction financing prevents complications at the worst possible time. Understanding how to navigate this transition is essential for any builder moving from site ownership to active construction.
The step-by-step home building process maps the complete construction sequence, showing exactly where land selection and site preparation fit into the overall build timeline and how the decisions made at the land stage cascade through every subsequent phase of construction from permitting through final move-in.
Conclusion
Land buying, site selection, and site preparation are where every successful home build truly begins, with decisions that shape every phase of construction that follows.
Decisions made at the land stage determine construction costs, timeline, and long-term property value more than any other single phase of the entire build process.
At Mr. Local Services, our trusted professionals handle every phase of site work, assessments, clearing, grading, drainage, and driveway construction, across the USA.
Frequently Asked Questions
What is a perc test and why does it matter when buying land?
A perc test measures how quickly soil absorbs water and determines whether a conventional septic system can be installed. Failing means the land may not be buildable without municipal sewer access.
What is the difference between a land loan and a construction loan?
A land loan finances raw land with higher interest rates and shorter amortization terms than conventional mortgages. A construction loan finances the building process and converts to a permanent mortgage at completion. They are separate products with different qualification standards.
How do I find out if a piece of land is in a FEMA flood zone?
Search the FEMA Flood Map Service Center using the property address. The map shows whether the parcel falls in Zone A, AE, V, or VE, which are high-risk regulated zones, or Zone X, which carries minimal flood risk.
What does a Phase I Environmental Site Assessment actually include?
A Phase I ESA reviews property history for signs of contamination, including prior industrial use, underground storage tanks, or hazardous materials, through records research and a site walk without soil sampling.
How much does site preparation typically cost for a new home build?
Site prep costs range from $5,000 to $100,000+ depending on clearing needs, grading complexity, driveway length, and utility distances, with rural raw land costing far more than improved suburban lots.
What are the most common reasons a land purchase falls through during due diligence?
The most common deal-killers are failed perc tests, undiscovered wetlands, title defects, prohibitive utility costs, and environmental contamination, most discovered during formal due diligence inspection periods.
Can I use land I already own as the down payment on a construction loan?
Yes. If you own land free and clear, most construction lenders will accept its appraised value as your down payment, letting you proceed without additional cash out of pocket.