Electrical system design for a tiny home on wheels is the complete plan that determines how power enters, moves through, and gets used inside a mobile dwelling. It covers codes, load capacity, wiring, panels, and power sources. Get it wrong and you risk fire, failed inspection, or a home you cannot legally park.
I work with homeowners, builders, and property managers who underestimate this system every single week. Tiny homes carry full-home electrical demand inside an RV-sized envelope. That tension drives every design decision.
This guide walks through definitions, codes, load calculations, shore power, solar and battery systems, dual voltage, panels, wiring, lighting, HVAC demand, safety, costs, mistakes, and hiring.
What Electrical System Design Means for a Tiny Home on Wheels
Electrical system design is the engineering plan that maps every watt from its source to its final outlet. In a tiny home on wheels, that plan has to survive highway vibration, weather exposure, and constantly changing power sources.
I think of it as three questions answered in order. Where does power come from, how much does the home need, and how does it travel safely to each device?
Traditional homes answer those questions once. A tiny home on wheels answers them again every time it moves.
Mobile Electrical Systems vs. Traditional Home Wiring
A stick-built house sits on a permanent foundation with a fixed utility connection and a stationary grounding electrode. Nothing about that describes a tiny home on wheels.
Mobile structures flex. Fasteners loosen, conductors chafe, and connections work themselves apart over thousands of road miles. Design choices that pass inspection in a fixed home fail on a trailer.
The chassis also changes the grounding picture entirely, which I cover further down.
The Three Power Sources Every THOW Uses
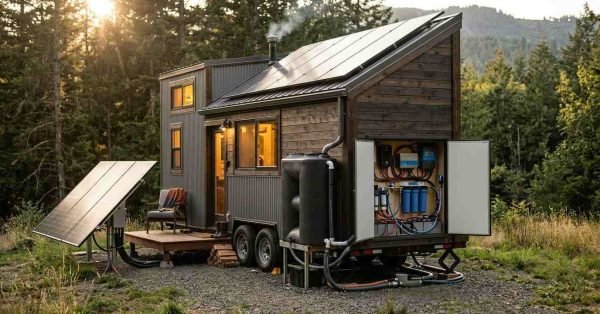
Most tiny homes on wheels draw from shore power, an off-grid solar and battery system, or a generator. Many use all three at different times.
Each source delivers power differently. Shore power arrives as steady 120/240V AC, solar arrives as variable DC, and generators produce AC with their own quirks.
The design job is making those three sources feed one panel without ever backfeeding into each other.
Who Designs, Installs, and Inspects the System
Three roles matter here: the designer who calculates loads and draws the plan, the licensed electrician who installs it, and the inspector or certifying agency who signs off.
Some builders combine the first two. I recommend keeping the third completely independent.
Skipping the inspection step is the fastest way to lose insurance coverage and financing eligibility.
Electrical Codes, Standards, and Certifications That Apply

Codes decide whether your tiny home is a dwelling, a recreational vehicle, or something in between. That classification changes everything downstream, including where you can legally park.
I see more projects stall on this question than on any technical detail. Homeowners build first and research classification second.
Sorting this out before the first wire goes in saves thousands.
NEC vs. RV Standards (NFPA 1192 / NFPA 70)
The National Electrical Code, published by NFPA as NFPA 70, governs permanent dwellings. NFPA 1192 governs recreational vehicles, and most tiny homes on wheels fall under it.
The two standards disagree on outlet spacing, conductor sizing, and panel requirements. Building to the wrong one means rework.
Many builders design to RV standards for the mobile envelope and borrow NEC practices where they are stricter.
ANSI, RVIA, and Third-Party Certification
RVIA certification and ANSI A119.5 compliance are the two credentials that open doors with lenders, insurers, and RV parks. The RV Industry Association operates the certification program that inspects builds against those standards.
Without certification, many parks will not accept the home and many insurers will not write a policy.
Third-party inspection typically costs less than a single failed rebuild.
State and Local Permitting Differences
Zoning and permitting for tiny homes on wheels vary by state, county, and sometimes by neighborhood. Some jurisdictions treat them as RVs, others as accessory dwelling units, and a few refuse to classify them at all.
I always tell clients to call the local building department before finalizing the electrical plan. The answer changes the design.
Permit requirements often dictate panel type, disconnect location, and whether an inspection is even possible.
Calculating Your Tiny Home Electrical Load
Load calculation is where good designs separate from expensive mistakes. It determines service size, wire gauge, breaker count, battery bank capacity, and solar array size all at once.
Skip it and you end up with a 30-amp service feeding a home that needs 50, or a battery bank that dies by 2 a.m.
I run this calculation before I draw a single circuit.
Building an Appliance and Fixture Inventory
Start by listing every device that consumes power, then record its wattage from the nameplate. Refrigerator, water heater, mini-split, induction cooktop, lighting, laptop chargers, and the well pump if you have one.
Nameplate ratings tell you peak draw, not average use. Both numbers matter for different parts of the design.
That inventory becomes the foundation for every sizing decision that follows.
Continuous vs. Intermittent Loads
A continuous load runs for three hours or more, and code requires sizing circuits at 125% of that value. Refrigerators, heaters, and HVAC systems fall into this category.
Intermittent loads like a microwave or hair dryer spike hard but briefly. They stress the service capacity without dominating daily consumption.
Confusing the two produces panels that trip constantly or systems that cost far more than needed.
Sizing for Growth and Seasonal Demand
Winter heating and summer cooling create demand peaks that spring calculations miss entirely. A system sized for mild weather struggles in January.
I build in headroom of roughly 20% on service capacity. Adding a dishwasher or a second heater later becomes a plug-in decision instead of a rebuild.
Future-proofing costs a little now and saves a lot later.
Shore Power Connections and Service Sizing

Shore power is the umbilical cord connecting your tiny home to an external electrical supply. It is the primary power source for most tiny homes parked on private lots or in RV parks.
The connection point, cord rating, and inlet type all have to match your service size exactly.
Mismatches here cause overheating, voltage drop, and melted connectors.
30-Amp vs. 50-Amp Service
A 30-amp service delivers roughly 3,600 watts on a single 120V leg. A 50-amp service delivers about 12,000 watts across two 120V legs, giving you 240V capability.
Tiny homes with electric water heaters, mini-splits, and induction cooking almost always need 50-amp. Simpler builds run comfortably on 30.
Your load calculation answers this question, not your square footage.
Inlets, Cords, and Transfer Equipment
The power inlet mounts on the exterior wall and accepts a rated shore power cord. Inlet, cord, breaker, and panel all have to carry the same amperage rating.
Weather-sealed inlets with spring covers prevent the moisture intrusion that kills connections over time.
Transfer switches handle the handoff between shore power, generator, and inverter without ever letting two sources touch.
Pedestal Hookups at RV Parks and Private Lots
RV park pedestals typically offer 30-amp and 50-amp receptacles, sometimes both. Private lots often provide only a standard 15-amp household outlet.
Running a tiny home on 15 amps means constant load management and no simultaneous high-draw appliances.
I test pedestal polarity and voltage before every connection, and I recommend a surge protector at that point.
Off-Grid Power: Solar, Batteries, and Inverters
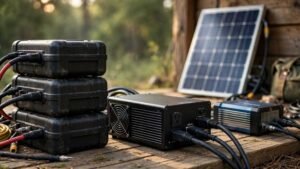
Off-grid capability turns a tiny home into a genuinely independent dwelling. It also introduces the most complex subsystem in the entire electrical design.
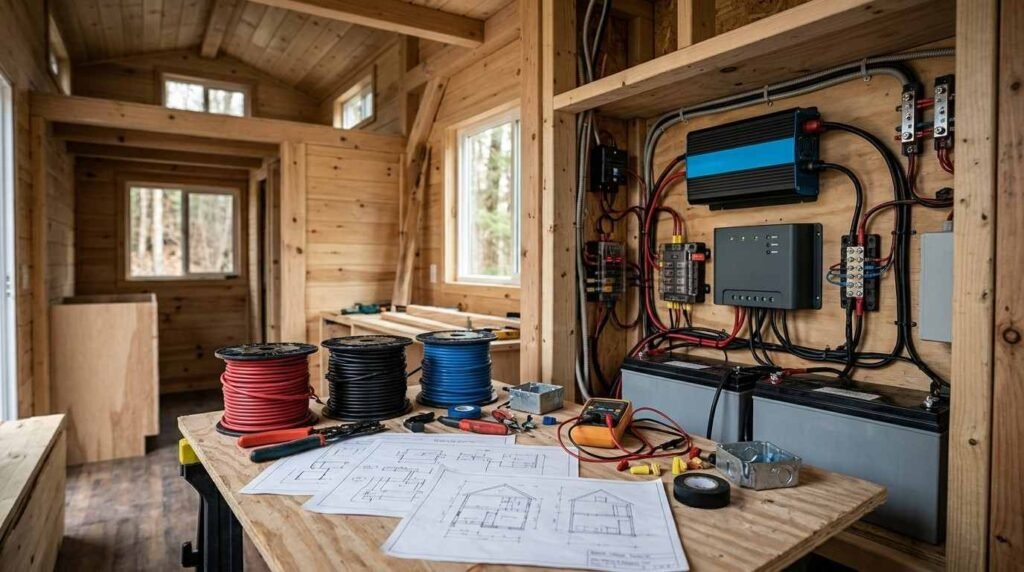
Solar panels generate DC power, batteries store it, and inverters convert it to household AC. Each component has to be sized against the others.
The U.S. Energy Information Administration reports that residential solar capacity continues to expand rapidly, and component costs have fallen alongside that growth.
Solar Array Sizing and Roof Constraints
A tiny home roof offers limited real estate, usually between 100 and 250 square feet of usable area. Vents, skylights, and shading cut that further.
Modern panels produce roughly 400 watts each in a standard residential size. That math caps most tiny home arrays between 1,200 and 3,000 watts.
Ground-mounted or portable arrays extend capacity when the roof runs out.
Battery Chemistry and Bank Capacity
Lithium iron phosphate has replaced lead-acid as the default for tiny homes. It weighs less, discharges deeper, and lasts several times longer.
Bank capacity gets measured in kilowatt-hours, and most tiny homes land between 5 kWh and 15 kWh depending on off-grid ambitions.
Weight matters here more than in a fixed home, because every pound rides on the trailer axles.
Inverters, Charge Controllers, and DC-to-AC Conversion
The inverter converts stored DC power into the 120V AC your outlets deliver. Size it to handle your largest simultaneous load, not your average draw.
MPPT charge controllers extract meaningfully more energy from the array than older PWM units. The difference shows up on cloudy days.
Inverter-chargers combine conversion and shore power charging in one unit, which saves precious wall space.
12V DC and 120V AC: Running Dual Systems Safely
Many tiny homes on wheels run two voltage systems side by side. The 12V DC system handles lighting, fans, and pumps, while 120V AC handles everything else.
This dual approach borrows directly from RV design and cuts inverter losses on small loads.
It also doubles the opportunity for wiring confusion.
When DC Makes Sense
DC works best for loads that run constantly at low draw. LED lighting, roof vent fans, water pumps, and refrigeration all qualify.
Running these on DC bypasses inverter conversion losses of roughly 10% to 15%.
For high-draw appliances, DC becomes impractical because conductor sizes grow enormous.
Separating and Labeling the Two Systems
DC and AC conductors must be physically separated and clearly labeled at every junction. Mixing them in the same box creates a serious shock and fire hazard.
I use distinct wire colors and permanent labels at every panel, junction, and device.
The next person who opens that panel deserves to understand it in ten seconds.
Generator and Backup Integration
Generators bridge the gap when solar underperforms and shore power is unavailable. Sizing follows the same load calculation logic as everything else.
A properly wired transfer switch isolates the generator from all other sources. That isolation protects utility workers and your equipment.
Never backfeed a generator through a standard outlet.
Panel, Circuit, and Breaker Layout
The electrical panel is the distribution hub where incoming power splits into individual circuits. In a tiny home, panel placement fights for space with everything else.
Poor panel placement creates code violations and daily frustration.
Good layout makes maintenance simple and inspections fast.
Load Center Placement in Tight Spaces
Code requires clear working space in front of the panel, typically 30 inches wide and 36 inches deep. That clearance cannot be blocked by furniture or storage.
I place panels in utility closets, under stairs with access panels, or in exterior weatherproof enclosures.
Exterior placement frees interior space but demands a properly rated enclosure.
Dedicated Circuits That Are Non-Negotiable
Certain appliances require their own circuit with no shared loads. Water heaters, mini-splits, refrigerators, and induction cooktops all belong on dedicated circuits.
Kitchen small-appliance circuits and bathroom receptacles also carry dedicated requirements.
Sharing these circuits produces nuisance trips and long-term equipment damage.
GFCI and AFCI Protection Requirements
Ground fault circuit interrupters protect against shock in wet locations: kitchens, bathrooms, exterior outlets, and anywhere near a sink. Arc fault breakers detect dangerous arcing in living areas.
The U.S. Fire Administration attributes a significant share of residential fires to electrical failures, and these devices exist specifically to interrupt those failure modes.
In a mobile structure with constant vibration, both protections matter more, not less.
Wiring, Conduit, and Materials for a Structure That Moves
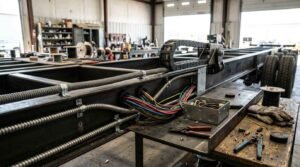
Wiring a tiny home on wheels means designing for movement that permanent homes never experience. Every connection faces vibration, temperature swings, and flexing walls.
Material selection here separates systems that last twenty years from systems that fail in three.
I treat every wiring decision as a road-durability decision.
Conductor Types and Gauge Selection
Stranded copper conductors handle vibration far better than solid copper, which work-hardens and cracks. This single choice prevents most long-term wiring failures in mobile structures.
Gauge selection follows amperage and run length, with voltage drop calculated over the full circuit distance.
Undersized wire runs hot, wastes energy, and creates fire risk.
Vibration, Flex, and Strain Relief
Every conductor needs mechanical support at regular intervals and strain relief at each termination. Unsupported wire eventually chafes through its insulation against framing.
Grommets protect conductors passing through metal studs or the chassis.
I add extra service loops at junction boxes so vibration pulls slack, not connections.
Grounding and Bonding on a Trailer Chassis
The trailer frame serves as the equipment grounding conductor path, and bonding it correctly is mandatory. The neutral and ground bond happens at exactly one location, and getting that wrong energizes the chassis.
When connected to shore power, the bond exists at the source, not in the tiny home panel.
This is the single detail I most often see done incorrectly on owner-built systems, and it is genuinely dangerous.
Lighting, Outlets, and Fixture Planning
Lighting and outlet placement shape how a tiny home actually feels to live in. Small spaces amplify both good and bad decisions here.
I plan fixtures alongside furniture layout, never after.
Retrofitting an outlet behind a built-in bed is not a project anyone enjoys.
Outlet Spacing in Small Footprints
RV standards and NEC differ on receptacle spacing, but both aim for accessible power along usable wall space. Tiny homes have very little uninterrupted wall.
I map outlets to actual furniture positions: bedside, desk, sofa, and kitchen counter.
Counter receptacles need GFCI protection and thoughtful spacing around the sink.
Low-Draw Lighting Strategies
LED fixtures draw a fraction of what incandescent and halogen consume, which matters enormously on battery power. A full lighting load can run under 100 watts.
Layered lighting with task, ambient, and accent fixtures makes small rooms feel larger.
Dimmable drivers extend battery runtime and improve comfort at night.
Smart Controls and Monitoring
Battery monitors and energy management displays turn invisible consumption into visible data. Off-grid living gets dramatically easier when you can see remaining capacity.
Smart switches and app-based controls reduce physical switch clutter on limited wall space.
I recommend at least a shunt-based battery monitor on any off-grid build.
Heating, Cooling, and High-Draw Appliance Considerations

Climate control dominates tiny home electrical demand. Heating and cooling routinely account for the largest share of daily consumption.
These decisions drive service size more than any other category.
I resolve HVAC choices before finalizing the load calculation.
Mini-Splits and HVAC Electrical Demand
Ductless mini-split heat pumps have become the standard for tiny homes because they heat and cool efficiently from one unit. A typical 9,000 BTU unit draws roughly 600 to 900 watts in operation.
Startup surge exceeds running draw, and soft-start devices reduce that spike substantially.
Mini-splits require a dedicated circuit and often a specific breaker size from the manufacturer.
Electric vs. Propane Trade-Offs
Propane handles cooking, water heating, and space heating without touching your electrical budget. That relief matters enormously on solar and battery systems.
All-electric builds simplify permitting, eliminate combustion risk, and pair well with large shore power service.
Most tiny homes I see land on a hybrid: propane for heat and cooking, electric for everything else.
Water Heaters, Induction Cooking, and Laundry
Electric tankless water heaters draw enormous power, sometimes 8,000 watts or more. Very few tiny homes on wheels support that load.
Induction cooktops draw 1,500 to 3,000 watts per burner and need dedicated circuits.
Combination washer-dryers concentrate laundry into one appliance but add a substantial continuous load during drying cycles.
Safety Systems, Inspection, and Ongoing Maintenance

Electrical safety in a mobile dwelling requires active systems and scheduled attention. Vibration and weather degrade connections that would stay stable in a fixed home.
I treat electrical maintenance the same way I treat brake maintenance on the trailer.
Both prevent the same category of outcome.
Surge Protection and Polarity Testing
RV park pedestals deliver inconsistent power quality, including reversed polarity, open grounds, and voltage swings. A quality surge protector with error detection blocks bad power before it reaches your panel.
I test every pedestal with a polarity tester before plugging in.
The cost of a surge protector is a rounding error against a fried inverter.
Detectors, Labeling, and Emergency Shutoff
Smoke detectors, carbon monoxide detectors, and propane detectors are mandatory in any tiny home with combustion appliances. Placement follows manufacturer specifications and code requirements.
Clear panel labeling lets anyone kill power to a specific circuit in seconds during an emergency.
An accessible main disconnect matters enormously when something goes wrong.
Annual Inspection and Service Intervals
I recommend a full electrical inspection annually, and always after any significant move. Terminals loosen, connections corrode, and insulation abrades.
The inspection covers torque checks at every termination, GFCI and AFCI testing, battery health, and visual conductor examination.
Catching a loose lug costs an hour. Missing it costs the home.
How much does a tiny home electrical system cost, and who should build it?
Cost Planning and Budget Ranges
Electrical work typically represents 5% to 10% of a tiny home build budget. The range widens dramatically once off-grid components enter the picture.
Shore-power-only systems land at the low end. Full solar independence multiplies the number.
I give clients three budget tiers so the trade-offs stay visible.
DIY vs. Licensed Electrician Costs
Owner-installed wiring saves labor but risks failed inspection, voided insurance, and rework that costs more than the original quote. Many jurisdictions require licensed work for permitted installations.
A licensed electrical contractor for residential projects handles permitting, code compliance, and inspection sign-off as part of the scope.
The safest split I see is owner-run conduit and licensed terminations.
Where Budgets Typically Break
Battery banks consume the largest single line item in off-grid builds, often exceeding the entire rest of the electrical system. Inverters follow closely behind.
Underestimating load and rebuilding at 50-amp after wiring for 30 is the second most common budget failure.
Permit fees, certification inspections, and surge protection get forgotten constantly.
Common Electrical Design Mistakes in Tiny Homes
The same handful of errors appear across nearly every problem build I review. All of them trace back to skipped planning.
Recognizing them early costs nothing.
Fixing them after drywall costs plenty.
The most frequent mistake is undersized service, where a 30-amp system meets 50-amp demand. Owners discover it the first time the mini-split and water heater run together.
Solid conductor use in a mobile structure ranks second, followed by improper neutral-to-ground bonding at the panel. Both create failures that hide until they become dangerous.
Other repeat offenders include no dedicated circuits for high-draw appliances, missing GFCI protection near water, unlabeled panels, and no surge protection at the shore power inlet. Inadequate battery ventilation and blocked panel access round out the list.
Choosing an Electrician for a Tiny Home on Wheels
Tiny homes on wheels sit between residential and RV work, and many electricians specialize in only one. The right professional understands both codes and knows where they conflict.
I screen for mobile-structure experience specifically.
Residential-only credentials leave gaps on a trailer.
Ask for license verification, insurance certificates, and photos of completed tiny home or RV electrical work. Ask which standard they build to and why.
A qualified contractor provides a written load calculation, a circuit schedule, and a clear scope covering permits and inspection coordination. Vague quotes signal vague work.
Working through a vetted home services provider network removes the screening burden and gives you accountability if something goes wrong later.
Conclusion
We covered codes, load calculation, shore power, solar storage, dual voltage, panels, wiring, lighting, HVAC demand, safety systems, costs, and contractor selection across one connected electrical design framework.
Each of these areas deserves deeper study, and dedicated resources exist for load math, solar sizing, and code compliance specifics as your project advances.
We help you connect with licensed electricians who understand mobile dwellings. Reach out to Mr. Local Services and build your system right the first time.
Frequently Asked Questions
What size electrical service does a tiny home on wheels need?
Most tiny homes need 30-amp or 50-amp service. Homes with mini-splits, electric water heaters, and induction cooking require 50-amp. Your load calculation determines the answer.
Does a tiny home on wheels follow NEC or RV electrical code?
Most tiny homes on wheels follow RV standards under NFPA 1192 and ANSI A119.5. Homes intended as permanent dwellings often follow NEC instead. Local jurisdiction decides.
Can a tiny home run entirely on solar power?
Yes, with adequate panel capacity, battery storage, and disciplined load management. All-electric heating and cooking make full solar independence significantly harder and more expensive.
How much does tiny home electrical work cost?
Shore-power-only systems typically run a few thousand dollars installed. Full off-grid solar and battery systems commonly reach five figures depending on capacity and components.
Do I need a licensed electrician for a tiny home on wheels?
Most jurisdictions require licensed work for permitted installations, and insurers frequently demand it. Licensed work also protects your certification eligibility and resale value.
Why do tiny homes use both 12V and 120V systems?
The 12V DC system powers lights, fans, and pumps directly from batteries without inverter losses. The 120V AC system handles appliances and standard household outlets.
How often should tiny home electrical systems be inspected?
Inspect annually and after every significant relocation. Road vibration loosens terminations and abrades insulation in ways that stationary homes never experience.