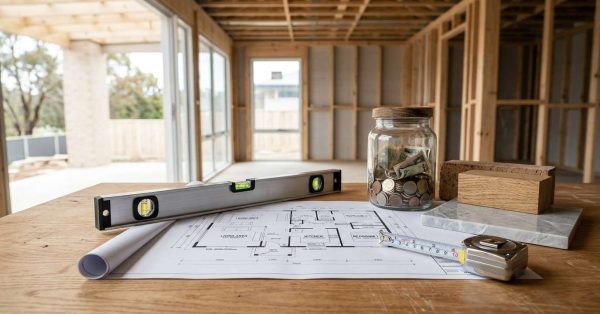

A kitchen remodel is a structural, aesthetic, or functional transformation of your home’s kitchen, ranging from a targeted cosmetic refresh to a complete gut renovation that relocates walls, plumbing, and electrical systems, making it the single most impactful home improvement project for daily livability and long-term property value.
An outdated or dysfunctional kitchen creates daily frustration, suppresses your home’s market value, and drives ongoing energy inefficiency; a properly planned remodel resolves all three and delivers measurable long-term return.
This complete guide covers remodel types, layout planning, cabinetry, countertops, backsplash, appliances, islands, sinks, lighting, flooring, costs, timelines, permits, and contractor selection, with dedicated deeper resources linked from every section.
What Is a Kitchen Remodel? Types, Scope and Decision Framework
A kitchen remodel covers a wide range of interventions, and the most important planning step any homeowner, landlord, or property manager can take is identifying which type of remodel is actually needed before any contractor conversation, budget estimate, or design session begins. Choosing the wrong scope produces two equally costly failure modes: underinvesting by planning a cosmetic refresh when mechanical systems are aging and will fail within a few years of the remodel, and overinvesting in a gut renovation when only cabinet and countertop replacement was needed.
Cosmetic Refresh updates surface-level elements — paint, cabinet hardware, lighting fixtures, and sometimes cabinet door faces — while leaving cabinet boxes, layout, countertops, and all plumbing and electrical rough-in in place. Typical cost: under $15,000. Best for kitchens with sound structural bones and functional layouts that simply look dated.
Pull-and-Replace replaces all cabinets, countertops, and fixtures within the existing footprint, without relocating plumbing or electrical rough-in. This is the most common full remodel type, typically costing $25,000 to $60,000 with a two- to four-week active construction timeline. Most jurisdictions require only electrical permits for this scope.
Gut Renovation demolishes everything to the studs and replaces all mechanical systems alongside every surface element. Required when plumbing or electrical is outdated, when structural damage exists, or when the layout needs fundamental reconception. Typical cost: $60,000 to $150,000 or more, depending on size, region, and specification level.
Layout-Change Remodel relocates any fixed element — the sink, cooktop, or refrigerator — or removes a wall. Either move triggers plumbing rough-in, electrical, and structural permit requirements that substantially expand scope, cost, and timeline regardless of the overall remodel level.
The permit implications of each scope level vary significantly: cosmetic refreshes typically require no permits, pull-and-replace remodels require electrical permits in most jurisdictions, gut renovations require building, electrical, and plumbing permits, and any layout change involving wall removal requires structural permits in addition to all others.
The most consequential structural decision many homeowners face is whether to remove a wall between the kitchen and an adjacent room, and the load-bearing wall assessment, beam sizing, permit sequence, and design integration required for this specific change are detailed in our open-concept kitchen conversion resource, which covers every step from structural engineering through cohesive space design.
Scope selection determines every downstream decision — which contractors to hire, what permits to pull, how long to expect the project to take, and what budget to set before anyone picks up a pencil or a sledgehammer. Understanding which type of kitchen remodel aligns with your budget, timeline, and condition of existing systems, from a cosmetic refresh that leaves walls untouched to a full gut renovation that replaces every mechanical system, is the essential first project decision, and our kitchen remodel types guide breaks down every scope level with detailed cost implications, permit requirements, and decision criteria for each.
Kitchen Layout and Design: The Foundation of Every Remodel
Layout is the decision that all other kitchen choices flow from. No countertop material, cabinet finish, lighting scheme, or appliance brand compensates for a layout that creates friction in daily use. The layout determines cooking efficiency, storage accessibility, traffic flow patterns, and how the kitchen integrates visually and functionally with adjacent dining and living spaces.
The Work Triangle and Zone-Based Design
The traditional kitchen work triangle connects the sink, refrigerator, and cooktop and was the standard planning model for residential kitchen design for decades. It remains a useful reference point. Contemporary kitchen planning has largely replaced it with zone-based organization, which divides the kitchen into distinct functional areas: preparation, cooking, plating, cleanup, storage, and in open-plan homes, a social zone near peninsula or island seating.
Zone design handles multi-cook households, eat-in configurations, and open-concept adjacency more naturally than the triangle because it does not assume a single dominant workflow.
The Six Primary Layout Shapes
Each of the six main layout configurations addresses a different set of room dimensions and household requirements.
Galley kitchens run two parallel countertops along facing walls with a work corridor between them. They are highly efficient for linear cooking workflow and common in apartments and narrow urban homes, but they create bottlenecks when multiple people use the kitchen at the same time.
L-shaped kitchens use two perpendicular walls of cabinets and avoid through-traffic naturally. They pair well with islands and work across a wide range of kitchen sizes.
U-shaped kitchens surround three walls with cabinets and countertops, providing maximum storage and counter space, but they require at least ten feet between opposing counters to maintain comfortable clearances.
One-wall kitchens place all elements along a single run and appear most often in studio apartments and loft-style open plans where kitchen footprint is minimal.
Island configurations add a freestanding central element that increases counter space, can incorporate seating, and defines the kitchen boundary in open-plan homes.
Peninsula configurations are attached islands, connected to a wall at one end, that require one fewer clearance side and work well where full island clearances are not achievable given room dimensions.
Aisle widths are a non-negotiable code and function parameter: 42 inches minimum in a single-cook kitchen and 48 inches minimum in a multi-cook kitchen between any two facing work surfaces.
A kitchen remodel is fundamentally a design problem before it becomes a construction problem, and homeowners who invest in a structured pre-construction design process consistently achieve better outcomes at lower cost — our remodeling planning and design pillar covers how to work with architects, designers, and design-build firms, what to look for when reviewing construction documents, and how to make material selections on a schedule that prevents costly project delays.
Refrigerator placement is a layout detail that often receives insufficient attention. Positioning the refrigerator at the end of a run, nearest to the kitchen entry, minimizes traffic interference with cooking workflow while keeping it accessible for household members who are not actively using the cooktop or prep areas.
Every layout shape, aisle clearance standard, zone design principle, and square footage recommendation that determines how well a kitchen functions for cooking, entertaining, and daily household use is documented in our kitchen layout options guide, which maps galley, L-shape, U-shape, one-wall, island, and peninsula configurations to specific room dimensions and lifestyle requirements with detailed clearance diagrams.
Kitchen Cabinetry: Style, Material and Configuration
Cabinetry defines the kitchen’s visual character more than any other single element and is typically the largest line item in a kitchen remodel budget, accounting for 30 to 40 percent of total project cost in mid-range renovations. Every cabinet decision — from box construction material through door style, finish type, and hardware selection — affects both aesthetics and long-term durability.
The Three Cabinet Tiers
Stock cabinets are manufactured in fixed standard sizes, available immediately from home centers and online retailers, and offer the lowest cost and the shortest lead time. They have limited style, size, and configuration options. They are best suited to rental properties, budget remodels, and situations where project speed outweighs customization.
Semi-custom cabinets are built to order in a wider range of sizes and configurations, with significantly more finish and door style options than stock. Lead times typically run six to ten weeks from order. This is the most common tier for homeowner-occupied mid-range kitchen remodels in the United States.
Custom cabinets are built to precise specifications by a cabinet maker, with essentially unlimited size, configuration, finish, and interior feature options. Lead times often run eight to sixteen weeks or longer. Custom cabinetry is appropriate for high-end remodels and kitchens with non-standard room dimensions that stock sizing cannot accommodate.
Box Construction and Door Styles
The cabinet box material matters significantly for long-term performance. Plywood boxes are dimensionally stable, resist moisture better than alternative materials, and hold screws more securely during installation and over time. Solid plywood is the recognized quality standard in the cabinetry industry. MDF faces and door panels are common in painted cabinet applications because MDF holds paint better than wood grain and resists warping when finished on all sides.
Cabinet door style is the primary driver of kitchen aesthetic character. Shaker doors — featuring a recessed flat center panel with a square-edged frame — have been the dominant residential style for over a decade because they translate naturally across transitional, contemporary, and traditional settings. Slab doors are flat-front and align with modern and minimalist aesthetics. Raised panel doors are formal and traditional.
Soft-close hinges and full-extension drawer slides were luxury upgrades a decade ago; they are now standard expectations at any mid-range or higher specification level.
The decisions made across cabinetry, countertops, tile, and flooring must coordinate as a cohesive whole-kitchen palette, and our kitchen materials and finishes pillar covers how to build, coordinate, and specify a material system that reads as intentional from every angle, including cabinet door materials, finish types, hardware coordination, and how to avoid combinations that look dated within a few years.
Cabinet organization systems — including full-extension drawer slides, pullout base shelves, drawer dividers, and pull-out trash cabinet configurations — must be specified at the point of cabinetry ordering. These features cannot be added after installation without cabinet replacement, which makes early planning critical.
Every variable that determines the right cabinetry for a kitchen, from box construction through door style, finish type, hardware selection, and the full refacing-versus-refinishing-versus-replacement decision, is covered comprehensively in our kitchen cabinet buying guide, which includes cost comparisons by tier and configuration.
Kitchen Countertops: Every Material Option Compared
Countertops are where kitchens take their visual and tactile identity, and they are among the most misunderstood purchases in any remodel. Homeowners frequently choose countertop materials based primarily on aesthetics without fully understanding the maintenance demands, durability limitations, and heat and stain resistance profiles that determine how each material performs over years of daily use.
Engineered Quartz
Engineered quartz is the most popular countertop material in the American kitchen remodel market. It combines a stone-like aesthetic with non-porous, low-maintenance performance. It resists staining without sealing, handles most kitchen chemicals without damage, and is available in an enormous range of colors and patterns. Cost ranges from $50 to $150 per square foot installed, depending on brand, pattern complexity, and regional labor rates.
Natural Stone: Granite, Marble and Quartzite
Granite is a natural stone quarried in slabs, each unique in pattern and color. It requires periodic sealing to maintain stain resistance but rewards that maintenance with natural variation and a warm, organic character that engineered materials cannot fully replicate. Installed cost typically runs $40 to $100 per square foot.
Marble offers unmatched visual elegance but demands significant maintenance discipline. It etches readily from acidic foods and beverages including lemon juice and wine and stains without prompt attention. It is best suited to low-traffic kitchens or homeowners who actively embrace the patina that accumulates with use.
Quartzite is a metamorphic natural stone that is harder and more durable than marble while offering similar visual character. It is frequently confused with quartz (an engineered product), but quartzite is a distinct natural material with different care requirements and natural stone variation.
Other Materials
Butcher block adds warmth and natural character to kitchen design but requires regular oiling, is susceptible to water damage at seams if not carefully maintained, and is not recommended for primary countertop runs near sinks without specific sealing protocols.
Laminate has seen significant quality improvement and is a legitimate choice for budget and rental applications, particularly in the matte stone-look formats that now approximate the appearance of engineered stone at a fraction of the cost.
The three most popular premium stone countertop materials have fundamentally different durability profiles, maintenance demands, and long-term cost implications; our quartz vs. granite vs. marble comparison covers porosity, heat resistance, scratch resistance, staining behavior, sealing requirements, and cost of ownership across the full product life for all three in a single structured resource.
Countertop edge profiles affect both aesthetics and long-term durability. Simple eased or beveled edges are less prone to chipping than ornamental profiles like ogee or dupont. Waterfall countertops, where the countertop material continues vertically down the side of an island or cabinet, are a significant contemporary design statement that performs best with book-matched stone slabs.
Every material from engineered quartz and natural granite through butcher block, laminate, solid surface, concrete, porcelain slab, and soapstone is profiled in our countertop material comparison guide, which maps each option to specific lifestyle requirements, kitchen use patterns, maintenance expectations, and installed cost ranges so homeowners can match material to reality rather than to aesthetics alone.
Kitchen Backsplash and Tile: Design, Material and Installation
The backsplash occupies a relatively small surface area compared to countertops or cabinetry, but it is one of the most visually prominent and editorially significant surfaces in any kitchen. It provides essential water protection behind the sink and cooktop, serves as the visual bridge between countertop and upper cabinets, and offers an opportunity for texture, pattern, and color that can anchor or transform the kitchen’s character.
Tile vs. Slab Backsplash
The primary backsplash decision is whether to use tile or slab material. Tile backsplashes offer maximum design flexibility — the ability to create patterns, mix materials, incorporate hand-painted accents, and build visual complexity that a single slab cannot achieve. Grout lines require periodic cleaning and re-sealing in high-use areas. Individual tiles can be replaced if damage occurs.
Slab backsplashes continue the countertop material — typically quartz or natural stone — up the wall in a single continuous piece. They deliver a seamless, contemporary look with no grout lines to maintain and read particularly well in modern and minimalist kitchen designs. Slab backsplash installation costs more than tile and requires more precise templating and fabrication.
Full-Height Backsplash
A full-height backsplash extends from the countertop surface all the way to the upper cabinet soffit or ceiling rather than stopping at the standard 18-inch height. Full-height installations have become increasingly common in modern kitchen designs, particularly where upper cabinets are replaced with open shelving, and they produce a cleaner, more intentional visual result when executed well.
Material Behind the Range
The area directly behind a cooktop or range experiences concentrated heat, steam, and grease. Materials that perform well in this zone include glossy ceramic and porcelain tile, stainless steel, and appropriately sealed natural stone. Porous materials, combustible surfaces, and certain adhesive systems are not suitable within the range surround area and may not meet local fire code requirements.
Tile versus slab decisions, full-height versus standard installations, subway tile patterns and grout selections, mosaic configurations, and the material choices that hold up best behind high-heat cooking surfaces are all covered in our kitchen backsplash design guide, which approaches the backsplash as both a functional water-protection surface and the kitchen’s most visible style statement.
Kitchen Appliances: Selection, Placement and Buying Strategy
Appliances set the performance ceiling of any kitchen. The cooktop determines cooking quality. The refrigerator determines fresh food storage capacity. The range hood determines air quality, grease control, and odor management. Getting appliance selection wrong creates functional problems that persist for the entire life of the remodel — typically ten to fifteen years or more before replacement.
Cooktop Technology
Gas cooktops remain the preference of experienced cooks for their instant visual heat feedback, responsive temperature modulation, and compatibility with any cookware. They require natural gas or propane service and produce combustion byproducts that require effective ventilation.
Electric smooth-top cooktops use radiant heating beneath a glass-ceramic surface. They are easier to clean than older coil models but lack the immediacy and visual feedback of gas burners.
Induction cooktops heat pots and pans directly through electromagnetic fields rather than flame or radiant heat. They offer faster boiling times than gas in controlled tests, highly precise temperature control, a surface that stays cool to the touch except where the pan heats it, and superior energy efficiency. The trade-off is the requirement for induction-compatible cookware with a magnetic base and higher upfront purchase cost.
The choice between cooking technologies has implications that extend well beyond the cooktop itself, affecting range hood sizing, ventilation requirements, electrical service capacity, and daily cooking performance in ways that ripple through the entire remodel plan; our gas vs. electric vs. induction comparison covers heat responsiveness, safety profiles, installation requirements, cookware compatibility, and energy efficiency across all three technologies.
Refrigerator, Range Hood and Dishwasher Essentials
Counter-depth refrigerators are flush with cabinet faces and provide a built-in appearance at significantly lower cost than true built-in models. They sacrifice some interior storage volume but dramatically improve the kitchen’s visual composition.
Range hoods must be matched to the cooktop output and kitchen volume. The National Kitchen and Bath Association recommends a minimum of 100 CFM (cubic feet per minute) for every 10,000 BTUs of gas range output. Ducted exterior venting is strongly preferred over recirculating systems for effective grease capture and odor removal.
Every appliance category — refrigerators, cooktops, ranges, range hoods, dishwashers, microwaves, drawer appliances, wine refrigerators, and smart-connected options — is covered in our kitchen appliance selection guide, which includes tiered brand comparisons at entry, mid, and luxury levels and a package-building framework that balances performance, brand consistency, and long-term serviceability.
Kitchen Islands and Peninsulas: Design, Sizing and Seating
The kitchen island has become the social and functional centerpiece of modern open-plan kitchen design. In homes where the kitchen opens to dining and living areas, the island serves simultaneously as additional prep counter, secondary appliance platform, gathering point for seating, and visual boundary that defines the kitchen zone without closing it off.
Sizing and Clearance Requirements
The minimum aisle clearance around a kitchen island is 42 inches on work sides (where someone may stand at the counter and open cabinet doors below) and 36 inches on non-work or pass-through sides. In practice, 48 inches on all work sides produces a substantially more functional and comfortable kitchen when multiple people use the space at once — the difference between 42 and 48 inches is significant when a person at the island is working and another person needs to pass with an oven door open behind them.
Island dimensions depend on available floor space after all clearances are maintained. A functional minimum island size is approximately 24 inches by 48 inches. Standard island counter height is 36 inches, consistent with perimeter countertop height. Bar-height overhangs at 42 inches are added for stool seating.
Island vs. Peninsula
A peninsula is an island attached to the wall at one end, requiring one fewer clearance side. It functions effectively as a casual dining counter on the open side and works well in kitchens where full island clearances are not achievable. Peninsulas are particularly useful for creating a defined kitchen boundary in open-plan homes while maximizing floor space efficiency.
Functional Add-Ons
Islands can incorporate a second sink — requiring a plumbing rough-in extension to the island location — a cooktop (requiring both gas or electrical rough-in and ventilation, typically a ceiling-mounted range hood above), dishwasher drawers, wine refrigerators, and decorative or bar-height seating overhangs.
Multi-level islands, where the main prep surface is at standard height and a raised section creates a bar-height dining area, provide visual interest and defined social zones but add complexity and cost to the cabinetry and countertop work.
Standard island dimensions, aisle clearance requirements, seating overhang specifications, multi-level configurations, double-island layouts, and the functional add-on options including secondary sinks, cooktops, dishwasher drawers, and wine refrigerators are covered comprehensively in our kitchen island design guide, which also includes the island-versus-peninsula decision framework with specific room-size thresholds and traffic-flow considerations.
Kitchen Sinks and Faucets: Function-First Selections That Last
The kitchen sink and faucet combination is the most-used functional unit in any kitchen, engaged dozens of times daily for food preparation, rinsing, cleanup, and utility tasks. A poorly chosen sink or inadequate faucet creates persistent daily frustration that no amount of beautiful cabinetry or premium countertops can offset — and because sink and faucet replacement requires countertop removal, getting this decision right the first time matters considerably.
Sink Types and Their Characteristics
Undermount sinks install beneath the countertop surface, creating a seamless transition from countertop to basin that makes cleanup easy — food and liquids can be wiped directly off the countertop into the basin without a lip or rim to trap debris. Undermount installation requires a countertop material strong enough to support the sink weight with undermount clips: stone, quartz, and solid surface all qualify; laminate does not.
Apron front sinks (also called farmhouse sinks) expose the front face of the sink basin, extending to the cabinet face instead of recessing behind it. They require a modified base cabinet configuration and carry a distinctive visual character that works naturally in transitional, farmhouse, and traditional kitchen designs.
Workstation sinks incorporate built-in ledges that accept proprietary accessories — cutting boards, colanders, drying racks, and knife holders — that sit above and across the basin. They maximize the functional footprint of a single-basin format and represent the premium segment’s fastest-growing sink category.
Basin Configuration
Single-basin sinks provide maximum flexibility for washing large pots, sheet pans, and oversized cookware, at the cost of simultaneous-task compartmentalization. Double-basin sinks allow separate soaking and rinsing zones. The trend in mid-range and luxury kitchen remodels has moved decisively toward single large basins or workstation formats, with double basins declining in specification frequency.
Faucet Features
Pull-down faucets with a retractable spray head are the most popular residential kitchen faucet configuration. Touchless motion-sensor faucets have achieved mainstream acceptance and meaningfully reduce cross-contamination when hands are handling raw food. Pot filler faucets mount near the cooktop and extend to fill pots at the cooking surface, eliminating the task of carrying heavy pots from sink to stove — a quality-of-life improvement that serious cooks consistently cite as one of their best remodel decisions.
Sink types, basin configurations, material comparisons (stainless steel, composite granite, fireclay), and every faucet feature from pull-down to touchless to pot filler are detailed in our sink and faucet selection guide, which helps homeowners match the most-used functional unit in the kitchen to their specific cooking workflow and household habits.
Kitchen Lighting and Electrical: Layers, Circuits and Code
Effective kitchen lighting requires three distinct, independently controlled layers working together. A kitchen lit only by a central overhead fixture — the most common residential lighting mistake — creates harsh shadows on every work surface and leaves the kitchen feeling flat and dim regardless of the fixture’s wattage. Planning lighting in three layers from the start of the design process costs no more than planning it as an afterthought and produces dramatically better results.
The Three Lighting Layers
Ambient lighting provides general illumination for the overall kitchen space. Recessed ceiling fixtures, LED wafer fixtures, or flush-mount ceiling lights deliver this layer. The standard layout for recessed ambient fixtures positions them approximately 24 inches from wall surfaces and spaces them on a grid based on the room height: a nine-foot ceiling typically uses fixtures spaced 4.5 feet apart. All ambient fixtures should be on dimmer circuits to allow transition between work and social settings.
Task lighting targets specific work surfaces with direct, focused light. Under-cabinet LED strip lights are the primary task lighting method in modern kitchens. They should be positioned toward the front of the upper cabinet soffit to place light on the countertop work zone and minimize shadows cast by the cook’s own body. Under-cabinet lighting should be on a separate circuit from ambient fixtures so it can operate independently.
Accent lighting highlights architectural features, open shelving displays, range hood detailing, or decorative ceiling elements. Interior cabinet lighting, toe-kick LED strips, and directional fixtures aimed at focal points serve this function and create the visual depth that distinguishes a professionally designed kitchen from a merely functional one.
Pendant Lighting Over Islands
Pendant lights above a kitchen island provide both focused task light for the island work surface and a decorative statement. Standard sizing guidance holds that pendant diameter should be approximately one-third to two-thirds of the island width. Multiple pendants should be spaced evenly with their centers aligning with the island’s long centerline, hanging 30 to 36 inches above the island surface.
Electrical Code Requirements
Kitchen electrical code in most U.S. jurisdictions, governed by the National Electrical Code (NEC), requires GFCI protection on all countertop receptacle circuits, dedicated 20-amp circuits for countertop small appliance areas, AFCI protection on kitchen branch circuits, and countertop outlet placement rules that require a receptacle within four feet of any counter run longer than 12 inches. Undercabinet lighting, dishwasher circuits, refrigerator circuits, and disposal circuits all require their own dedicated breakers.
The complete lighting design methodology, including recessed layout grids, pendant sizing formulas, under-cabinet lighting options, dimmer compatibility guidance, and the full NEC electrical requirements governing kitchen circuits and outlet placement, is detailed in our kitchen lighting plan resource.
Kitchen Flooring: Durability, Style and Material Selection
Kitchen flooring absorbs more daily stress than almost any other floor in the home: sustained heavy foot traffic, water and food spills, dropped cookware, standing on hard surfaces for extended cooking sessions, and temperature variation near ovens and refrigerators. Material selection must balance durability, comfort, maintenance requirements, and visual cohesion with the overall kitchen design.
The Primary Options
Hardwood flooring — solid or engineered — brings warmth and timeless visual appeal to kitchens. Solid hardwood is susceptible to moisture and humidity-related expansion and contraction and must be carefully finished and sealed in a kitchen environment. Engineered hardwood, with its cross-laminate construction, handles humidity fluctuations better than solid and can be installed over concrete subfloors where solid cannot. All hardwood scratches and dents over time, which most homeowners accept as the natural character of a lived-in kitchen.
Luxury Vinyl Plank (LVP) is now the most commonly installed kitchen flooring material in American residential remodels. It is fully waterproof, highly scratch-resistant, comfortable underfoot compared to tile, and available in convincing wood and stone visual formats. Click-lock installation can often be placed as a floating floor over existing material, reducing labor cost. Kitchen-grade LVP should have a minimum 12-mil wear layer; lower thicknesses degrade more rapidly under kitchen foot traffic.
Porcelain tile is the most durable kitchen flooring material available. It is impervious to water, resists scratching, and handles heavy use without surface degradation. The trade-off is hardness and cold underfoot: standing on porcelain tile for extended cooking sessions generates fatigue more quickly than softer materials. Large-format tiles (24×24 inches or larger) have become the contemporary standard because they minimize grout line frequency and maximize visual continuity.
Heated Kitchen Floors
Electric radiant heating mats install beneath tile or LVP as thin heating elements connected to a dedicated thermostat. They eliminate the cold-floor problem of tile and stone surfaces, significantly improving kitchen comfort in cold climates. System and installation costs typically run $10 to $25 per square foot installed.
Flooring Transitions
Where kitchen flooring meets an adjacent room’s material, the transition requires an appropriate threshold or T-bar profile that accommodates height differences between materials. In open-plan homes where the same flooring continues from kitchen into dining or living areas, the absence of a visible transition creates a more seamless visual result — a common design objective that requires planning the flooring purchase and installation to cover multiple rooms as a single contiguous surface.
Hardwood, LVP, porcelain tile, ceramic tile, heated floor systems, and transition solutions for every kitchen configuration are covered in our kitchen flooring options guide, which includes durability ratings, maintenance profiles, subfloor requirements, and installed cost comparisons for each material.
Kitchen Remodel Cost, Budget and Process
Budget is the variable that determines more project outcomes than any other. Before any designer, architect, or contractor conversation begins, homeowners need a realistic understanding of what a kitchen remodel costs at their target scope level — because scope, material tier, contractor selection, and timeline all flow directly from the budget number established at the start.
Cost Ranges by Remodel Level (2025)
Kitchen remodel costs vary by kitchen size, region, specification level, and the presence of plumbing, electrical, or structural work. The following ranges represent full installed cost including materials, labor, and contractor overhead for typical U.S. kitchens:
Budget Remodel (cosmetic or entry-tier pull-and-replace): $15,000 to $35,000
Mid-Range Remodel (pull-and-replace with semi-custom cabinets, quartz or granite countertops, mid-tier appliances): $35,000 to $75,000
Upper Mid-Range Remodel (semi-custom to custom cabinets, premium countertops, higher-end appliances, some structural or layout change): $75,000 to $125,000
Luxury Remodel (custom cabinetry, stone or specialty countertops, professional-grade appliances, structural changes, full gut scope): $125,000 and above
According to Remodeling Magazine’s 2024 Cost vs. Value Report, minor kitchen remodels return approximately 96.1% of their cost at resale nationally, while major mid-range kitchen remodels return closer to 49.5% — a difference that meaningfully shapes how homeowners should calibrate scope based on their time horizon, market, and whether they are remodeling to live or to sell.
Homeowners remodeling with an eye toward eventual resale need specific data on which kitchen investments return at closing; our kitchen remodel ROI resource tracks national cost-versus-value data by project type, clarifies which upgrades appraisers credit in their valuations, and identifies the over-improvement threshold for different neighborhood price points so homeowners can calibrate scope to their specific market position.
Budget Allocation by Category
In a typical mid-range kitchen remodel, budget breaks down approximately as follows:
Cabinetry: 30 to 40 percent Countertops: 10 to 15 percent Appliances: 10 to 15 percent Labor (installation, plumbing, electrical): 20 to 30 percent Flooring: 5 to 10 percent Lighting, hardware, and finishing: 5 to 8 percent Contingency reserve: 10 to 15 percent
The contingency budget is not optional. Hidden conditions discovered during demolition — including outdated wiring that does not meet current NEC requirements, plumbing that fails code inspection, subfloor water damage, or asbestos-containing materials in pre-1980 kitchens — routinely add 10 to 20 percent to total project cost when they occur. A contingency budget prevents these discoveries from derailing the project.
Timeline and Trade Sequencing
A pull-and-replace kitchen remodel typically runs four to eight weeks from first demolition day to completed punch list. A gut renovation with structural or layout changes extends to eight to fourteen weeks or longer depending on permit timelines and trade availability.
Trade sequencing follows a standard order that must not be compressed: demolition, structural work (if any), plumbing rough-in, electrical rough-in, HVAC modifications, inspections, drywall, painting, cabinet installation, countertop templating, countertop fabrication (one to two weeks), countertop installation, backsplash, fixture installation, appliance installation, and punch list.
Cabinet lead times commonly drive the project schedule. Semi-custom cabinets typically ship in six to ten weeks from order confirmation; custom cabinets run eight to sixteen weeks. Planning the overall project timeline around cabinet and countertop lead times — not around demo day — prevents weeks of idle time on an active job site.
Kitchen projects involving structural changes, MEP upgrades, or phased execution require a broader financial framework than a simple material cost estimate — our remodeling budget and financing options pillar covers HELOC, construction loans, renovation mortgages, draw schedules, contingency planning, and the difference between fixed-price and cost-plus contractor contracts for projects at every scale.
The full cost spectrum from a budget cosmetic refresh through a luxury custom gut renovation, including category-by-category budget allocation, hidden cost scenarios, permit fee ranges, regional pricing variations, contingency guidance, and contractor payment structures, is covered in our kitchen remodel cost breakdown guide for 2025, updated with current labor and material pricing across U.S. regions.
Common Mistakes, Timeless Principles and Real-World Lessons
Even well-prepared homeowners make kitchen remodel mistakes that cost time, money, and long-term satisfaction. Understanding the most common failure patterns before they occur is one of the highest-leverage preparations any homeowner can make before starting the planning process.
Design Decisions That Age Poorly vs. Those That Last
High-contrast cabinet combinations dominated kitchen design in the early 2020s — particularly very dark lower cabinets paired with stark white uppers. Well-executed examples look striking; poorly executed examples feel dated within a few years. Similarly, highly specific hardware finishes tied to a single era, tile patterns with strong period associations, and unusual material combinations with limited market appeal often underperform in resale contexts.
What endures: white or soft off-white perimeter cabinetry with a contrasting island, quartz countertops in neutral stone tones, subway tile in classic stacked or brick-lay patterns, integrated or panel-ready appliances, and hardware finishes in brushed nickel, matte black, or warm brass applied consistently throughout the kitchen.
The Most Common Mistakes
Insufficient storage planning ranks as the most common functional regret in completed kitchen remodels. Homeowners who design the visual kitchen carefully but fail to plan for specific storage needs — baking sheet height, pot lid drawers, small appliance garages, pantry depth — discover these gaps only after installation, when correction requires cabinet replacement.
Lighting planned as an afterthought produces the second most frequent complaint. Specifying recessed lights without designing the layered system produces inadequate task lighting and no accent layer.
Under-ventilating the cooktop is a problem that becomes apparent during the first serious cooking session. Range hood selection and duct sizing must be planned in coordination with cooktop selection — not chosen independently by the electrician and HVAC sub.
Most kitchen remodels occur as part of a broader property improvement strategy; for homeowners managing a full-home project, our whole home remodel integration pillar covers how to coordinate a kitchen renovation within a complete home project without budget conflict, design inconsistency, or scheduling delays that compound across multiple trades.
Every question that comes up during a kitchen project, from initial scope decisions and material selection through contractor management, permit compliance, punch list execution, and documentation for resale, is addressed in our kitchen remodel FAQ, which covers the 100 most frequently asked questions across every phase of a kitchen renovation from pre-planning through project closeout.
Conclusion
A kitchen remodel touches every dimension of home life, from layout functionality and material durability to cooking performance and long-term property value.
Each dedicated resource linked throughout this guide provides the deeper research needed to make every material, layout, and contractor decision with confidence.
Ready to start? Mr. Local Services connects homeowners and property managers with experienced kitchen remodeling professionals delivering quality results from design through completion.
Frequently Asked Questions
How long does a kitchen remodel take from start to finish?
A pull-and-replace kitchen remodel without layout changes typically takes four to eight weeks of active construction. Gut renovations with plumbing, electrical, or structural modifications run eight to fourteen weeks or longer, depending on permit timelines and trade scheduling.
Do I need a permit to remodel a kitchen?
Most kitchen remodels involving electrical work, plumbing changes, or structural modifications require building permits. Cosmetic updates to surfaces without touching mechanical systems or relocating fixtures typically do not. Verify requirements with your local building department before beginning any work.
What is the single biggest budget mistake homeowners make in kitchen remodels?
Failing to set aside a ten to fifteen percent contingency for hidden conditions discovered during demolition — outdated wiring, plumbing code gaps, subfloor damage, or hazardous materials in older homes — is the most financially damaging planning omission. These conditions are common and cannot be identified without opening the walls.
Should I hire a general contractor or a design-build firm for a kitchen remodel?
A general contractor is the right choice when design is already finalized and you need execution-focused construction management. A design-build firm manages both design and construction under one contract, which simplifies communication and accountability but reduces the flexibility to select individual trades or designers independently.
Which kitchen remodel projects return the most value at resale?
According to national cost-versus-value research, minor kitchen remodels return close to their full investment at resale, while major gut renovations with luxury specifications return closer to 50 percent. Strategic mid-range remodels that update aesthetics without over-improving for the neighborhood price point consistently outperform luxury renovations in net dollar return.
Is it worth remodeling a kitchen before selling a house?
Targeted cosmetic updates — painting cabinets, replacing countertops, updating hardware, and refreshing lighting — often return well in pre-sale contexts. Full gut renovations rarely justify the cost and timeline before listing. Consult a local real estate professional to assess which specific updates your market rewards before committing to any scope.
How do I decide between a full gut renovation and a pull-and-replace remodel?
If the existing layout functions well, the plumbing and electrical systems are in serviceable condition, and the cabinet boxes are structurally sound, a pull-and-replace remodel is typically the better investment. A gut renovation is warranted when mechanical systems are outdated and near end of life, when structural issues or water damage are present, or when the floor plan fundamentally does not support the way the household uses the kitchen.