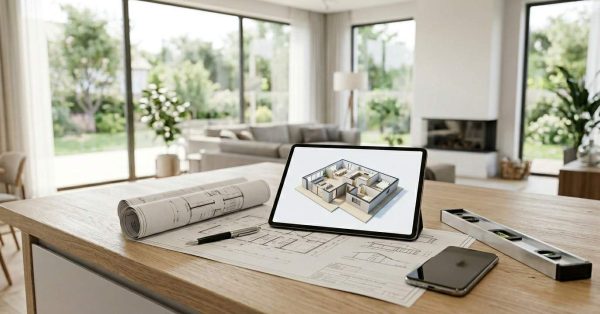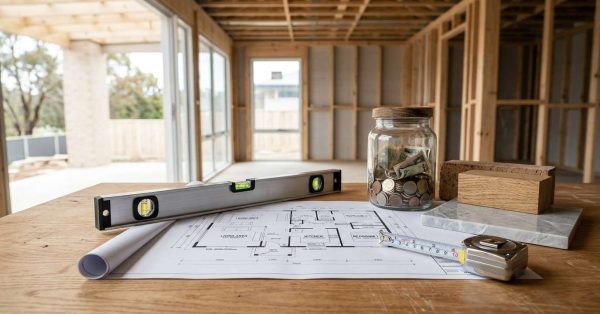
MEP systems — mechanical, electrical, and plumbing — are the invisible infrastructure that powers, waters, and ventilates every remodeled home. These interconnected trades must be planned, permitted, and installed in the correct sequence for any residential or commercial remodel to succeed safely.
Getting MEP wrong is the leading cause of failed inspections, unexpected budget overruns, and costly rework — hidden problems that only surface long after walls are closed and finishes are installed.
This guide covers every MEP dimension homeowners and property managers encounter in a remodel: electrical service, plumbing repipe, water heating, gas systems, drainage, specialty systems, permits, costs, and contractor hiring.
What Are MEP Systems? Scope, Definition & Why They Matter in Every Remodel
MEP is the abbreviation for Mechanical, Electrical, and Plumbing — the three primary trade categories that govern how a building functions at a systems level. In residential and commercial remodeling, MEP encompasses everything from the electrical panels and wiring that distribute power, to the supply pipes that deliver hot and cold water, to the gas lines feeding appliances, the drain systems removing wastewater, and the specialty systems protecting the home from radon, flooding, and power surges.
The “M” — Mechanical Systems Explained
The mechanical category in residential remodeling primarily refers to HVAC — heating, ventilation, and air conditioning. It includes forced-air ductwork, split systems, ductless mini-splits, whole-house ventilation equipment, and the mechanical connections (gas lines, electrical circuits, drainage) that HVAC equipment requires. In commercial projects, mechanical also includes building automation systems, make-up air units, and commercial exhaust systems. Because HVAC is an extensive topic in its own right — with its own sizing calculations, equipment types, ductwork design rules, and permit requirements — this guide focuses on the electrical and plumbing sides of MEP, plus specialty systems, while treating mechanical as the coordinating partner.
The “E” — Electrical Systems Explained
Electrical systems in a remodel span the full chain from the utility service entrance through the main panel, subpanels, branch circuits, wiring devices, outlets, lighting, and low-voltage systems. A remodel may require anything from adding a single 20-amp circuit for a new appliance to upgrading the entire service from 100 amps to 200 amps, rewiring the complete home with new branch circuits, and pre-wiring for structured low-voltage infrastructure.
The “P” — Plumbing Systems Explained
Plumbing encompasses supply lines (the pipes delivering hot and cold water to every fixture), drain-waste-vent (DWV) systems that remove wastewater and prevent sewer gas from entering the home, gas distribution piping, and water heating equipment. A typical remodel may involve partial or full repipe of deteriorated supply lines, DWV modifications to add fixtures, gas line extensions for new appliances, and water heater replacement or upgrade.
Why MEP Is the Backbone of Every Remodel
MEP systems work in walls, floors, and ceilings — invisible after a remodel is complete, but fundamental to how the home functions every single day. They are inspected at the rough-in stage before walls close and again at final inspection. Errors, deferred upgrades, or code violations in MEP systems are among the most expensive problems to fix after a remodel is complete, because correction almost always requires reopening finished surfaces.
Because low-voltage pre-wiring, smart panel integration, and connected device infrastructure all fall within the MEP rough-in window, the smart home remodeling guide covers every pre-wire decision — from Matter-compatible networking to Lutron lighting and whole-house security — that must be planned alongside electrical rough-in to avoid costly retrofits.
The MEP Rough-In Sequence: Trade Coordination & Order of Operations
One of the most important things to understand about MEP in remodeling is when it happens relative to other construction phases. MEP systems do not install simultaneously, and the sequence of trade work is not optional. Coordinating the right sequence prevents trade conflicts, avoids delays, and ensures inspections occur at the right time.
When MEP Happens in the Construction Timeline
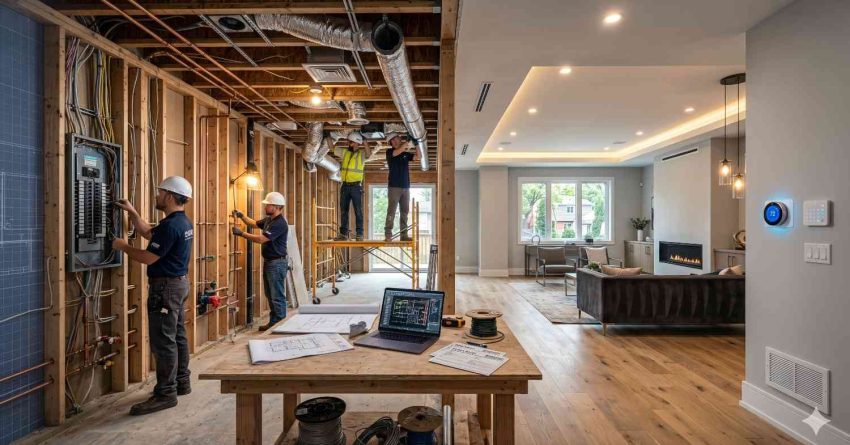
MEP rough-in occurs after demolition and after structural framing modifications are complete — and before insulation or drywall goes up. This is the window, sometimes only two to four weeks on a typical residential remodel, during which all electrical wiring, plumbing pipe, gas line, and HVAC ductwork must be run through open wall and floor cavities. Missing this window means opening finished walls later, which increases labor cost significantly and disrupts the finishes already installed.
Permits for each MEP trade must be pulled before rough-in begins. The rough-in inspection — conducted by the local building department before walls close — confirms code compliance of all MEP work before it becomes permanently inaccessible.
Before rough-in begins, a systematic assessment of existing MEP infrastructure — testing electrical capacity, evaluating pipe materials, scoping gas line adequacy, and inspecting the DWV system — prevents costly mid-project discoveries; our pre-construction MEP assessment guide walks through every diagnostic check a homeowner or contractor should complete before framing walls are opened.
Trade Sequencing: Who Goes First, Second & Third
The general order of MEP rough-in in residential remodeling is:
- Structural framing and any required shear wall work first
- HVAC ductwork next — because ducts are large, rigid, and claim the most space; they are the least flexible to route around other systems
- Plumbing rough-in follows HVAC — large pipes run through joists and walls before smaller electrical wiring
- Electrical rough-in last — because wire is the most flexible and routes around plumbing and HVAC most easily
This sequence applies generally, but real-world projects require ongoing coordination between trades. On complex projects — particularly when existing systems must remain operational — daily communication between the general contractor and each MEP subcontractor is essential.
A complete visual breakdown of the MEP trade sequence — showing exactly when HVAC ductwork, plumbing rough-in, and electrical rough-in occur relative to each other and to framing, insulation, and drywall — is available in the MEP trade sequencing guide, which gives homeowners and project managers the coordination roadmap needed to schedule trades without conflicts or delays.
Rough-In vs Trim-Out: The Two Phases of MEP Work
MEP happens in two distinct phases. Rough-in is all the infrastructure work — running pipe, conduit, and wire through the building’s structural cavities — that will be buried behind finished surfaces. Trim-out, also called the finish or set phase, happens at the end of the project after walls, flooring, and ceilings are complete. During trim-out, electricians install outlets, switches, and fixtures; plumbers set fixtures and make final connections; and HVAC technicians install grilles, registers, and thermostats.
Understanding how MEP rough-in fits within the broader construction timeline — from demolition and structural framing through insulation, drywall, and finish work — is covered in full detail in The Complete Guide to Whole Home Remodeling, which maps the correct order of operations for every trade across a major remodel.
Electrical Service & Panel Upgrades During Remodeling
The electrical service is the entry point for power into the home. It consists of the utility feed from the street, the meter base, the main disconnect, and the main distribution panel (breaker box). In residential remodeling, the service upgrade decision — whether to stay with existing capacity or upgrade — has cascading effects on everything else in the electrical system.
When to Upgrade Your Electrical Service
Most homes built before 1980 have 100-amp service, which was adequate for the appliance loads of that era. Today’s homes — with EV chargers drawing 30–50 amps, heat pump water heaters requiring dedicated 30-amp circuits, induction ranges on 50-amp circuits, and central air conditioning — routinely require 200-amp service as a minimum. Some larger homes and those pursuing whole-home electrification may warrant 400-amp service or a separate secondary panel.
A remodel is the ideal time to upgrade electrical service: walls are open, and the utility company can be scheduled alongside the construction. Upgrading service while walls are closed costs significantly more in labor — and may require re-opening recently finished surfaces.
100A vs 200A vs 400A Service: What Each Supports
The difference between 100-amp and 200-amp service is not only capacity — it affects the physical panel size, the number of available circuit slots, and the ability to add major load circuits. A 100-amp panel may have only 20 circuit slots, limiting the total number of dedicated circuits available. A 200-amp panel typically offers 40 or more circuit slots. Upgrading from 100A to 200A typically costs $1,500–$4,000 installed, depending on panel location, utility requirements, and local labor rates.
Subpanel Installation Basics
When a remodel adds significant square footage — a home addition, a finished basement, a detached ADU, or a garage conversion — a subpanel is typically installed to feed the new area from the main panel. A subpanel extends the electrical system without replacing the main panel and allows the new space to have its own organized circuit distribution. Subpanel sizing is determined by the total anticipated load of the new space.
Aluminum Wiring, Knob-and-Tube, Smart Panels & EV Chargers
Homes built in the 1960s and early 1970s sometimes used aluminum for branch circuit wiring. Aluminum branch wiring expands and contracts differently than copper and can work loose at connections, creating fire hazards. Knob-and-tube wiring (pre-1950) lacks grounding conductors, cannot safely serve modern loads, and is typically flagged by home inspectors and insurance carriers. Both require remediation — often full rewiring — before a remodel is permitted in most jurisdictions.
Smart panels, such as Span or Lumin, provide circuit-by-circuit energy monitoring, remote load management, and EV charging prioritization through a smartphone interface. They represent a significant upgrade to standard breaker panels and are a growing consideration in whole-home remodels targeting energy efficiency and electrification.
Every decision in the electrical service upgrade process — from 100A vs 200A vs 400A service comparisons to smart panel options, EV charger circuit requirements, knob-and-tube remediation costs, and subpanel installation — is covered in the electrical service upgrade guide, which walks through every code trigger, cost factor, and utility coordination step homeowners encounter during a remodel.
Lighting Circuits, Dimmers & Smart Wiring
Lighting circuit planning in a remodel is far more than deciding where fixtures go. It determines how rooms feel, how flexible the lighting system will be over time, and whether smart lighting systems can be integrated cleanly now or only at significant retrofit cost later.
Lighting Circuit Planning for Remodels
Code requires that every habitable room have at least one switched lighting outlet. Best practice goes further: separating lighting circuits from receptacle circuits in kitchens and living areas, providing dedicated circuits for high-load recessed lighting in larger rooms, and keeping bedroom lighting on isolated circuits to prevent nuisance trips. Adding lighting circuits costs a small fraction during rough-in compared to the cost of adding them after walls are closed — making the rough-in window the right moment to plan for future needs.
Most rooms benefit from at least two circuits: one for overhead or ambient lighting and one for task or accent lighting. Dimming capability is best designed at the circuit level, using compatible fixtures and dimmers from the outset rather than retrofitting mismatched combinations later.
Dimmer Compatibility With LEDs
LED lighting has largely replaced incandescent and halogen in residential remodeling, and compatibility between LED fixtures and dimmer switches is a common source of problems. Not all LED fixtures are dimmable; not all dimmers are LED-compatible; and not all combinations that are individually listed as compatible perform well together. The solution during rough-in is specifying fixtures from manufacturer-tested dimmer compatibility lists, ensuring neutral wire presence at switch locations (required for most modern smart and standard LED dimmers), and testing dimmer-fixture combinations on site before walls close.
Smart Lighting Wiring Requirements
Smart lighting systems — from whole-home solutions like Lutron RadioRA3 and Caseta to individual smart switches — often require a neutral wire at every switch location. Many older homes wired with “switched hot” only at the switch box cannot support modern smart switches without a neutral wire retrofit, which requires running new wiring to every affected switch location. Pre-wiring with a neutral at every switch during rough-in eliminates this limitation permanently, for a cost of approximately $20–$40 per switch location in rough-in labor — versus $150–$400 per location for a retrofit.
The complete breakdown of how to design lighting circuits for every room — including dimmer compatibility charts for LED fixtures, neutral-wire requirements for smart switches, and dedicated circuit recommendations by room type — is covered in the lighting circuit planning guide, which gives homeowners and electricians the information they need to specify circuits correctly before walls close.
Outlets, Devices, Wiring & Low-Voltage Pre-Wire
Modern homes require substantially more electrical outlets, circuits, and low-voltage infrastructure than was standard even 15 years ago. A remodel is the only cost-effective window to install all of this correctly.
Outlet Placement Code & Best Practices
The National Electrical Code (NEC) requires that in any room, no point along a wall should be more than 6 feet from an outlet. Outlets must be placed within 2 feet of a doorway on either side. GFCI (Ground Fault Circuit Interrupter) protection is required in bathrooms, kitchens (countertop outlets), garages, outdoors, unfinished basements, and other wet or damp locations. AFCI (Arc Fault Circuit Interrupter) protection is now required in virtually all living areas in most code-adopting jurisdictions.
Beyond code minimums, best practice adds USB-C combination outlets in bedrooms and home offices, pop-up or flush-mounted outlets in kitchen islands, in-drawer charging outlets in kitchen cabinets, and 20-amp circuits (rather than 15-amp) throughout the home for greater flexibility.
For homes with aluminum branch wiring — a common discovery in homes built from 1965–1973 — understanding the remediation options, costs, and code requirements is critical before planning any electrical expansion; the complete copper vs aluminum branch wiring guide —-covers identification, arc fault risk, COPALUM connector remediation, pig-tailing methods, and when full rewiring is the only code-compliant path forward.
Wire Gauge, USB-C Outlets & Smart Receptacles
Mismatched wire gauges and circuit breakers are among the most common — and most dangerous — electrical errors in remodeling. The NEC requires 14-gauge wire for 15-amp circuits and 12-gauge wire for 20-amp circuits. Using undersized wire on a 20-amp circuit creates a fire hazard. Smart receptacles (with built-in monitoring, USB-C ports, or wireless control) require neutral wire connections and occasionally require deeper electrical boxes.
Cat6a, Fiber & Low-Voltage Pre-Wire Strategy
Low-voltage pre-wiring includes structured cabling (Cat6 or Cat6a ethernet), coaxial cable for video distribution, speaker wire, in-wall security camera cabling, and access control and doorbell wiring. Running low-voltage during MEP rough-in costs a fraction of the retrofit cost and creates the foundation for a capable, reliable smart home network. Cat6a is the current standard for future-proofing, supporting 10-gigabit network speeds and PoE (Power over Ethernet) for cameras, access points, and VoIP devices.
The full specification guide for outlet placement code, USB-C receptacle types, wire gauge and amperage reference tables, Cat6a vs Cat6 vs fiber pre-wire comparisons, and conduit strategy for maximum future flexibility is covered in the low-voltage pre-wire strategy guide — the definitive cluster resource for every wiring and device decision made during MEP rough-in.
Whole-House Repipe: When & How to Replace Your Supply Lines
Plumbing supply lines are the pipes that deliver hot and cold water to every fixture, appliance, and hose bib in the home. When these pipes fail — through corrosion, mineral buildup, pinhole leaks, or aging material failure — a whole-house repipe is the permanent, code-compliant solution. A remodel creates ideal access: walls are already open, and all trades are on site.
PEX-A vs PEX-B vs Copper: The Core Repipe Decision
PEX (cross-linked polyethylene) pipe has largely replaced copper in new residential construction because it is flexible, freeze-resistant, easy to install, and significantly less expensive than copper. PEX-A uses an expansion fitting system (fewer connection points, lower failure risk); PEX-B is more common and uses crimp or clamp fittings, performing similarly at a slightly lower cost. Copper remains the premium alternative for homeowners who prefer its proven longevity and non-petroleum composition, but at 2–3× the material cost of PEX.
Replacing Galvanized, Polybutylene & Lead Pipes
Galvanized steel pipes, common in homes built before 1960, corrode progressively from the inside — restricting water flow, reducing pressure, and eventually leaching rust into household water. Polybutylene pipe, installed from approximately 1978 to 1995, is prone to cracking from oxidants in municipal water supplies and has been the subject of major class-action settlements. Lead supply pipe or lead solder joints in pre-1986 homes represent a documented health hazard. All three materials should be identified and replaced, not reconnected, during any significant remodel that opens their surrounding walls.
Manifold (Home Run) vs Trunk-and-Branch Systems
Traditional trunk-and-branch plumbing runs a large main line from the water heater with smaller branches tapping off to individual fixtures. Manifold systems run individual PEX lines from a central manifold directly to each fixture, providing individual shutoff valves for every fixture and reducing cross-flow between fixtures. Manifold systems cost slightly more in pipe material but significantly simplify future maintenance and leak isolation.
Every plumbing supply decision — from PEX-A vs PEX-B vs copper comparisons to manifold vs trunk-and-branch layouts, galvanized and polybutylene pipe replacement costs, sewer lateral replacement, and trenchless repair options — is covered in full detail in the whole-house repipe guide, which includes installation sequences, material cost benchmarks, and what to expect during a full repipe.
Water Heating Systems: Tank, Tankless, Heat Pump & Recirculation
Water heating accounts for approximately 18% of a typical home’s energy use, according to the U.S. Department of Energy. A remodel — especially one involving MEP rough-in — is the optimal moment to upgrade to a more efficient water heating system, since the infrastructure changes (new circuits, gas line modifications, venting changes) are significantly less expensive when other trades are already mobilized on site.
Tank vs Tankless: The Core Decision
Storage tank water heaters (40–80 gallons) heat and hold water continuously, maintaining a ready supply at modest installation cost. They are straightforward to replace and familiar to virtually every plumber. Tankless (on-demand) water heaters heat water only when called for, eliminating the standby heat loss that consumes energy even when no hot water is being used. Gas tankless units deliver high flow rates and long service life but require larger gas supply lines and proper venting to the exterior. Electric tankless units require substantial electrical capacity — typically two or three 240-volt, 40-amp circuits — making them practical primarily in homes with 200-amp or larger service.
Heat Pump Water Heaters: Efficiency & Requirements
Heat pump water heaters (HPWHs) extract heat from surrounding air and transfer it to the water tank using a refrigerant cycle, consuming approximately 2–3× less electricity than conventional electric resistance water heaters. As of 2025, HPWHs qualify for a 30% federal tax credit under IRA Section 25C, making them one of the highest-ROI upgrades available during a remodel. Installation requires adequate surrounding air volume (at least 700–1,000 cubic feet), a consistent ambient temperature range, and a nearby drain for the condensate produced during operation.
Sizing, Recirculation Pumps & Point-of-Use Options
The first-hour rating (FHR) — how many gallons of hot water a unit can deliver in the first hour — is the key sizing metric, not tank capacity alone. Hot water recirculation systems pump water through a dedicated loop or use the cold line return path, keeping hot water available at distant fixtures within seconds rather than minutes. This reduces water waste significantly. Point-of-use electric water heaters serve individual remote fixtures (a powder room far from the main water heater) without running long hot water lines.
Our complete tank vs tankless comparison covers every water heating decision homeowners and contractors face — including first-hour rating calculations for proper sizing, heat pump water heater installation requirements, gas vs electric trade-offs, recirculation pump configurations, and point-of-use water heater applications for long-run fixtures.
Plumbing Fixtures: Rough-In Dimensions, Pressure & Water Quality
Plumbing fixtures are the visible endpoints of the supply and drain systems, but their long-term performance depends entirely on what happens in the walls behind them during rough-in. Getting rough-in dimensions wrong — by even an inch or two — results in fixtures that do not fit properly, exposed pipe connections, and costly demolition and reinstallation.
Fixture Rough-In Heights, Dimensions & Code Requirements
Rough-in height refers to the height above the finished floor at which water supply and drain connections are set before fixtures are installed. Standard toilet rough-in is 12 inches from the finished wall to the drain center (10-inch and 14-inch rough-in toilets exist but are less common). Shower valve rough-in typically sets at 48 inches above the subfloor for standard showerheads, and at 80 inches for ceiling-mounted or rain head installations. Vanity supply lines rough in at 21 inches above the finished floor for standard 34-inch vanities. These dimensions must account for the finished floor height (tile adds ½ inch to ¾ inch) to avoid visible pipe below a toilet or an improperly positioned valve.
Pressure Balancing vs Thermostatic Valves
Pressure-balancing valves maintain a constant hot-to-cold ratio when other fixtures in the home are used simultaneously, preventing scalding when a toilet flushes in an adjacent bathroom. These are code-required in all new shower and tub-shower installations. Thermostatic valves maintain a precise temperature regardless of flow rate changes — providing an additional layer of safety and comfort, particularly for households with young children or elderly occupants. Thermostatic valves cost more to purchase and install but are the appropriate specification for primary bathrooms and walk-in showers.
Whole-House Water Filtration & Softeners
Whole-house water filtration systems remove sediment, chlorine, chloramines, and other contaminants at the point of entry to the home, protecting fixtures, water-using appliances, and water heaters from buildup and chemical degradation. Water softeners remove dissolved calcium and magnesium that cause scale deposits in pipes, water heaters, and fixture surfaces. Both systems require space near the main water entry point, a drain connection for backwash and regeneration, and periodic maintenance. A remodel is the right time to install these systems — doing so retroactively requires breaking into the main line and is disruptive to occupied homes.
The exact specifications every contractor needs — fixture rough-in heights by fixture type, pressure balancing vs thermostatic valve selection criteria, PRV installation requirements, water pressure testing protocol, and whole-house filtration and softener system placement — are covered in the complete fixture rough-in dimensions guide, which prevents the costly errors that result from imprecise rough-in setpoints.
Gas Systems in Remodeling: Sizing, Materials & Conversion
Gas systems in remodeling range from extending an existing distribution line for a new range or fireplace insert, to resizing the complete supply system as appliance loads change, to removing gas infrastructure entirely as part of a home electrification project. Each scenario requires different planning, permitting, and inspection.
Gas Line Sizing & BTU Load Calculations
Gas lines must be sized to supply adequate pressure and volume — measured in BTUs per hour — to all connected appliances simultaneously at rated capacity. Adding a high-BTU range (e.g., 65,000 BTU), a gas dryer, or a whole-house generator without assessing existing line capacity can reduce pressure to other appliances, causing underperformance, efficiency loss, and in some cases equipment damage or unsafe operation. Gas line sizing calculations use total connected BTU load, pipe run length, pipe diameter, allowable pressure drop, and the specific gravity of the gas being served.
CSST vs Black Iron Gas Pipe
Black iron pipe (rigid threaded steel) is the traditional material for gas distribution within residential structures and remains widely specified for sections near high-heat appliances and for main gas entry lines. CSST (Corrugated Stainless Steel Tubing) is a flexible alternative that installs significantly faster, requires fewer fittings and supports, and accommodates seismic movement better than rigid pipe. Most jurisdictions accept both materials; however, CSST must be bonded to the home’s electrical grounding system per manufacturer requirements and most current codes, to prevent damage from induced current during nearby lightning events.
Gas-to-Electric Conversion: When & How
The shift toward home electrification is driving increasing demand for gas-to-electric conversions: replacing gas ranges with induction cooktops, gas water heaters with heat pump water heaters, and gas furnaces with heat pump HVAC systems. Each conversion requires evaluating electrical panel capacity for the new loads, potentially upgrading service and running new circuits, and properly capping gas stub-outs to code. In jurisdictions with energy-use benchmarking or new construction electrification mandates, proactive planning of the gas-to-electric transition during a major remodel avoids future forced compliance costs.
The full technical framework for gas system decisions in remodeling — including BTU load calculation methods, pipe diameter selection tables, CSST vs black iron material comparisons with bonding requirements, gas-to-electric conversion planning steps, and the permit process for adding gas service — is covered in the gas line sizing guide, the essential reference for any remodel touching the gas distribution system.
Drainage, Venting & Below-Grade Plumbing
The drain-waste-vent (DWV) system removes wastewater and prevents sewer gas from entering the home. It operates on gravity and air pressure equalization — and unlike supply systems, it cannot be pressurized to force water through undersized or incorrectly pitched pipes. Getting DWV right during rough-in is essential, because correcting it after walls close is one of the most disruptive and expensive plumbing repairs a homeowner can face.
DWV System Design for Remodels
DWV systems work by gravity: drain pipes slope toward the main sewer at 1/4 inch per foot of horizontal run (for 1½-inch through 3-inch pipes). Vent pipes connect the drain system to open air above the roof line, preventing the vacuum formation that would halt drainage and allowing sewer gas to exhaust safely. Adding fixtures during a remodel — a new bathroom, a kitchen island sink, or a laundry room relocation — requires extending or modifying the DWV system, which often requires opening floors and walls to tap into existing drain stacks.
Every drain pipe and vent must be correctly sized to its fixture unit load. Undersized pipes block; oversized pipes may not maintain adequate flow velocity to clear waste. A licensed plumber designing the DWV layout must account for all existing and new fixture unit loads simultaneously.
Air Admittance Valves, Sump Pumps & Ejector Pumps
Air Admittance Valves (AAVs) are one-way mechanical vents that allow air into the drain system without requiring a pipe run through the roof — useful for island sinks, fixtures added in finished spaces, and basement wet bars. Most jurisdictions now permit AAVs in appropriate locations; some have restrictions. Sump pumps remove groundwater that collects in basement sump pits, protecting against flooding. Ejector pump systems handle below-grade waste — from basement bathrooms and laundry rooms — that cannot gravity-drain to the main sewer lateral, grinding waste material and pumping it up to the sewer elevation.
Adding a Below-Grade Bathroom
Adding a bathroom in a basement is one of the most requested remodeling projects and one of the most technically demanding from a plumbing standpoint. If the basement drain floor elevation is above the sewer main, conventional gravity drainage works with minimal slab cutting. If below — which is common — an ejector pump system is required. Either scenario involves breaking the concrete slab to access or install drain lines, followed by patching and finishing. The ejector pump requires a sealed basin, a vent, and a discharge line running up and connecting to the main drain above the slab.
The complete technical reference for drainage system design during remodeling — covering drain slope requirements, vent stack sizing and routing, air admittance valve use cases, sump pump and ejector pump selection, below-grade bathroom additions, and macerator and upflush toilet options — is laid out in the DWV system design guide, which gives homeowners and plumbers everything needed to plan a compliant, functional drain-waste-vent system.
Specialty MEP Systems: Radon, Surge Protection, Greywater & More
Beyond the core electrical, plumbing, and gas systems, many remodels involve specialty MEP systems that significantly affect long-term health, safety, and operating costs. These systems are almost always less expensive to install during a remodel than to retrofit after completion.
Radon Mitigation in Remodels
Radon is a naturally occurring radioactive gas that forms from uranium decay in soil and rock. It enters homes through foundation cracks, utility penetrations, and soil-contact surfaces. The EPA estimates that nearly 1 in 15 U.S. homes has elevated radon levels, making it the second leading cause of lung cancer in the United States after smoking. Testing is inexpensive (test kits cost $10–$30); mitigation — typically a sub-slab depressurization system that draws radon from beneath the slab and vents it above the roofline — costs $800–$2,500 installed. A basement finishing remodel or any project opening the foundation slab is the ideal time to test and, if warranted, install mitigation.
Backwater Valves & Whole-House Surge Protection
Backwater valves (sewer backflow prevention valves) protect the home against sewage backup caused by heavy rain events overwhelming the municipal collection system. Installed in the main sewer lateral where it exits the house, a backwater valve allows normal drainage flow and closes automatically when flow reverses. They are particularly valuable in flood-prone areas or neighborhoods with aging combined sewer infrastructure. Whole-house surge protectors, installed at the main electrical panel, protect all connected electronics, appliances, and HVAC equipment from voltage spikes caused by lightning strikes, utility switching events, and large motor loads cycling.
Greywater Reuse, Rainwater Harvesting & Central Vacuum
Greywater reuse systems capture water from sinks, showers, and laundry for toilet flushing or landscape irrigation, reducing potable water demand. Rainwater harvesting systems collect roof runoff in cisterns for non-potable uses. Both require pre-plumbing during rough-in and must comply with state and local regulations, which vary widely. Central vacuum systems provide whole-house cleaning capability from wall inlets throughout the home — quiet, powerful, and permanently installed. The vacuum tubing and electrical supply must be pre-run during MEP rough-in; retrofitting these systems after construction is complete requires reopening walls.
The specialty MEP cluster covers each of these systems in dedicated depth — starting with the radon mitigation planning guide, which explains sub-slab depressurization system design, testing protocols, and integration with basement finishing remodels, and extending across the full cluster to backwater valves, whole-house surge protection, greywater systems, and central vacuum pre-wiring.
MEP Permits, Inspections & Code Compliance
Every MEP trade category — electrical, plumbing, and mechanical — requires permits in virtually all US jurisdictions. Permits are not bureaucratic formalities; they trigger inspections that confirm the work meets code and is safe. Unpermitted MEP work creates liability, complicates sales, and may be uninsurable.
Which MEP Systems Require Permits
Any new electrical circuit, panel replacement, service upgrade, or fixture change that involves the wiring (not just device replacement) requires an electrical permit. Any modification to water supply, drain, or gas systems — including adding fixtures, replacing water heaters, or relocating the laundry room — requires a plumbing permit. New HVAC equipment installation, ductwork modifications, and exhaust fan additions require mechanical permits. Some jurisdictions issue combined MEP permits; most issue them separately by trade. Owner-builder exemptions exist in some states but do not eliminate the permit requirement.
Rough-In vs Final MEP Inspections
MEP rough-in inspection occurs after all wiring, pipe, and conduit are installed but before walls close. The inspector confirms that work is installed correctly, is properly supported, meets clearances, and complies with the applicable code version. Final inspection occurs after trim-out — fixtures are installed, devices are operational, and equipment is connected and tested. Failing either inspection requires corrections before proceeding to the next phase. Most jurisdictions permit corrections and re-inspection within a defined window without additional fees.
Key Codes: NEC, IPC/UPC & IMC
The National Electrical Code (NEC), published by NFPA, governs electrical installations. The International Plumbing Code (IPC) or Uniform Plumbing Code (UPC) governs plumbing. The International Mechanical Code (IMC) governs HVAC and exhaust systems. Most jurisdictions in the US adopt one of these model codes with local amendments, on adoption cycles that may lag the current published edition by two to four years. Knowing which edition and which amendments apply in your jurisdiction is essential before designing or submitting for permits — particularly for AFCI requirements, GFCI locations, and energy code compliance for mechanical equipment.
For the full permit application process, inspection schedule, common code violations by trade, what to expect at rough-in and final inspections, and how to navigate plan review for complex MEP work, The Complete Guide to Remodeling Permits, Codes & Inspections covers every permit type, code requirement, and inspection stage that homeowners and contractors encounter across all project types.
MEP Costs in Remodeling: Budgeting for Systems Upgrades
MEP systems work is among the largest and most variable line items in any remodel budget. Understanding typical cost ranges — and the factors that drive them higher — helps homeowners plan realistically and avoid budget shock mid-project.
Typical Electrical Upgrade Cost Ranges
A 200-amp service upgrade typically costs $1,500–$4,000 installed, including panel replacement and utility coordination. Whole-house rewiring of a 2,000-square-foot home using new PVC conduit or NM cable runs $8,000–$20,000 depending on accessibility and local labor rates. Adding individual branch circuits ranges from $150–$500 per circuit in open-wall conditions during rough-in. Smart panel upgrades (Span, Lumin) run $3,000–$5,000 for the panel plus installation, not including the service upgrade if needed.
Typical Plumbing System Cost Ranges
Whole-house PEX repipe typically costs $4,000–$15,000 for a 2,000–2,500-square-foot single-family home; copper repipe runs 30–50% more. Tankless water heater installation costs $1,500–$4,500 for gas units (more if gas line resizing is required); heat pump water heater installation costs $1,200–$3,000 plus electrical circuit. Basement bathroom addition with ejector pump can run $5,000–$15,000 in plumbing costs alone, before any finishing work.
Hidden MEP Cost Triggers
The most frequent mid-project budget surprises in MEP work involve discoveries in existing systems: knob-and-tube wiring requiring full remediation before new circuits can be added; galvanized or polybutylene pipe that must be completely replaced before any new supply work ties in; deteriorated cast iron drain lines requiring lining or replacement; and an electrical panel with no remaining circuit capacity requiring full upgrade before any additional load is served. Pre-construction MEP assessment (see L4 Gap 1) is the most reliable way to identify and price these conditions before construction begins.
For a complete framework covering how to build an MEP-inclusive remodel budget — including contingency allocation for hidden conditions, hard vs soft cost definitions, labor vs materials splits, draw schedules, and financing options from HELOCs to construction loans — The Complete Guide to Remodeling Budgets, Costs & Financing provides the full financial planning structure every homeowner needs before beginning MEP-intensive work.
MEP & HVAC: How Mechanical Systems Intersect in a Remodel
While this guide covers the electrical, plumbing, and specialty dimensions of MEP, the mechanical (M) component — heating, ventilation, and air conditioning — is inseparable from everything covered here. HVAC systems require dedicated electrical circuits for condensers, air handlers, mini-split compressors, and heat pumps. They require gas line connections for furnaces and combination boilers. Their condensate drains must tie into the plumbing drain system. And their ductwork and refrigerant line sets compete for the same wall, floor, and ceiling cavities as plumbing and electrical rough-in.
Coordinating HVAC with electrical and plumbing trades during rough-in is non-negotiable on any remodel involving more than one trade. On a whole-home remodel, the HVAC contractor should be involved in the planning phase — before walls open — so that duct routing, equipment locations, and refrigerant line paths are established before the plumber and electrician set their work. The rule of thumb: HVAC claims space first, then plumbing, then electrical.
The companion resource to this guide — The Complete Guide to HVAC in Remodeling — covers the mechanical dimension of MEP in full: heat pump vs furnace selection, ductwork sizing and layout, mini-split installation by zone, Manual J load calculations, indoor air quality systems, and HVAC zoning for two-storey homes, all of which must be coordinated with electrical and plumbing trades during rough-in.
MEP Considerations by Project Type
MEP requirements vary substantially depending on what type of remodel you are undertaking. What applies to a bathroom remodel differs from a whole-home gut remodel, and ADU construction presents a different set of MEP decisions entirely.
Kitchen & Bathroom Remodel MEP
Kitchen remodels typically require adding dedicated 20-amp circuits for the refrigerator, microwave, and dishwasher; a 50-amp circuit for an electric range or induction cooktop; additional GFCI-protected countertop circuits; a gas line extension if adding or relocating a gas range; supply and drain modifications for an island sink or relocated plumbing; and a properly vented range hood (not recirculating). Bathroom remodels involve GFCI circuits for all outlets, exhaust fan circuits, supply and drain rough-in for new or relocated fixtures, possibly a radiant floor heating circuit, and in primary bath applications, thermostatic shower valve pre-plumbing.
Whole Home Remodels & Additions
A whole-home remodel is the optimal opportunity to address all deferred MEP maintenance: replace aging galvanized pipe, rewire outdated branch circuits, upgrade the panel, and install modern water heating. Home additions must tie new MEP systems into existing infrastructure — which requires assessing electrical panel headroom, verifying main sewer elevation relative to the addition’s drain system, and confirming gas line capacity before the addition is designed.
For remodels specifically driven by a whole-home electrification goal — replacing gas appliances with induction cooking, heat pump HVAC, and heat pump water heaters simultaneously — our whole-home electrification MEP planning guide covers the panel upgrade sequence, circuit planning, and load management strategy required to support a fully electric home without overloading existing infrastructure.
ADU MEP Systems
Accessory Dwelling Units present a distinct set of MEP decisions. Detached ADUs typically require an underground electrical feed from the main panel or a separate utility meter, new plumbing connection to the main sewer (which must be verified for adequate capacity and elevation), and either a gas line extension or a fully electric design with heat pump HVAC and water heating. Attached ADUs may share the main panel via subpanel or require service upgrade to accommodate the additional load.
For MEP decisions specifically driven by sustainability goals — whole-home electrification roadmaps, panel upgrade requirements for heat pump systems, IRA tax credit eligibility, air sealing impacts on mechanical ventilation requirements, and greywater and rainwater integration — The Complete Guide to Green & Energy-Efficient Remodeling provides the sustainability-focused MEP framework.
Hiring MEP Subcontractors: Electricians, Plumbers & Mechanical Pros
MEP systems must be installed by licensed subcontractors in virtually every US jurisdiction. Licensing requirements vary by state and trade, but the core requirement — that permitted electrical, plumbing, and mechanical work be performed by a licensed tradesperson — is nearly universal. A general contractor who lacks MEP licensing must subcontract each trade to an appropriately licensed professional.
When hiring MEP subcontractors directly or evaluating those proposed by a general contractor, homeowners should verify active trade license status (not just a general contractor’s license), confirm current general liability insurance and workers’ compensation coverage, check that the sub has experience with the specific type of work at hand (a plumber who specializes in residential service remodels differs meaningfully from one who primarily performs new construction plumbing), and request references from recently completed comparable projects. Getting multiple bids on MEP work — with clearly defined scope — is the most reliable way to identify fair pricing and avoid both under-specification and overcharging.
For the full framework on vetting MEP subcontractors — including how to verify trade license status, compare bids across electricians and plumbers, structure contracts for MEP work, manage the subcontractor relationship during rough-in, and resolve disputes — The Complete Guide to Hiring & Managing Remodeling Contractors covers every step of the contractor relationship for residential and commercial projects.
Conclusion
MEP systems — electrical, plumbing, and gas — are the functional foundation of every remodeled property, determining safety, performance, and long-term value.
Every cluster guide linked from this resource covers one MEP dimension in complete technical depth, forming a comprehensive reference for any MEP-intensive remodel.
When you are ready to plan MEP upgrades for your next project, Mr. Local Services connects you with licensed electricians, plumbers, and mechanical contractors who deliver quality workmanship, transparent pricing, and reliable results.
Frequently Asked Questions
What does MEP stand for in remodeling?
MEP stands for Mechanical, Electrical, and Plumbing — the three trade categories governing how a building’s systems function, including HVAC, wiring, water distribution, gas lines, and drainage.
Do all three MEP systems need to be upgraded during a whole home remodel?
Not necessarily. The decision depends on the condition and age of existing systems, what permits the scope triggers, and whether the remodel opens walls where systems run. A pre-construction MEP assessment identifies what must, should, and can safely be deferred.
When during a remodel are MEP systems installed?
MEP rough-in occurs after demolition and structural framing, before insulation and drywall. Final trim-out — installing fixtures, devices, and equipment — happens at the project’s end after walls and flooring are complete.
What happens if I remodel without pulling MEP permits?
Unpermitted MEP work can trigger fines, required demolition and re-inspection, complications at home sale, and denial of insurance claims. The risks significantly outweigh the permit fees and timeline involved in pulling them correctly.
How do I know if my electrical panel needs upgrading before a remodel?
Key indicators include a 100-amp or smaller main breaker, a fuse box rather than a circuit breaker panel, fewer than 20 circuit slots, or the desire to add EV chargers, heat pump systems, or high-amperage appliances. A licensed electrician can assess panel capacity in under an hour.
Can MEP rough-in be done in phases if the budget doesn’t allow everything at once?
Yes, if planned strategically upfront. Running conduit stubs, pipe rough-ins, and capped outlets to future fixture locations during the open-wall window costs a fraction of what retrofitting costs later. A phased MEP approach requires a complete plan before any walls close.
What is the most commonly overlooked MEP system in home remodeling?
Low-voltage pre-wiring — ethernet, speaker wire, security cabling, and smart home conduit — is consistently overlooked until homeowners want smart features and face retrofit costs three to five times higher than rough-in pricing would have been.