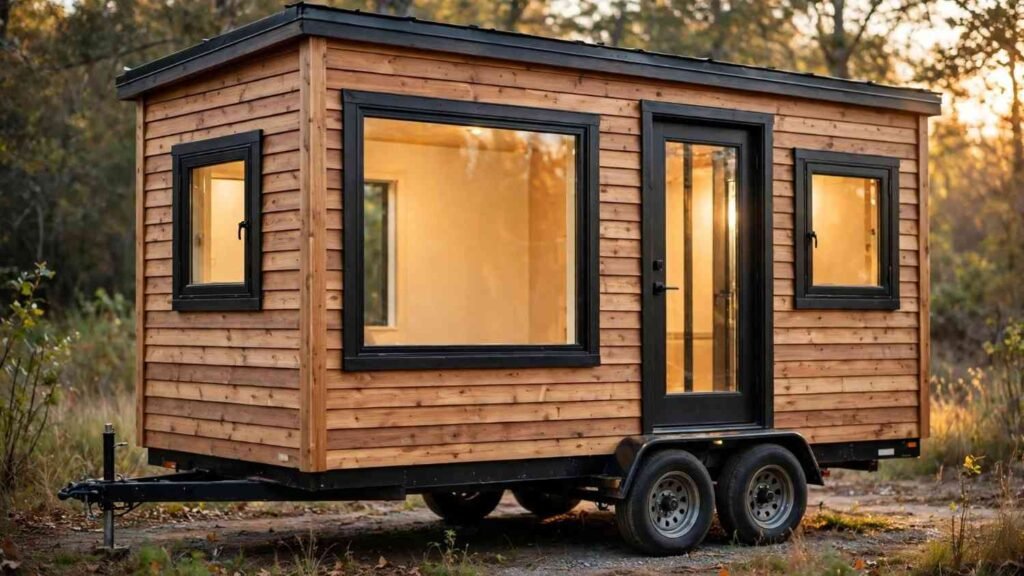
Window and door selection for tiny homes on wheels is the process of choosing openings that survive highway travel while keeping a small, mobile structure sealed, lit, and legal. I treat it as a structural decision, not a style one. Every pound and every seam matters here.
Weight limits, road vibration, and a shallow wall cavity change every rule you learned from stick-built houses. Get this wrong and you get leaks, cracked glass, and failed inspections.
This guide covers what makes mobile openings different, window and door types, frame materials, glazing, sizing, weatherproofing, codes, security, budget, installation, maintenance, and repair decisions.
What Makes Window and Door Selection Different in a Tiny Home on Wheels
A tiny home on wheels is a small dwelling built on a towable trailer chassis, which means it lives under two rule sets at once: building performance and road performance. That dual identity drives every choice I make. A window that performs beautifully in a foundation home cracks after 300 miles of interstate.
I start with three constraints: total weight, dynamic movement, and wall depth. Everything else follows from those.
Weight, Balance, and Axle Load
Glass and framing are dense. A single mid-size residential double-hung unit runs 40 to 70 pounds installed, and six of them shift your tongue weight noticeably.
I map openings against axle position before I order anything. Heavy glass on one side of a 24-foot trailer creates a lean you feel in the tow mirrors.
Most tiny homes on wheels stay under the 10,000 to 14,000 pound range typical of tandem-axle trailers, and the Federal Highway Administration’s bridge formula guidance governs how that load distributes across axles. That ceiling fills faster than builders expect.
Road Vibration and Highway Wind Pressure
Towing subjects a wall assembly to constant racking and flex. Rigid, brittle assemblies lose that fight.
I favor units with welded or mechanically fastened corners over glued-only frames. And I insist on sealants that stay flexible through thousands of cycles.
Wind load at highway speed hits an unmoving house only during storms. It hits a towed house every trip.
Wall Depth, Framing, and Rough Opening Limits
Tiny home walls often run 2×4 or even 2×3 to save weight and interior space. That shallow cavity limits how thick a window frame and jamb extension can be.
I confirm rough opening depth before selecting any unit. Residential windows built for 2×6 walls need custom jamb work in a 3.5-inch wall, which adds cost and leak risk. Framing around openings also needs headers sized for dynamic load, and that structural work overlaps directly with carpentry and framing services on any retrofit.
Window Types for Tiny Homes on Wheels
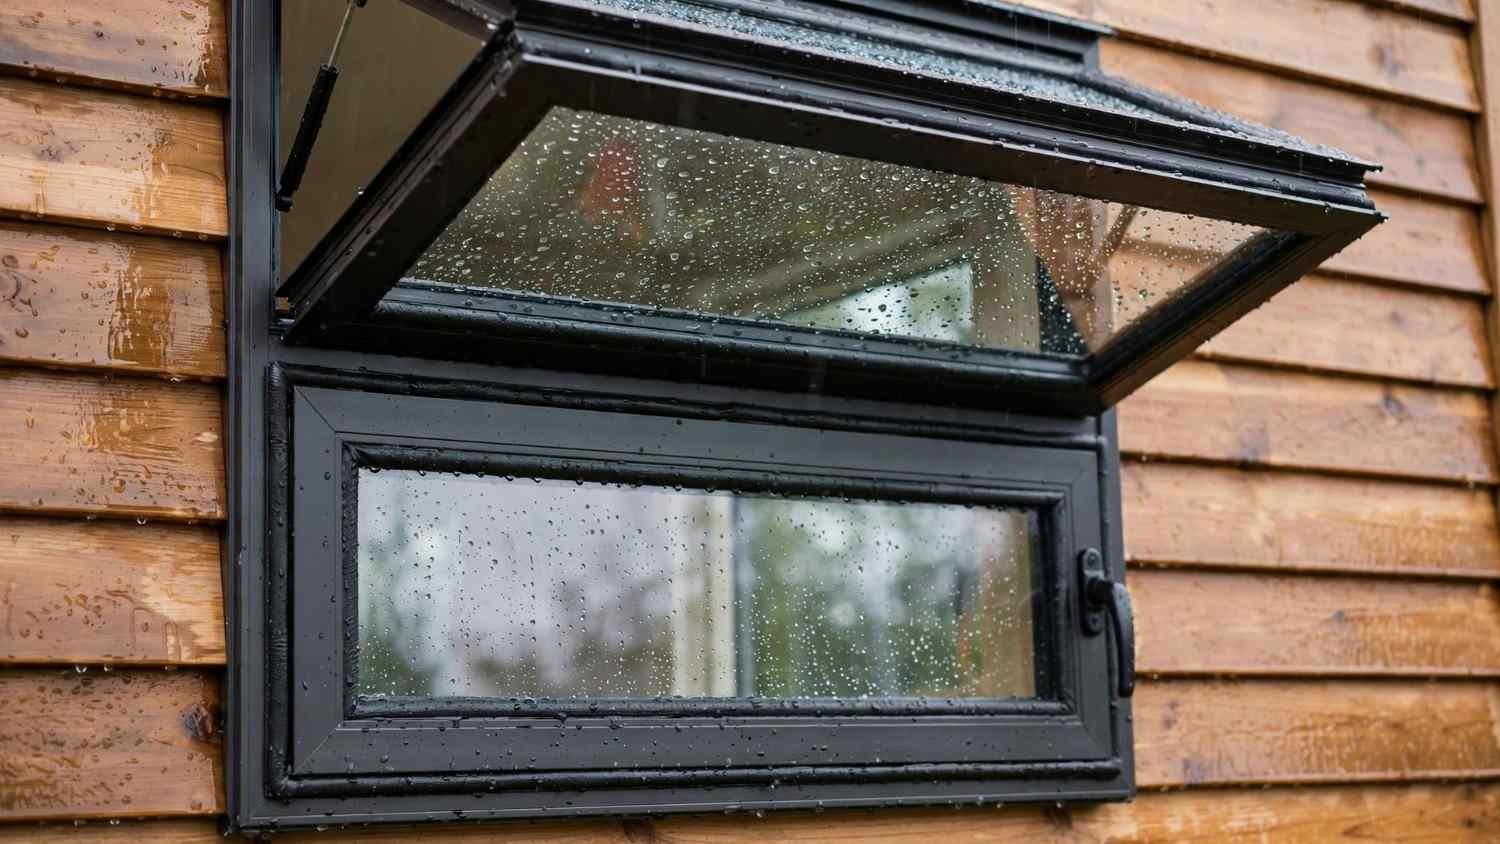
Window type controls ventilation, weather resistance, and how much wall you sacrifice. I narrow the field fast because only a handful of styles suit a moving structure.
Awning, Casement, and Sliding Windows
Awning windows hinge at the top and open outward, so they shed rain while venting. That makes them my default for tiny homes in wet climates.
Casements seal tightly with compression gaskets and give the best air-tightness of any operable style. Sliders weigh less and cost less, though they leak more air.
Fixed and Picture Windows
Fixed units have no moving parts, no hardware, and the lowest failure rate on the road. I use them for view walls and high placements.
They add no ventilation, so I pair every fixed window with an operable unit nearby.
Egress and Skylight Windows
At least one opening in each sleeping area needs to function as an emergency exit. Lofts complicate this because ladder access and clear opening dimensions fight each other.
Skylights and roof vents bring light into lofts without stealing wall space. They also become the first place I check for leaks after a tow, and skylight flashing detail belongs squarely in roofing and flashing services.
RV Windows vs. Residential Windows
RV windows are lighter, thinner, and designed for vibration, but they offer weaker insulation values. Residential windows insulate better and last longer while weighing far more.
I mix both on most builds: RV units where weight matters, residential units where comfort matters. Full spec-by-spec comparison lives in a dedicated RV windows versus residential windows guide <!–NEW PAGE NEEDED–>.
Door Types for Tiny Homes on Wheels
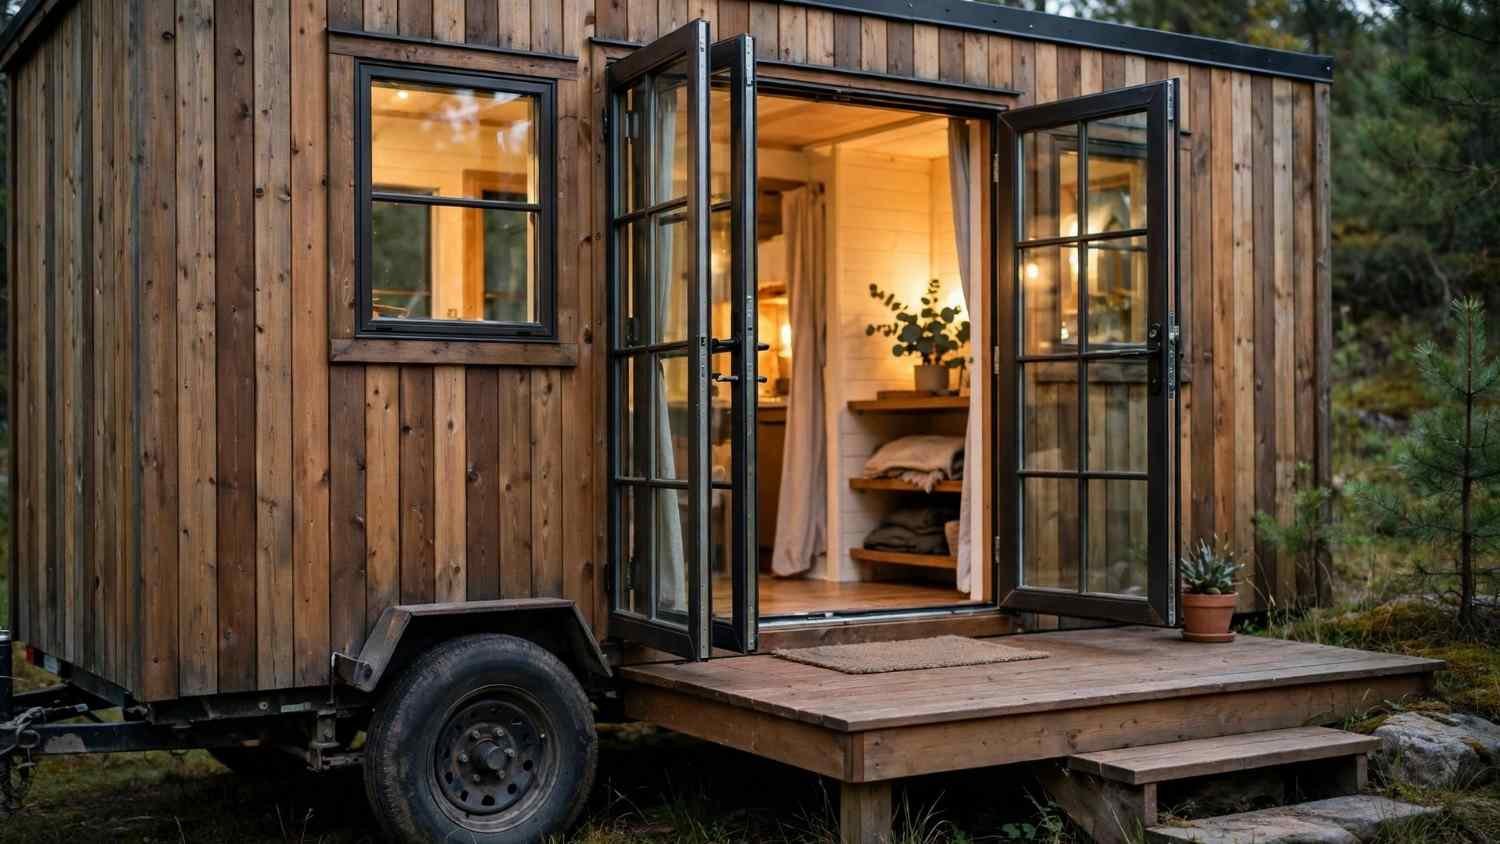
A door is the single largest hole in the envelope and the most-used moving part in the house. I pick it for seal quality first and looks second.
Entry Doors: Swing, French, and Sliding
Standard 30-inch or 32-inch swing doors give the best weather seal and the simplest hardware. Narrower doors save wall but complicate moving furniture.
French doors open the space to a deck beautifully and double the seal points that eventually fail. Sliding glass doors weigh the most and need dead-flat tracks that towing rarely preserves. Selection, hanging, and hardware fitting all fall under door installation and repair services.
RV Entry Doors and Screen Options
RV entry doors come pre-hung, pre-flashed, and light, often with an integrated screen door. They install fast and handle vibration well.
Their thin insulation shows in cold climates. I add a storm-style secondary panel when the home parks somewhere with real winters.
Interior, Barn, and Pocket Doors
Swing doors eat floor area a tiny home cannot spare. Barn doors slide on exposed track and rattle on the road unless pinned.
Pocket doors disappear into the wall and demand a cavity most tiny walls lack. I use curtains and sliding panels more often than doors inside these homes.
Secondary Egress and Loft Access Doors
Fire safety needs a second way out. A large awning or casement window near the loft serves that role in most builds.
I verify clear opening height, width, and sill height against code before framing.
Frame Materials: Vinyl, Aluminum, Wood, and Fiberglass
Frame material sets weight, thermal performance, and how the unit ages under motion. This is where I see the most expensive mistakes.
Weight per Unit Comparison
| Frame Material | Relative Weight | Thermal Performance | Road Durability |
| Aluminum (RV) | Lightest | Poor without thermal break | Excellent |
| Vinyl | Light | Good | Good; softens in extreme heat |
| Fiberglass | Moderate | Excellent | Excellent |
| Wood-clad | Heaviest | Excellent | Good with maintenance |
Vinyl gives most builders the best balance of cost, weight, and insulation. Fiberglass costs more and outperforms everything on stability.
Corrosion, Warping, and Climate Fit
Coastal parking corrodes bare aluminum quickly. Desert heat expands vinyl and stresses corners.
I match material to where the home actually parks, not where it gets built.
Glazing, U-Factor, and Energy Performance
Glazing is the biggest thermal weak point in a tiny envelope. A small house loses heat through glass disproportionately because the window-to-floor ratio runs high.
Double vs. Triple Pane in a Small Envelope
Double-pane insulated glass is the practical baseline. Triple-pane cuts heat loss further and adds serious weight per square foot.
I specify triple-pane only for cold-climate builds with weight headroom. Most tiny homes on wheels do better with double-pane plus better air sealing.
Low-E Coatings and SHGC by Climate Zone
Low-emissivity coatings reflect infrared heat while passing visible light. ENERGY STAR climate zone criteria set U-factor and solar heat gain coefficient targets by region, and I use those numbers as my spec floor.
Southern builds need low SHGC to block heat. Northern builds want higher SHGC on south-facing glass to capture free winter warmth.
Condensation and Moisture Control
Small volume plus cooking, showering, and breathing equals high interior humidity. Cold glass becomes the condensation surface.
I combine warm-edge spacers, mechanical ventilation, and a bath fan that actually moves air. Persistent condensation signals a ventilation problem, and unresolved moisture leads straight to water damage restoration work nobody budgeted for.
Sizing, Placement, and Natural Light Strategy
Placement decides whether 200 square feet feels like a cabin or a closet. I sketch light and sightlines before I sketch anything else.
Window-to-Wall Ratio in Under 400 Square Feet
More glass means more light and more thermal loss. I target roughly 10 to 15 percent of floor area in glazing for a balanced tiny home.
Going past 20 percent creates a greenhouse in summer and a refrigerator in winter.
Cross-Ventilation and Airflow Paths
Air needs an inlet and an outlet on opposite walls. One window on each end of the home moves far more air than two on the same side.
I place a low inlet and a high outlet to drive stack-effect airflow.
Privacy, Views, and Parking Orientation
A tiny home rotates its orientation every time it moves. That makes fixed privacy assumptions risky.
I keep bathroom and sleeping glass small, high, or obscured. Large glass goes where a deck or view usually ends up.
Weatherproofing, Flashing, and Air Sealing
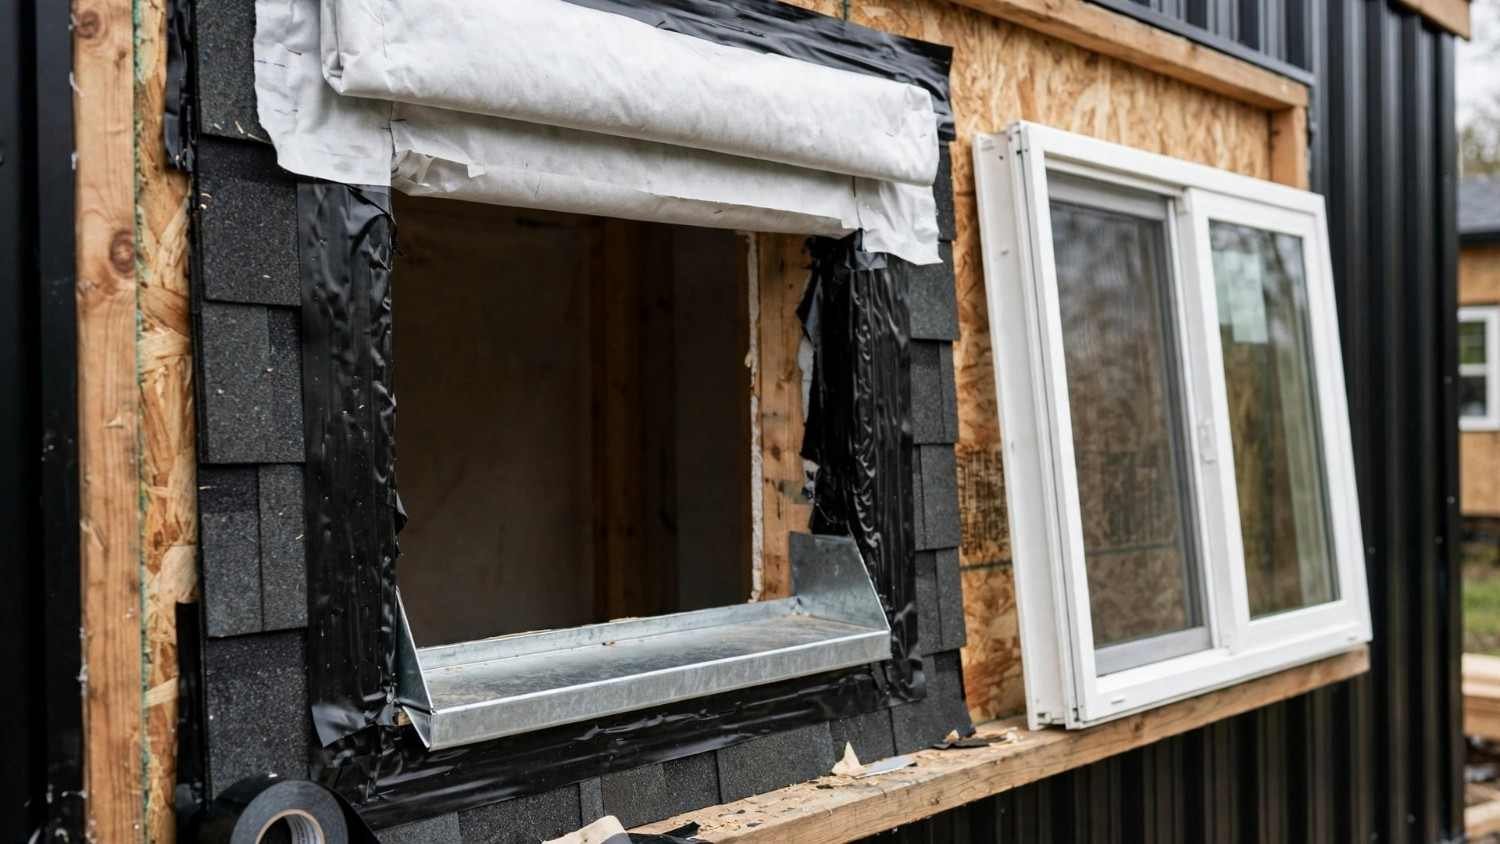
Water intrusion destroys more tiny homes than any other failure. Every opening is a planned hole that must drain.
Flashing Tape, Sill Pans, and Drainage Planes
I install a sloped sill pan under every window and lap flashing tape shingle-style from bottom to top. Water always gets in eventually, so the assembly needs a path out.
Housewrap laps over head flashing, never under it. That single detail prevents most callbacks.
Sealants Rated for Movement
Standard caulk cracks under towing flex. I use flexible polyurethane or silicone sealants rated for continuous joint movement.
I inspect and refresh those joints on a schedule instead of waiting for stains.
Codes, Standards, and Certifications That Apply
Tiny homes on wheels sit in a regulatory gray zone that varies by state and by park. Knowing which pathway you build to determines which windows and doors qualify.
ANSI 119.5, NOAH, and RVIA Pathways
Third-party certification through NOAH or RVIA under ANSI 119.5 treats the home as a park model or recreational vehicle. Those pathways accept RV-rated windows and doors.
Certification also unlocks insurance and financing that uncertified builds struggle to get.
IRC Appendix Q and Egress Requirements
Appendix Q of the International Residential Code addresses dwellings under 400 square feet, including loft egress and emergency escape openings. The International Code Council’s tiny house provisions spell out minimum clear opening dimensions.
I design egress to residential standards even on RV-certified builds. Safety margins cost little at the framing stage.
DOT Height and Width Clearance Limits
Federal and state limits generally cap towed width at 8 feet 6 inches and height near 13 feet 6 inches. Awning windows that swing outward and door awnings must fold inside that envelope.
I measure every protrusion in the open and closed position.
Security, Locking Hardware, and Safety
A towable home gets left alone in unfamiliar places. Hardware quality matters more here than in a suburban house.
Deadbolts, Multi-Point Locks, and Keying
RV entry doors often ship with weak factory locks. I upgrade to a graded deadbolt or a multi-point lock that pulls the slab tight against the weatherstrip.
Rekeying and hardware upgrades are quick wins, and a locksmith service handles both in a single visit.
Fire Egress and Smoke Detection Placement
Small volume means smoke fills the space in seconds. Detectors belong in the loft, the main room, and near cooking.
I confirm every sleeping area has an operable exit within reach without moving furniture.
Budget, Sourcing, and Salvage Options
Windows and doors typically absorb 8 to 12 percent of a tiny home build budget. Smart sourcing moves that number a lot.
New vs. Salvaged vs. Surplus Units
New units bring warranties, matched sizing, and known performance. Surplus and builder-overstock units cut cost sharply when you design openings around what you find.
Salvaged windows tempt everyone. Old single-pane sashes and failed seals cost more in heat loss than they save at purchase.
Cost Ranges and Where the Money Goes
Expect roughly $200 to $600 per quality operable window and $600 to $2,000 for a good entry door with hardware. Fiberglass and triple-pane push the top of those ranges.
I spend on the entry door and the largest glass first. Small fixed units are where I economize. Broader pricing patterns across a full build appear in our tiny home construction and remodeling services overview.
Should I Install These Myself or Hire a Pro?
That question separates the planning stage from the doing stage, and the answer changes everything downstream.
Installation: DIY vs. Professional Fitting
Selection is half the job. Installation determines whether the selection ever performs as rated.
What a Pro Installer Handles
A professional squares the rough opening, sets the unit plumb in a moving structure, and builds a drainage assembly that survives towing. That includes shimming, fastener pattern, flashing sequence, and interior trim.
Pros also carry the warranty responsibility when a seal fails. For homeowners juggling multiple trades at once, general handyman services coordinate the smaller openings while specialists handle the large ones.
Common DIY Failure Points
I see the same four mistakes repeatedly: reverse-lapped flashing, over-driven fasteners racking the frame, missing sill pans, and rigid caulk. Each one shows up as a stain six months later.
Cutting the opening is easy. Making it never leak is not.
Maintenance, Inspection, and Seasonal Care
A moving house needs a maintenance rhythm a static house does not. I build inspection into the travel routine.
Post-Tow Inspection Routine
After every move, I walk the perimeter and check every seam, sealant bead, and hardware point. Vibration loosens fasteners and opens hairline gaps.
I operate every window and door to confirm nothing racked out of square during transit.
Reseal, Re-Caulk, and Hardware Service Intervals
Exterior sealants get a full inspection twice a year and replacement every three to five years. Hinges, rollers, and locks get lubricated seasonally.
Screens, weatherstripping, and glass cleaning fold into the same pass, which is why many owners bundle it with scheduled home maintenance and repair services <!–NEW PAGE NEEDED–>.
Repair, Replacement, and Retrofit Decisions
Openings fail in predictable ways. Knowing which failures justify replacement saves real money.
Repair vs. Replace Signals
Fogged glass between panes means a failed seal, and the insulated glass unit gets replaced while the frame stays. Rot, racked frames, and cracked welds mean the whole unit goes.
Sticking operation usually points to hardware or squareness, both repairable. Repair and replacement of individual units falls under window installation and repair services.
Retrofitting Older Tiny Homes on Wheels
Older builds often carry single-pane RV glass and undersized egress. Upgrading glazing improves comfort immediately and cuts heating load.
I check header capacity and weight distribution before enlarging any opening. Enlarging changes the structure, and interior patching afterward brings drywall and ceiling repair into the same job.
Working With Mr. Local Services
I connect tiny home owners with vetted installers who understand mobile construction, not just residential framing. That distinction matters when the house drives at 65 miles per hour.
We handle selection guidance, supply sourcing, installation, flashing, hardware, and follow-up maintenance under one point of contact. Transparent pricing comes before any work starts.
Homeowners, landlords, and property managers use us for single-window swaps and full envelope upgrades alike. One call covers the whole scope.
Conclusion
You now understand how weight, vibration, wall depth, glazing, codes, and hardware together shape every window and door decision in a mobile tiny home.
These openings connect to framing, roofing, sealing, and security work across your property, and our deeper guides expand each dimension for you.
We match you with tiny home specialists who install it right the first time. Contact Mr. Local Services today for a transparent quote.
Frequently Asked Questions
Can I use regular house windows in a tiny home on wheels?
Yes, with planning. Residential windows insulate better but weigh more and need flexible sealants plus jamb adjustments for shallow tiny home walls.
What is the best window type for a tiny house on wheels?
Awning windows lead for most builds. They vent during rain, seal tightly, and stay clear of the DOT width envelope when opened.
Do tiny home windows need to meet egress code?
Every sleeping area needs one emergency escape opening. IRC Appendix Q and RV certification pathways both set minimum clear opening dimensions.
How much do windows and doors cost for a tiny home?
Budget 8 to 12 percent of your build cost. Quality operable windows run $200 to $600 each, entry doors $600 to $2,000 installed.
Why do my tiny home windows keep leaking after towing?
Vibration opens rigid sealant and loosens fasteners. Proper sill pans, shingle-lapped flashing, and movement-rated sealants solve nearly every recurring leak.
Should I choose double or triple pane glass?
Double pane suits most tiny homes. Triple pane adds real weight per square foot and only pays off in genuinely cold climates.
How often should tiny home windows and doors be inspected?
Check every seal and hardware point after each tow. Schedule a full exterior sealant inspection twice yearly regardless of travel frequency.