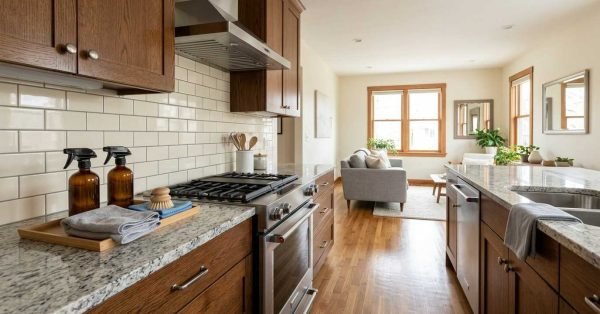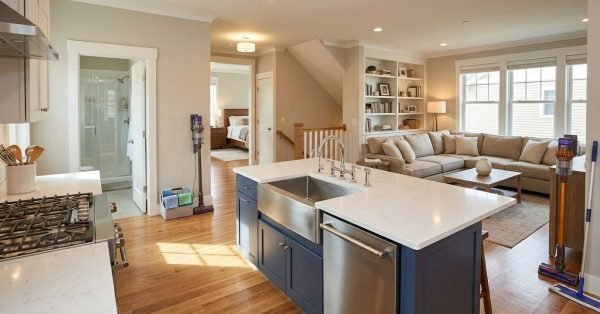
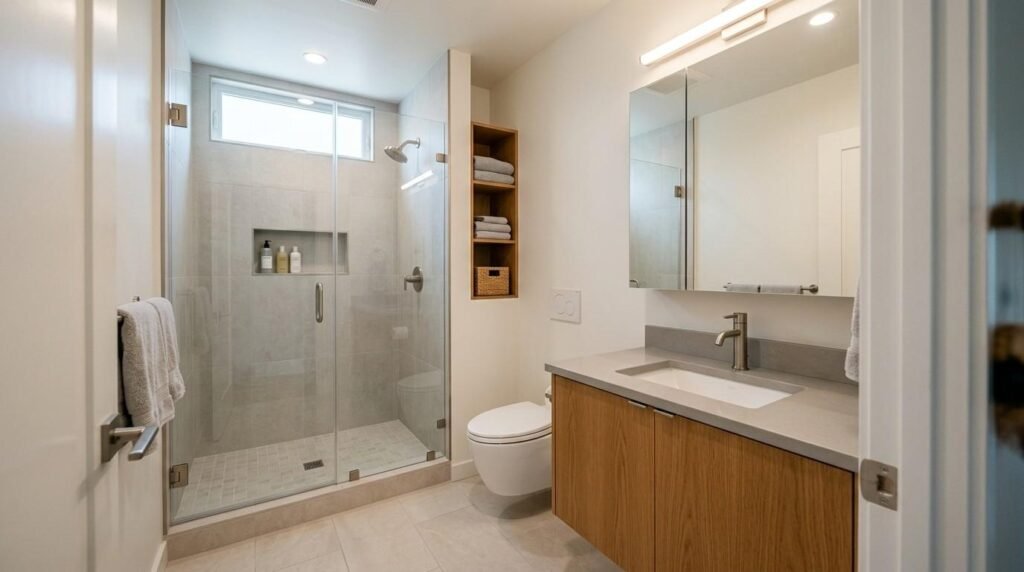
An ADU bathroom is the full or partial bathroom inside an accessory dwelling unit, designed to serve a separate household in a compact footprint. I’ve seen these small rooms make or break an entire ADU project for homeowners, landlords, and property managers alike.
Every square inch carries weight here. A bad layout choice costs thousands to undo, and a missed code detail stalls your permit and your rental income for months.
In this guide I cover definitions, sizing, codes, plumbing, electrical, fixtures, surfaces, design tricks, costs, the build process, hiring, maintenance, and resale value.
What Is an ADU Bathroom?
An ADU bathroom is a bathroom built inside an accessory dwelling unit, which is a self-contained secondary living space on a residential lot. It serves its own household, so it needs the same core functions as a main-house bathroom in far less space.
I think of it as a complete bathroom that happens to be small. That distinction matters, because shrinking a bathroom is not the same as removing parts of one.
Most ADUs across the U.S. housing stock fall between 400 and 1,200 square feet, which leaves roughly 35 to 60 square feet for the bathroom.
How ADU Bathrooms Differ From Main-House Bathrooms
The biggest difference is independence. An ADU bathroom often sits far from the main house’s plumbing stack, so it needs its own supply routing, drainage path, and sometimes its own water heater.
Occupancy patterns differ too. A single tenant or family member uses this room every day, which puts steady wear on fixtures and finishes.
And privacy rules change. Many ADU floor plans place the bathroom off a hallway rather than a bedroom, so it doubles as the guest bath.
Full Bath, Three-Quarter Bath, and Half Bath Explained
A full bath includes a toilet, sink, shower, and tub. A three-quarter bath swaps the tub for a shower only, and a half bath includes just a toilet and sink.
Most ADUs I work on land on the three-quarter bath. It satisfies tenants, meets code for a dwelling unit, and saves 12 to 18 square feet compared to a tub layout.
Half baths work only as a second bathroom, never as the unit’s only bathroom.
Who Uses ADU Bathrooms Most
Aging parents, adult children, long-term tenants, and short-term guests make up the bulk of ADU occupants. Each group brings different needs, and the bathroom absorbs most of them.
Property managers tell me tenant complaints cluster around water pressure, hot water recovery, and ventilation. I design around those three first.
ADU Bathroom Size and Layout Fundamentals
Layout drives everything else in an ADU bathroom. Fixture positions determine plumbing runs, plumbing runs determine framing, and framing determines your finish budget.
I start every design with the drain locations, not the tile. Moving a toilet flange three feet adds real labor and often means cutting a slab.
Get the layout right and a 36-square-foot bathroom feels generous. Get it wrong and 60 square feet feels cramped.
Minimum Square Footage That Actually Works
The International Residential Code sets clearance minimums rather than a room-size minimum, so the practical floor is around 30 square feet for a three-quarter bath.
My comfortable target sits at 40 to 50 square feet. That range fits a 30-inch vanity, a 36-inch shower, and a toilet with real elbow room.
Below 30 square feet, you enter wet-room territory where the shower and floor merge into one waterproofed space.
Common Small-Bathroom Layout Types
Three layouts handle almost every ADU. The single-wall layout stacks all three fixtures along one plumbing wall, which cuts plumbing cost the most.
The corridor layout puts the vanity and toilet on one wall with the shower opposite. The corner layout tucks the shower into a back corner and frees the entry wall.
I choose the single-wall layout whenever the floor plan allows it, because a shorter plumbing run means fewer failure points and a faster bathroom remodeling schedule.
Clearance, Door Swing, and Traffic Flow
Code requires 21 inches of clear floor space in front of a toilet and 15 inches from the toilet centerline to any side wall. Those two numbers dictate more layouts than anything else.
Door swing eats space fast. I specify pocket doors or outswing doors in bathrooms under 40 square feet, which recovers up to 9 square feet of usable floor.
Traffic flow matters even in a one-person bathroom. Nobody wants to squeeze past a vanity to reach the shower.
Building Codes, Permits, and Accessibility Rules
ADU bathrooms need permits. Every jurisdiction I work in treats an ADU as a separate dwelling unit, which triggers plumbing, electrical, mechanical, and building permits.
State-level ADU reform has simplified this in many places. California alone permitted more than 28,000 ADUs in recent reporting years, largely because the state streamlined local review.
The bathroom itself rarely causes permit trouble. Ventilation, egress in adjacent rooms, and ceiling height cause most of it.
Ventilation, Egress, and Ceiling Height Basics
Bathrooms need mechanical ventilation or an operable window. I install a fan regardless, because window-only ventilation fails in cold weather when nobody opens it.
Ceiling height minimums typically run 7 feet, with reduced allowances over fixtures in sloped-ceiling conversions. Garage and attic conversions run into this constantly.
Egress applies to sleeping rooms, not bathrooms, but a bathroom placed in a former bedroom changes that room’s classification.
Accessibility and Aging-in-Place Requirements
Many ADUs house aging family members, and that changes the design brief entirely. Blocking for future grab bars costs almost nothing during framing and thousands after tile goes up.
I build in a curbless shower entry, 36-inch clear door width, and reinforced walls whenever the client mentions a parent. Those three moves cover most aging-in-place needs.
Reach out for safety and mobility upgrades if the unit will house someone with limited mobility now.
Working With Inspectors and Local Jurisdictions
Inspectors care about sequence. Rough plumbing, rough electrical, and framing all get inspected before insulation and drywall close the walls.
I schedule inspections early and keep the approved plans on site. That single habit prevents most delays.
Local amendments vary widely, so I verify fan CFM requirements, water heater rules, and setback distances with the building department before design finalizes.
Plumbing Systems for an ADU Bathroom
Plumbing is the highest-risk system in an ADU bathroom. It determines cost, schedule, and long-term reliability more than any finish choice.
Two questions drive the plumbing plan. Where does clean water come from, and where does waste water go?
Detached units make both questions harder, and that is where budgets swing the most.
Supply Lines, Drain Lines, and Venting
Supply lines are the easy part. PEX runs flexibly through framing and tolerates freezing better than copper.
Drain lines demand slope, typically a quarter inch per foot, which forces real decisions about floor height and joist routing. A toilet needs a 3-inch drain, and that pipe dictates the framing plan.
Venting keeps drains flowing and sewer gas out. Air admittance valves solve tight island-sink situations where a full vent stack cannot reach the roof, and a licensed plumbing professional confirms whether local code accepts them.
Water Heater Options for Small Spaces
Tankless units dominate ADU bathrooms because they mount on a wall and free up floor area. A single bathroom rarely needs more than a 4 to 6 gallon-per-minute unit.
Small tank heaters, in the 20 to 40 gallon range, cost less upfront and tolerate hard water better. I choose them when the ADU sits far from the gas meter.
Point-of-use electric heaters serve half baths well, where demand stays low.
Detached ADUs and Sewer or Septic Connections
Detached ADUs need a new lateral to the sewer main or a tie-in to the existing house lateral. Trenching distance drives this cost, and it climbs quickly across driveways and mature landscaping.
Septic systems need capacity review. Adding a bathroom and a household increases design flow, and many counties require a septic evaluation before permit approval.
I get this answered in week one of design. Nothing derails an ADU budget faster than a septic surprise.
Electrical, Lighting, and Ventilation Design
Electrical work in an ADU bathroom is compact but code-heavy. Small room, plenty of rules.
I plan circuits, lighting layers, and exhaust together, because they share the same ceiling cavity and the same rough-in inspection.
Good execution here shows up as a bathroom that feels bright and stays dry.
GFCI Protection and Circuit Planning
The National Electrical Code requires GFCI protection for bathroom receptacles and a dedicated 20-amp circuit for them. That circuit serves the bathroom outlets only.
Lighting and the exhaust fan run on a separate circuit. A heated floor or heated towel bar needs its own dedicated circuit too.
I add an outlet inside the vanity for electric toothbrushes and razors, which keeps the counter clear. A licensed electrical contractor handles the panel work and load calculation.
Layered Lighting in a Compact Bathroom
One ceiling fixture is not enough. I use three layers: ambient overhead, task lighting at the mirror, and a niche or toe-kick accent.
Vanity lighting works best at eye level on both sides of the mirror, which eliminates the shadows a single overhead light creates.
Color temperature around 3000K reads warm without turning skin tones orange. I keep every fixture in the room at the same temperature.
Exhaust Fan Sizing and Moisture Control
Sizing is simple math. For bathrooms under 100 square feet, I allow 1 CFM per square foot with a 50 CFM minimum, so most ADU bathrooms need 50 to 80 CFM.
Duct routing matters more than fan brand. The duct must exhaust outside, never into an attic, and shorter runs with fewer elbows move far more air.
A humidity-sensing fan runs until the room actually dries out. That single upgrade prevents most mold problems I see in rentals.
Fixtures, Fittings, and Space-Saving Selections
Fixture selection is where an ADU bathroom either feels intentional or feels like a compromise. Scale is the whole game.
I pick fixtures that match the room’s proportions rather than shrinking full-size choices. A 24-inch vanity designed as a 24-inch vanity looks better than a chopped-down 36-inch one.
Durability ranks equal with size, especially in rental units where turnover is constant.
Toilets: Wall-Hung, Compact Elongated, and Corner Units
Wall-hung toilets save 8 to 10 inches of projection by hiding the tank in the wall. They cost more and need a 2×6 wall, and they buy the most floor space of any option.
Compact elongated toilets deliver a comfortable seat in a 27 to 28 inch footprint. This is my default recommendation for ADUs.
Corner toilets solve awkward diagonal layouts, though they feel unusual to most tenants.
Showers Versus Tubs in Limited Square Footage
Showers win in almost every ADU. A 36-by-36 neo-angle or a 32-by-60 alcove shower serves adults comfortably and drains faster than a tub-shower combo.
Tubs earn their space when the ADU houses young children or when comparable rentals in the area all include one. A 54-inch soaking tub fits where a standard 60-inch tub does not.
Curbless entries with linear drains make small showers feel twice as large.
Vanities, Sinks, and Storage Solutions
Floating vanities open the floor visually and simplify cleaning. I pair them with a 22-inch-deep top rather than the standard 21 to gain counter space without touching the footprint.
Recessed medicine cabinets add storage inside the wall cavity, costing zero floor area. Over-toilet shelving captures dead vertical space.
Vessel sinks look striking and steal counter space, so I use undermount or integrated tops in compact bathrooms.
Tile, Flooring, and Wall Surface Choices
Surfaces do two jobs in an ADU bathroom. They keep water out of the structure, and they set the visual tone of the room.
I treat waterproofing as a structural decision and tile selection as a design decision. They get separate attention and separate budgets.
Failure here is expensive because it hides behind finished walls for years before it shows.
Waterproofing Behind the Surface
Tile is not waterproof. The membrane behind it is, and I specify a sheet or liquid membrane over cement board in every shower.
Shower pans need a proper pre-slope and a bonded flange drain. Skipping the pre-slope traps water under the pan and rots the subfloor.
Curbless showers need waterproofing extended across the entire bathroom floor, which is why they cost more.
Slip Resistance and Safety Ratings
Shower floors need a coefficient of friction of 0.42 or higher when wet. Small-format mosaic tile hits that easily because grout joints add grip.
Large-format polished tile looks beautiful and turns dangerous when wet. I keep it on walls only.
Textured porcelain plank flooring gives wood looks with real slip resistance, and it holds up better than vinyl in high-humidity rooms. Professional tile and flooring installation protects the waterproofing you paid for.
Grout, Sealant, and Long-Term Maintenance
Epoxy grout resists staining and needs no sealing, which suits rental bathrooms. Cementitious grout costs less and needs resealing every year or two.
Silicone caulk belongs at every change of plane: wall to floor, wall to wall, and around the tub. Grout cracks in those joints because they move.
I inspect caulk lines annually. Fresh caulk costs a few dollars and prevents thousands in water damage.
Design Styles That Make Small Bathrooms Feel Larger
Perception carries as much weight as square footage. I have made 36-square-foot bathrooms feel roomy and 60-square-foot bathrooms feel tight.
The tricks are consistent: continuity, reflection, and light. Break up a small room and it shrinks.
Style choice matters less than restraint. Fewer materials, fewer transitions, fewer visual stops.
Color, Contrast, and Reflective Surfaces
Light, low-contrast palettes push walls outward. I run the same tile color from floor to wall in the smallest bathrooms, which erases the boundary lines that signal size.
A large mirror doubles the perceived depth. Wall-to-wall mirrors above the vanity do this best.
Semi-gloss paint and satin-finish tile bounce light without the glare of high gloss. A fresh interior painting coat in a light neutral transforms a dated ADU bathroom for very little money.
Fixture Scale and Visual Continuity
Matching metal finishes across faucet, shower trim, and hardware reduces visual noise. Three finishes in a small bathroom reads as clutter.
Continuous flooring from the adjacent hallway into the bathroom makes both spaces feel bigger. I skip the threshold transition wherever the substrate allows.
Frameless glass shower doors preserve sightlines across the whole room. Framed doors and curtains cut it in half.
Natural Light, Windows, and Skylights
Natural light is the single biggest upgrade to a small bathroom. A high transom window brings daylight in and keeps privacy intact.
Solar tubes work in interior bathrooms with attic access, delivering daylight without a full skylight cost. New window installation in an ADU conversion often pays for itself in perceived value.
Frosted or reeded glass handles privacy where clear glass will not.
ADU Bathroom Costs and Budget Planning
Cost conversations go better with real numbers. An ADU bathroom typically runs $8,000 to $25,000 in the U.S., depending on plumbing distance, fixture grade, and whether the space is new construction or a conversion.
Plumbing rough-in claims the largest single share, often 25 to 35 percent. Finishes get the attention, but the pipes get the money.
The national average bathroom remodel sits well above that range for main-house projects, which shows how much the compact footprint saves.
Typical Cost Ranges by Bathroom Type
A half bath in an attached ADU runs $4,000 to $9,000 when it ties into existing plumbing. Short runs and few fixtures keep it simple.
A three-quarter bath lands in the $10,000 to $20,000 range for most projects. That covers a tiled shower, mid-grade fixtures, and full rough-in.
A full bath with a tub adds $2,000 to $5,000 over the three-quarter equivalent, plus the framing to fit it.
Where Budgets Usually Break
Three items blow budgets consistently. Sewer or septic connections for detached units, slab cutting to relocate drains, and discovering existing water damage during demolition.
I hold a 15 percent contingency on every ADU bathroom. Conversions of garages and basements need 20 percent.
Change orders mid-project cost far more than decisions made during design.
Cost Drivers Owners Control
Fixture grade is the easiest lever. A quality mid-tier faucet performs nearly as well as a premium one at a third of the price.
Keeping fixtures on existing drain locations saves thousands. So does choosing a prefabricated shower base over a custom tiled pan.
Bundling the bathroom with other ADU trades reduces mobilization costs, since crews already on site charge less than return trips.
The ADU Bathroom Build Process, Step by Step
The build sequence rarely changes. Understanding it helps owners spot delays before they become expensive.
I break every ADU bathroom into three phases: paperwork, rough-in, and finish. Each phase ends with an inspection or a decision gate.
Total timelines run 3 to 8 weeks of active work, spread across a longer calendar because of permits and inspections.
Design, Permitting, and Scheduling
Design takes one to three weeks, including fixture selection and drain layout. I lock every fixture choice before permit submission.
Permit review runs two to eight weeks depending on jurisdiction. Streamlined ADU programs move fastest.
Material lead times need attention early. Wall-hung toilet carriers and custom glass regularly run four to six weeks.
Rough-In Through Finish Work
Demolition and framing come first, followed by plumbing and electrical rough-in. Rough inspection happens before anything closes.
Then insulation, drywall, and waterproofing. The waterproofing step is where I spend the most supervision time, because it is invisible once tile covers it.
Tile, fixture setting, trim, and paint finish the room. Careful drywall and ceiling work at this stage determines how sharp the tile lines look.
Inspections and Final Walkthrough
Final inspection covers plumbing operation, GFCI function, fan operation, and clearances. I run every fixture before the inspector arrives.
The walkthrough checks caulk lines, door swing, drawer function, and drainage speed. Small punch-list items get fixed same-day.
I document the shutoff valve locations for the tenant. That one page prevents emergency calls.
Choosing the Right Professionals for Your ADU Bathroom
An ADU bathroom touches more trades than any other room of its size. Coordination quality separates a smooth project from a stalled one.
I recommend a single point of accountability, whether that is a general contractor or a coordinated service network. Managing five separate trades yourself invites gaps.
Licensing and insurance verification comes before any price discussion.
Which Trades Are Involved
Plumbing, electrical, framing, drywall, tile, and painting all appear in a typical ADU bathroom. Larger projects add HVAC for supplemental heat and general handyman services for punch-list work.
Sequencing them correctly prevents rework. Tile before electrical trim, waterproofing before tile, never the reverse.
One coordinator handling the schedule saves owners real money.
Questions to Ask Before You Hire
I ask three questions of every contractor. How many ADU bathrooms have you completed, who pulls the permit, and what does your waterproofing assembly look like?
The waterproofing answer reveals the most. A vague answer means walking away.
Written scopes, itemized allowances, and a payment schedule tied to milestones protect both sides.
Maintenance, Moisture, and Long-Term Protection
An ADU bathroom that gets maintained lasts decades. One that gets ignored fails in five years, and the failures are always water failures.
Rental units need more attention than owner-occupied ones. Tenants report problems late, so I build inspection into the lease cycle.
Twenty minutes a quarter prevents almost every major repair.
Routine Upkeep That Prevents Big Repairs
I check caulk joints, run the exhaust fan with a tissue held to the grille, and look under the vanity for moisture. Three checks, five minutes.
Drain maintenance keeps hair clogs from becoming standing water. A quarterly enzyme treatment handles it without harsh chemicals.
Fan grilles collect dust and lose airflow, so I clean them twice a year alongside routine home maintenance and cleaning visits.
Warning Signs of Hidden Water Damage
Soft spots in the floor near the toilet, discolored grout in one specific area, and a musty smell that returns after cleaning all point to hidden moisture.
Peeling paint on the ceiling below a second-floor bathroom means an active leak. That gets attention the same week.
Fast response limits the damage, and professional water damage restoration stops mold before it spreads into framing.
ADU Bathrooms as a Rental and Resale Asset
The bathroom carries outsized weight in ADU value. Tenants and buyers judge the whole unit by it.
I have watched two identical ADUs rent at different rates because one bathroom felt current and the other felt dated. Finish quality reads instantly.
Return on investment stays strongest when the bathroom matches the neighborhood’s rental expectations rather than exceeding them.
What Tenants Notice First
Water pressure, hot water speed, and ventilation top every tenant list I have seen. Those three are systems, not finishes.
Then storage. Tenants notice immediately when there is nowhere to put anything.
Lighting quality comes next, which makes the vanity light one of the highest-value small upgrades available.
Durability Choices for Rental Turnover
Porcelain tile floors, solid-surface counters, and quality-brand valve cartridges survive tenant turnover. Vinyl plank and builder-grade valves do not.
Semi-gloss paint on walls wipes clean and repaints easily between tenants. Flat paint shows every scuff.
I specify replaceable components over integrated ones. A cracked separate sink costs far less to swap than a cracked integrated top.
Conclusion
I covered ADU bathroom definitions, sizing, codes, plumbing, electrical, fixtures, surfaces, design strategy, costs, build sequence, hiring, maintenance, and long-term rental value.
Every one of those areas connects to a deeper resource, and each decision compounds across the life of your accessory dwelling unit.
We connect you with vetted local pros who handle ADU bathrooms end to end. Reach out to Mr. Local Services and start yours today.
Frequently Asked Questions
How small can an ADU bathroom be?
A functional three-quarter ADU bathroom starts around 30 square feet. I target 40 to 50 square feet for comfortable clearances and real storage.
Does an ADU bathroom require a permit?
Yes. Every ADU bathroom needs plumbing, electrical, and building permits because the unit counts as a separate dwelling.
What does an ADU bathroom cost?
Most ADU bathrooms run $8,000 to $25,000. Plumbing distance, fixture grade, and conversion versus new construction drive the range.
Should an ADU bathroom have a tub or shower?
A shower fits better in almost every ADU. Tubs make sense for young children or when nearby rentals all include one.
Can an ADU bathroom share plumbing with the main house?
Attached ADUs usually tie into existing lines. Detached units typically need a new lateral to the sewer main or septic tie-in.
How long does an ADU bathroom take to build?
Active work runs 3 to 8 weeks. Permits and material lead times stretch the full calendar to two or three months.
Does an ADU bathroom need its own water heater?
Most do. A tankless unit or small 20 to 40 gallon tank serves one bathroom well and mounts in minimal space.