
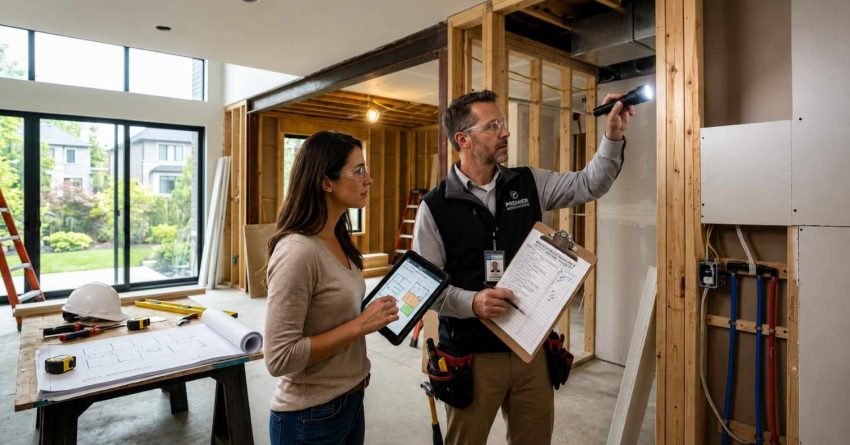
Inspections, walkthroughs, and quality control are the enforcement layer between a construction contract and a finished home that actually performs as promised. Every stage of construction triggers specific inspection points that protect your safety, confirm code compliance, and document the quality of your builder’s work.
Skipping inspections, or conducting them without a systematic approach, is precisely how construction defects go undetected until they become costly warranty claims, legal disputes, or structural failures years after move-in.
This guide covers every key phase inspection, how municipal and third-party inspections compare, what the pre-drywall walkthrough must address, how to build a punch list, and how to secure your certificate of occupancy.
What Are New Construction Inspections and Why They Matter
New construction inspections are formal reviews conducted at defined stages of building to verify that work meets applicable codes, contract specifications, and quality standards. They serve two distinct but complementary purposes: code compliance confirms the home is legally safe and habitable; quality control confirms the home was built to the workmanship standard you contracted for.
In the United States, virtually all new residential construction requires a series of municipal inspections conducted by the local authority having jurisdiction (AHJ). These inspections follow a phased schedule tied to construction progress — foundation, framing, rough-in, insulation, and final are the most common required checkpoints. Each phase inspection must pass before the builder can proceed to the next stage of work.
The Role of Inspections in Protecting Your Investment
New home construction involves hundreds of individual decisions made by dozens of subcontractors working across a 6-to-18-month schedule. No single person oversees every detail of every trade every day. Inspections create structured moments of verification — checkpoints at which someone specifically qualified reviews the work before it is covered, finished, or permanently installed.
The cost of addressing defects scales dramatically with how late in the build process they are discovered. A framing error caught before sheathing costs a few hundred dollars to fix. The same defect discovered after drywall, paint, and trim installation may require thousands of dollars in demolition and reconstruction. Defects discovered after move-in often involve insurance claims, contractor coordination, temporary relocation, and legal fees that dwarf the original repair cost.
Code Compliance vs. Quality: Two Different Standards
Understanding the precise distinction between code compliance and construction quality is foundational to every effective inspection program — our code compliance vs quality inspections <!–NEW PAGE NEEDED–> guide explains exactly what each standard measures, how they interact, and why passing every required municipal inspection does not guarantee a home that meets the quality standard you contracted for.
New construction inspections also connect directly to your builder’s warranty obligations, your lender’s draw approval process, and your eventual certificate of occupancy. Without completed and passed phase inspections on record, a CO cannot be issued — and without a CO, you cannot legally occupy the home or receive your final mortgage disbursement.
Our new construction inspections guide covers every inspection type, who conducts them, what standards they enforce, and what happens when they fail — providing the complete foundation for managing inspections across your entire build.

Municipal Inspections vs. Third-Party Independent Inspections
Municipal building inspectors are employed by your local jurisdiction and their role is to enforce minimum code compliance. They are not your advocates. Their job is to verify that construction meets the adopted International Residential Code (IRC) or locally amended equivalent — not to assess whether your builder did good work relative to your contract.
A typical municipal phase inspection lasts 15 to 30 minutes. Inspectors work from checklists calibrated to the most commonly cited code violations and cannot feasibly examine every element of work in every home they visit. A passing grade from a municipal inspector means the work was observed to meet minimum code requirements during that brief review window — nothing more and nothing less.
What Municipal Inspectors Actually Check
Municipal inspectors verify specific code-driven criteria: anchor bolt spacing and embedment, rebar placement before concrete, electrical panel labeling, GFCI protection in required locations, smoke detector placement, egress window dimensions, and similar objectively measurable compliance items. They do not typically assess whether insulation is uniformly installed without gaps, whether ductwork is sealed at all joints, or whether workmanship meets industry-standard quality thresholds.
When and Why You Need Your Own Inspector
Independent third-party inspectors work for you. They assess both code compliance and workmanship quality, conduct more thorough phase reviews than the standard municipal visit, and produce detailed written reports with photographs that you can use to hold your builder accountable. According to the American Society of Home Inspectors (ASHI), defects identified and corrected at the pre-drywall stage cost approximately one-tenth the amount to address compared to the same defects discovered after move-in.
Our guide on independent vs municipal inspection explains exactly what each type of inspector checks, where their responsibilities overlap, and when hiring your own inspector delivers meaningful return on investment relative to the inspection fee.
Selecting and vetting the right third-party inspector requires understanding certifications, phase-specific experience, and what a quality report should contain — our guide to hiring a third-party inspector walks through every step of that evaluation process.
Phase Inspections: The Complete Schedule from Foundation to Final
New construction inspections follow the natural progression of the build. Each phase has a specific window during which the work can be inspected, and once covered by subsequent construction, most defects become invisible or prohibitively expensive to access and correct. Understanding the full phase schedule is not optional knowledge for anyone building a new home.
Foundation, Framing, and Rough-In Inspections
Foundation inspection occurs after formwork is set and rebar is placed, but before concrete is poured. Inspectors verify rebar placement, depth, size, and spacing, along with anchor bolt locations and stem wall dimensions. Once concrete is poured, these elements cannot be changed without demolition.
Framing inspection is conducted after all structural framing, sheathing, and housewrap are installed but before any MEP rough-in work begins. This is when structural headers, shear walls, stair framing, and load path continuity are verified against the approved plans.
Rough-in inspection covers all mechanical, electrical, and plumbing (MEP) rough work installed after framing but before insulation is placed. This inspection verifies that pipes, wires, and ducts are correctly sized, located, routed, and protected — work that is entirely hidden once drywall is hung.
Insulation Inspection
Insulation inspection confirms that all thermal and acoustical insulation meets the required R-values for each climate zone location and is installed correctly — without gaps, compressions, or bypasses that would undermine both thermal and moisture performance.
Final Inspection
The final inspection occurs when all systems are operational, all finishes are complete, and the home is ready for occupancy. This inspection covers functional verification of every system and confirms that all items from previous conditional inspection approvals have been addressed.
Inspections occur within the larger context of your build timeline — our home building process phases guide maps every construction milestone from pre-construction through CO issuance, helping you anticipate where each inspection window falls within the schedule.
Our dedicated phase inspection schedule article covers every required and recommended inspection in full detail, including what triggers each phase, who conducts it, what documentation to request, and how to coordinate your independent inspector with the municipal schedule.
The Pre-Drywall Inspection: Your Most Critical Quality Checkpoint
The pre-drywall inspection is the single most important owner-conducted walkthrough in the entire build process. It occurs after framing is complete and MEP rough-in work is done but before drywall is hung — the last practical opportunity to view and verify the structural skeleton, rough plumbing, electrical wiring, HVAC ductwork, and insulation installation of your new home.
Once drywall goes up, the work inside your walls is hidden from view and inaccessible without demolition. The window for this inspection is brief — typically a few days between insulation completion and the start of drywall installation. Builders are not legally required to schedule a pre-drywall walkthrough for owners in most jurisdictions, but reputable builders offer it proactively. If yours does not, request it explicitly in writing well in advance.
What to Examine Before the Walls Close
The pre-drywall walkthrough should systematically cover: framing layout conformity with approved plans, all MEP rough-in locations and pipe/wire support, insulation completeness and correct R-value grade for each location, window flashing at rough openings, fire blocking at floor penetrations, blocking installed for future grab bars or heavy fixtures, low-voltage pre-wiring paths and boxes, and ventilation duct routing to exterior.
Research from the National Association of Home Builders (NAHB) consistently finds that pre-drywall inspections deliver the highest cost-benefit ratio of any owner-arranged quality review, with an average return of $8 to $12 in prevented remediation costs for every $1 spent on the inspection fee.
Common Defects Found at the Pre-Drywall Stage
The most frequently missed items across thousands of pre-drywall inspections include missing fire blocking, insulation voids in exterior wall cavities, duct connections not sealed with mastic, plumbing drain lines installed with insufficient slope, and electrical wiring with insufficient clearance from framing edges that creates future risk of nail puncture.
Our pre-drywall inspection checklist provides a comprehensive, trade-organized review covering every critical item across structural, MEP, insulation, and low-voltage rough-ins — designed to guide you or your third-party inspector through the walkthrough in a systematic sequence that minimizes the risk of missing anything.
The most frequently discovered defects, what they look like, and what remediation requires are documented in our common pre-drywall defects guide, which covers framing errors, plumbing slope failures, HVAC duct routing issues, and insulation installation failures that inspectors consistently catch on new construction walkthroughs.
System-Level Inspections: MEP, Air Tightness, and Structural
Beyond phase inspections governed by the municipal building department, a new home has specific systems that warrant their own inspection and commissioning protocols at final. MEP systems each have inspection criteria that extend beyond rough-in code compliance to include final trim-out correctness, function testing, and performance verification.
HVAC system commissioning verifies that the installed system operates within design parameters: airflows balance correctly across all zones and rooms, refrigerant charge is within manufacturer specification, thermostats and zone controls respond accurately, and the home meets blower door and duct leakage performance targets established by the energy code or certification program. An undersized or improperly commissioned HVAC system is the leading source of first-year owner complaints in new home construction, according to J.D. Power’s New Home Builder Customer Satisfaction Study.
Plumbing final inspection verifies that all fixtures flow correctly, drains properly, have adequate trap protection, and show no leaks at supply or drain connections. Water heater installation, pressure-reducing valve calibration, and recirculation pump function are also verified.
Electrical final inspection includes testing all outlets, switches, GFCI protection, AFCI protection, panel labeling accuracy, and confirmation that all circuits match the approved load schedule. EV charger circuits, solar interconnection equipment, and generator transfer switch installations require specific additional verification.
Conducting meaningful system-level inspections requires understanding what correct installation looks like across all three MEP trades — our MEP systems for new builds pillar covers sizing requirements, code standards, and quality benchmarks for each mechanical system in depth.
Air tightness testing using a blower door is increasingly required under IECC energy codes and mandatory for Passive House and ENERGY STAR certification programs. Thermal imaging cameras identify temperature anomalies invisible to the naked eye — revealing insulation voids, moisture intrusion paths, and electrical hot spots that pass visual inspection entirely — and our thermal imaging inspection guide <!–NEW PAGE NEEDED–> explains how this technology should be incorporated into a comprehensive quality control program.
Drone-based roof inspection allows complete coverage of complex roof systems without scaffolding — our drone roof inspection guide <!–NEW PAGE NEEDED–> explains what aerial inspection reveals and when it should supplement a standard roofing phase review.
Our guide to the blower door air tightness test explains how this critical test works, what ACH50 results indicate about building envelope performance, and what remediation looks like when a home fails to meet the target leakage threshold required by code or certification.
Energy Code Inspections, HERS Ratings, and ENERGY STAR Verification
Modern homes in most US jurisdictions must comply with the International Energy Conservation Code (IECC) — and verifying that compliance requires inspections beyond the standard building code phase schedule. Energy code inspections assess air sealing quality, insulation installation uniformity, mechanical system efficiency ratings, duct leakage, and lighting power density.
As of 2026, 42 states have adopted the IECC 2018 or 2021 edition in some form, creating binding requirements for blower door testing, duct tightness verification, and confirmed R-value installation quality. These tests are conducted by certified HERS raters or approved third-party verifiers, and passing documentation must be submitted to the building department before a certificate of occupancy can be issued in many jurisdictions.
What the HERS Index Measures
The HERS (Home Energy Rating System) Index is a numerical score representing a home’s energy efficiency relative to a standardized reference home. A score of 100 equals the reference building; a score of 50 means the home uses 50% of the energy of that reference. The lower the score, the more efficient the home. ENERGY STAR certification requires a HERS score at or below a threshold that varies by climate zone — typically in the 55 to 75 range for most markets.
Our HERS rating inspection process guide explains what a certified HERS rater checks during the on-site verification, how scores are calculated from field measurements and software modeling, and what corrective action looks like when a home fails to achieve its target score before the final inspection.
ENERGY STAR Verification Protocol
ENERGY STAR certification requires a thermal bypass checklist inspection conducted specifically before insulation is installed — an additional pre-drywall quality check targeting air barrier continuity that is separate from the standard pre-drywall walkthrough. This inspection must be completed by a certified third-party ENERGY STAR rater, not the builder or municipal inspector.
Our ENERGY STAR home verification guide covers the full verification protocol, including every mandatory field test, the documentation chain required for certification, and the measurable resale value premium associated with ENERGY STAR-certified new homes.
Our energy code inspection process article explains the full IECC compliance verification workflow, how mandatory energy inspections differ from voluntary performance certifications, and how to ensure your build documentation is complete when the building department conducts its energy compliance review.
The Final Walkthrough and Pre-CO Strategy
The final walkthrough is a builder-accompanied review of the completed home conducted in the days before the final municipal inspection and certificate of occupancy. It is one of the most consequential meetings of your entire build experience — a structured opportunity to document every incomplete or unacceptable item before you sign any closing documents.
Most builders schedule the final walkthrough three to seven days before the planned closing date. The most effective approach is to walk the home on your own — or with your independent inspector — before the official builder-accompanied walkthrough so you arrive with a pre-built itemized list rather than discovering issues in real time during a meeting your builder controls.
What to Verify at the Final Walkthrough
A complete final walkthrough covers: every window and door opens, closes, locks, and seals correctly; all fixtures and appliances power on and cycle through their functions; flooring is installed correctly with no gaps, squeaks, or damaged pieces; cabinetry and countertops are defect-free; paint is complete with no holidays or touch-up inconsistencies; trim is fully caulked, filled, and painted; HVAC operates in all zones; smart home systems respond as configured; exterior grading drains away from the foundation with no ponding areas present.
Walking the home before your builder does gives you structured documentation leverage — our pre-CO walkthrough strategy explains how to conduct this owner-led review systematically and what to document to maximize your builder’s accountability during the joint walkthrough that follows.
The period between substantial completion and closing is also your last structured opportunity to address items that might otherwise carry over unresolved — our pre-closing inspection approach explains how to coordinate this final quality review alongside your lender’s inspection requirements and what items to prioritize when the closing timeline is compressed.
Once all walkthrough items are documented and the municipal final inspection passes, the builder submits for CO issuance — our new construction final walkthrough checklist covers every system, surface, finish, and function you must verify before signing at closing, organized by trade and room for maximum efficiency.
Punch Lists: Building, Managing, and Resolving Items
A punch list is a formal written record of incomplete or defective items identified during the final walkthrough or any other inspection conducted near the close of construction. It is not a complaint register — it is a contractual instrument that creates a documented record of items your builder has acknowledged and agreed to address, either before closing or under a post-closing escrow arrangement.
How you build, manage, and enforce your punch list directly determines how completely and promptly those items are resolved. Vague, unorganized punch lists routinely result in items slipping through without resolution, disputes about whether items were reported, and builder claims that the defect did not exist at time of closing.
How to Structure an Effective Punch List
Effective punch lists are organized by trade and room location rather than by order of discovery. A list that randomly mixes HVAC, trim, flooring, and plumbing items creates scheduling confusion for the builder and gives no clear accountability for dispatch. A list organized as “Primary Bedroom: Trim / Paint / Flooring” followed by “Main Bathroom: Tile / Plumbing Fixtures / Drywall” allows the builder to efficiently dispatch the correct subcontractors.
Every item should include: precise location (room, wall, fixture name), a specific description of the defect or incomplete work, a reference to the contract specification or code section violated if applicable, and at least one photograph with a timestamp. A specification violation reference — “spec’d Kohler Purist faucet installed; model substituted without authorization” — carries far more legal weight than “wrong faucet.”
A ready-to-use trade-organized format designed specifically for new construction is available in our new build punch list template, which you can use directly or adapt for your build type, contract scope, and finish specifications.
Managing Resolution Before and After Closing
Structural and mechanical punch list items should always be resolved and verified before closing. Cosmetic items may be carried into a post-closing holdback or escrow arrangement if time constraints require — but this must be documented in a formal written amendment signed by both parties, not an informal verbal agreement.
Our punch list best practices guide covers the full process from item documentation through final builder sign-off, including how to structure holdback arrangements, what documentation protects you legally, and how to escalate unresolved items through the warranty process.
When items stall, when builders dispute scope, or when timelines exceed what is reasonable, having clear expectations for resolution helps you act decisively — our punch list resolution timeline guide covers standard completion timeframes for different item categories, escalation paths for unresolved items, and what legal options exist when a builder fails to deliver.

Certificate of Occupancy: What It Means and How to Get It
The certificate of occupancy (CO) is the legal document issued by the local building authority confirming that a structure is safe for human habitation and meets all applicable code requirements. Without a CO, you cannot legally occupy the home, your lender will not release the final mortgage disbursement, and any attempt to occupy the property may constitute a municipal code violation subject to fines and mandatory evacuation orders.
The CO is issued after the final building inspection passes. The building official verifies that all required phase inspections were completed and passed, that all conditional approvals from prior inspections were satisfied, that utilities are connected and functional, and that no outstanding violations remain on the permit record.
Common CO Denial Reasons and Resolution Path
The most common reasons for certificate of occupancy denial include: failed final inspection items (open electrical circuits, disconnected mechanical systems, uncapped plumbing), outstanding permit violations from earlier phases that were not corrected, required third-party test documentation not submitted (blower door results, HERS certification, duct leakage test reports), and site grading conditions that do not meet approved drainage plan requirements.
Understanding what causes the final inspection to fail positions you to prevent delays — our common final inspection failures guide documents the most frequently cited denial reasons by trade and system type, with specific resolution steps for each category.
Our certificate of occupancy process guide covers the complete CO issuance workflow, including what triggers issuance, the sequence of submittals required by different jurisdictions, how to resolve outstanding violations, and what recourse exists when a builder fails or refuses to obtain a CO on the agreed timeline.
Inspection Reports, Disputes, and How to Respond
Every inspection generates documentation — whether a pass/fail stamp from a municipal inspector or a detailed narrative report from a third-party quality inspector. Knowing how to read, use, and act on inspection documentation is a core competency for anyone managing a new construction project.
Municipal inspection records are public documents in most jurisdictions. You can request copies of all phase inspection reports from your building department. These records confirm which inspections were conducted, whether any failed conditions were documented, how those conditions were resolved, and whether all required inspections occurred on the appropriate schedule.
Third-party inspector reports contain substantially more detail: photographs with annotations, severity classification of findings (safety-critical versus code violation versus quality deficiency versus advisory item), references to specific code sections violated, and recommended remediation approaches. A high-quality inspection report functions as both a builder accountability document and a legal record if disputes arise.
Our reading inspection reports guide decodes standard report formats, severity rating systems used by different inspection organizations, and how to prioritize the action items a report contains so you can communicate findings to your builder clearly and efficiently.
When Inspectors and Builders Disagree
When you believe an inspector has flagged something that is actually compliant — or missed something that clearly is not — there is a formal path to challenge the finding without damaging your relationship with the building department. Documentation of the disputed condition, a reference to the applicable code section, and a written request for re-examination typically initiates the process.
Our challenging an inspection finding guide explains the formal appeals process available in most jurisdictions, documentation strategies for contested items, and how to involve your builder constructively rather than creating an adversarial dynamic with the AHJ.
When your builder and your independent inspector reach conflicting conclusions about whether work meets code or contract quality standards, a structured resolution framework prevents the disagreement from stalling your schedule indefinitely — our inspector versus builder conflicts guide explains how to navigate these disagreements, protect your legal position, and determine when a third expert opinion is warranted.
Specialty Build Inspections: Prefab, Modular, THOW, and Alternative Construction
Standard new construction inspection protocols are designed for site-built stick-frame homes. Specialty build types — factory-built modular homes, prefab panelized construction, tiny homes on wheels, barndominiums, shipping container conversions, SIP construction, and alternative material systems like ICF or rammed earth — each carry unique inspection considerations that extend beyond or differ materially from the standard phase schedule.
Modular homes undergo a factory inspection process conducted by a state-approved third-party inspection agency before any modules leave the manufacturing facility. These factory inspections verify compliance with the IRC to the same standard as site-built homes, but the inspection occurs at the factory. After delivery and crane set, site inspections cover the foundation, utility connections, mate-line work between modules, and final occupancy conditions. Understanding the split between factory and field inspections is essential to comprehensive QC on modular builds.
Tiny homes on wheels (THOWs) are inspected under RVIA, ANSI A119.5, or NOAH certification standards rather than the standard IRC building code. These certifications verify that the home was built to applicable RV safety standards. Any permanent site installation involving utility connections, septic hookups, or foundation placement may trigger additional local code inspections that vary substantially by jurisdiction.
How Factory Inspections Differ from Site Inspections
The fundamental difference is that factory quality control occurs in a controlled manufacturing environment with the inspector on-site throughout production, whereas site-built inspections are point-in-time reviews of work completed across a many-month schedule. Factory inspections can catch consistency issues that site inspections simply cannot observe — but they cannot substitute for site inspections of foundation, utilities, and mate-line work after delivery.
For a full explanation of how modular and factory-built inspections integrate with site-phase requirements, our prefab and modular home inspections resource covers the complete inspection framework alongside the broader prefab construction process.
Steel-frame and hybrid specialty builds carry unique structural, thermal bridging, and MEP inspection requirements not present in standard wood-frame construction — our barndominium inspection requirements guide covers the specific items inspectors must verify at each phase of metal building construction, including diaphragm connections, insulation gap management at thermal bridges, and grounding requirements specific to steel framing.
Jurisdiction-Specific Inspection Requirements
Inspection requirements vary significantly across states, counties, and municipalities. The baseline is the adopted edition of the IRC, but state amendments, specialty overlay codes, and local AHJ interpretations create material differences in what is required, how aggressively it is enforced, and what documentation must be submitted to trigger CO issuance.
California operates the most complex new construction inspection environment in the country. In addition to standard IRC-based phase inspections, California’s Title 24 energy code requires verified compliance documentation from a certified HERS rater. CalGreen mandatory measures add green building requirements. Properties in designated fire-prone areas are subject to Wildfire Urban Interface (WUI) code requirements covering materials, defensible space planning, and attic and eave venting. Coastal zone projects require Coastal Commission review.
Florida adds a mandatory wind mitigation inspection overlay to all coastal and inland construction within the state. The Florida Building Code requires documentation of roof-to-wall connection types, opening protection status, and roof covering wind resistance rating — documentation that directly affects homeowner insurance premiums and is required for CO issuance in hurricane-zone counties.
Washington, Oregon, and California require seismic bracing inspections for new construction that verify lateral load resistance systems are correctly installed — an inspection layer absent in most non-seismic jurisdictions. Our seismic bracing inspections guide <!–NEW PAGE NEEDED–> covers what these inspections verify and how to prepare for them in Western markets.
Understanding how permit issuance and code adoption govern the inspection schedule provides the broader framework — our permit and code compliance framework guide explains how the permit process structures inspection sequencing and what state code amendments mean for your specific build location.
Detailed state-specific inspection guides are available for California new construction inspections, which covers Title 24 energy compliance, CalGreen, and WUI overlay requirements, and Florida hurricane-code inspection, which explains wind mitigation verification, opening protection documentation, and the insurance impact of passing these inspections.
The 11-Month Warranty Inspection
Most new homes carry a one-year workmanship warranty from the builder, covering visible defects in materials and workmanship. The 11-month inspection is a proactive walkthrough conducted approximately 11 months after your closing date — your final opportunity to identify and formally document all warranty-eligible items before the one-year coverage window expires.
This inspection is among the most routinely overlooked quality control opportunities available to new home owners. After 11 months of occupancy through all four seasons, issues that were not visible at move-in have had time to manifest: seasonal settling cracks where drywall joints meet structural elements, nail pops indicating shrinkage in framing lumber, HVAC performance shortfalls that only become apparent under peak heating or cooling load, grading or drainage issues revealed by heavy rain events, and surface finishes that have failed under normal use conditions.
What to Document Before Your Workmanship Warranty Expires
The 11-month inspection should be conducted systematically, covering every system, surface, and exterior element — and every item discovered must be documented in writing with photographs and submitted to your builder as a formal warranty claim before the one-year anniversary date. Items discovered after that date but not documented and submitted within the warranty period are generally outside the builder’s contractual obligation to repair, though they may fall under the two-year systems warranty or ten-year structural warranty.
Understanding your warranty structure fully is critical to knowing which coverage period applies to each item — our home warranty and move-in guide covers the complete 1-2-10 year warranty framework, what each coverage tier includes, and the documentation practices that protect your rights throughout each coverage period.
Our 11-month warranty inspection guide provides a comprehensive inspection checklist covering every system, surface, and exterior element to examine at this critical milestone, along with documentation best practices, sample warranty claim language, and guidance on escalating items when your builder disputes coverage.
Hiring a New Construction Inspector and Understanding Costs
Independent new construction inspection is one of the highest-return investments available to a builder-client or new home buyer. Third-party inspection fees typically range from $200 to $800 per phase depending on home size, build complexity, and market, but the cost of a single undetected defect discovered post-occupancy routinely exceeds the total inspection budget for an entire build.
The most important credentials to verify when selecting a new construction inspector include: certification from InterNACHI (International Association of Certified Home Inspectors) or ASHI (American Society of Home Inspectors), specific experience with new construction phase inspections rather than only resale property inspections, familiarity with the adopted code edition in your jurisdiction, demonstrated understanding of energy code compliance requirements, and the ability to produce detailed written reports with trade-organized findings and photographic documentation.
Credentials, Certifications, and What to Ask
Before hiring, ask prospective inspectors how many new construction phase inspections they complete per month, whether they conduct pre-drywall inspections specifically, how they handle findings that the builder disputes, whether they provide energy code compliance verification as part of their service, and what their report turnaround time is from site visit to delivered report.
Our new construction inspection costs guide breaks down typical fees for municipal, third-party quality, energy code, specialty, and system-level inspections across different build types and markets — giving you the information to budget a complete inspection program into your overall construction soft costs from day one.
When an inspection fails and a re-inspection is required, additional fees apply in most jurisdictions — our re-inspection fees guide explains how these fees are structured, who bears responsibility for them (typically the builder in standard contract language), and how proactive pre-inspection preparation reduces the probability of triggering them.
Understanding the role inspection plays within the broader builder relationship — including how to document disputes, protect your legal rights, and work effectively with a builder throughout the process — is covered in depth in our hiring and working with builders pillar, which addresses every dimension of the builder-owner relationship from contract through occupancy.
For a complete guide to finding, vetting, and engaging the right independent inspector for your specific build — including credential verification steps, scope negotiation strategies, and report format requirements to specify in advance — our third-party inspector selection guide covers every step of the hiring process.
Conclusion
Inspections, walkthroughs, and quality control are the primary mechanisms verifying the home being built actually matches the one you contracted for.
Every construction phase creates an opportunity to catch defects at a fraction of post-occupancy repair costs, from the foundation pour through the final 11-month warranty walkthrough.
At Mr. Local Services, we connect homeowners and builders with qualified new construction inspectors at every build phase. Contact us to get started today.
Frequently Asked Questions
What is the difference between a municipal inspection and a third-party quality inspection?
A municipal inspector verifies minimum code compliance on behalf of the local government. A third-party quality inspector works for you, assessing both code compliance and workmanship quality, and delivering a detailed report you can use to hold your builder accountable.
When should I schedule a pre-drywall inspection?
Schedule the pre-drywall inspection immediately after insulation is complete and before any drywall is installed. Confirm the timing with your builder weekly during the framing and rough-in phases, as this window is typically only three to seven days.
What is a HERS rating and do I need one?
A HERS (Home Energy Rating System) rating is a numerical score measuring a home’s energy efficiency relative to a reference standard. Many jurisdictions now require HERS verification as part of energy code compliance for CO issuance, and it is also required for ENERGY STAR certification and several green financing programs.
What happens if my home fails the final inspection?
The building department issues a conditional rejection that lists the specific items requiring correction. Your builder corrects each item, requests a re-inspection, and pays any applicable re-inspection fees. The certificate of occupancy is issued only after the final inspection passes without outstanding conditions.
What should be included on a punch list?
Every incomplete or defective item found during the final walkthrough, organized by trade and room location, with a precise location description, specific defect description, contract specification reference where applicable, and a photograph for each item. Vague entries produce inconsistent results; specific, documented entries create accountability.
What is the 11-month warranty inspection?
The 11-month inspection is a proactive walkthrough conducted approximately 11 months after closing to identify and document all warranty-eligible defects before the one-year workmanship warranty expires. Items not reported in writing before that deadline generally fall outside builder warranty coverage.
Can I occupy a new home without a certificate of occupancy?
No. Occupying a new home without a certificate of occupancy is illegal in virtually all US jurisdictions, violates the terms of most mortgage agreements, and may result in municipal fines or mandatory evacuation. Your lender will also withhold the final mortgage disbursement until a CO is formally issued.