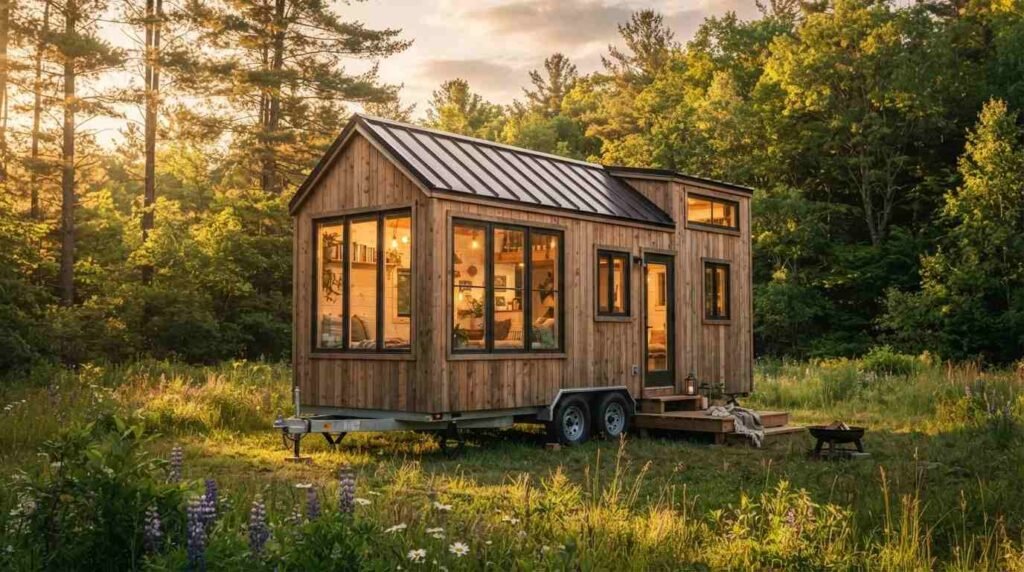
A tiny house on wheels is a permanent dwelling built on a road-legal trailer chassis, typically 100 to 400 square feet, designed to be towed rather than set on a foundation. Building one means completing trailer prep, framing, weatherproofing, systems rough-in, insulation, and interior finish in a fixed sequence.
I have watched too many people buy a trailer first and figure out the rest later. That order costs money, months, and sometimes the whole build. Sequence matters more than skill here.
This guide covers what a tiny house on wheels legally is and what it costs, the zoning and parking rules that decide where it can sit, the structural work from trailer to roof, the plumbing, electrical, insulation, and HVAC systems inside the walls, the interior finish and fixtures, and the certification, towing, and maintenance that follow the build.
What a Tiny House on Wheels Actually Is
A tiny house on wheels is a compact dwelling permanently framed onto a towable trailer, built to residential standards but registered and moved as a vehicle. That dual identity, house in construction and vehicle in law, shapes every decision that follows.
I frame it this way because the legal classification drives the build. A structure on a foundation answers to local building code. A structure on a trailer answers to vehicle law, RV standards, and whatever the parking jurisdiction decides to enforce.
Most builds land between 8.5 and 10 feet wide and 20 to 34 feet long. Anything wider than 8.5 feet needs an oversize permit to move on public roads in most states.
Tiny House on Wheels vs. RV vs. Park Model
The difference comes down to construction standard and intended use. An RV is built for travel under ANSI 119.5 and is not meant for full-time residence. A park model is a 400-square-foot recreational unit designed to sit in one place with utility hookups.
A tiny house on wheels sits between them. It uses residential framing, insulation, and finishes but travels on a chassis, and that hybrid nature is exactly why zoning offices struggle with it.
Why People Build Instead of Buy
Cost is the honest answer. A professionally built shell plus DIY finish work cuts total spend roughly in half compared to a turnkey purchase, and control over layout is the second reason.
Building also means I know what is behind every wall. That matters enormously when something leaks five years later.
Costs, Timelines, and Skills You Need Before You Start
A DIY tiny house on wheels typically costs $30,000 to $60,000 in materials for a 24-foot build, while a professionally built turnkey unit runs $80,000 to $150,000. Timeline for a first-time owner-builder working weekends is nine to eighteen months.
The gap between those numbers is labor, and labor is where most budgets break. I have seen people underestimate hours by a factor of three on their first build.
Skills you genuinely need before starting: basic framing, comfort with a circular saw and level, and the patience to redo work. Everything else can be learned or hired out.
Realistic Build Budgets by Size
Here is what materials typically cost by trailer length for a mid-spec build with standard finishes.
| Trailer length | Approx. sq ft | DIY materials | Turnkey build |
| 16 ft | 128 | $18,000–$28,000 | $45,000–$70,000 |
| 20 ft | 160 | $24,000–$38,000 | $55,000–$90,000 |
| 24 ft | 192 | $30,000–$48,000 | $70,000–$110,000 |
| 28 ft | 224 | $38,000–$58,000 | $85,000–$130,000 |
| 34 ft | 272 | $45,000–$70,000 | $100,000–$160,000 |
Add 15 to 20% contingency to any figure above. First builds always find surprises.
DIY, Hybrid, or Contractor Build
The hybrid path is what I recommend to most first-timers. A builder delivers a weathertight shell with trailer, framing, roof, windows, and siding complete, and the owner finishes systems and interior.
That split protects the parts where mistakes are expensive and unfixable, then hands over the parts where mistakes are cosmetic and cheap.
Legal Rules, Zoning, and Where You Can Park It
A tiny house on wheels is legal to build and own almost everywhere in the US, but legal to live in full-time in far fewer places. Zoning, not construction code, is the real constraint, and it is decided at the city or county level.
I always tell people to research parking before buying a trailer. The build takes a year; finding legal ground can take longer.
Roughly half of US states now have some form of tiny house provision in their residential code, but adoption at the municipal level is uneven and slow.
RVIA, ANSI 119.5, and Appendix Q
Three standards matter. ANSI 119.5 governs park model recreational vehicles, RVIA certification signals a unit was built to recognized RV standards, and Appendix Q of the International Residential Code sets tiny house allowances for lofts, stairs, and ceiling heights.
Appendix Q applies to houses on foundations, but many jurisdictions reference it when evaluating a house on wheels. Building to Appendix Q dimensions is the safest default even when it is not required.
Parking, Permits, and Insurance
Legal parking options fall into four buckets: RV parks and tiny house communities, private land with an accessory dwelling unit permit, agricultural land with looser residential rules, and month-to-month arrangements that carry real risk.
Insurance follows classification. An RVIA-certified unit gets standard RV coverage, while an uncertified owner-build often needs a specialty policy or a builder’s risk policy during construction.
Designing the Floor Plan and Weight Distribution
Floor plan design for a tiny house on wheels must balance living function against weight placement, because an unbalanced load makes the trailer unsafe to tow. Heavy elements go over or between the axles, never at the rear overhang.
I sketch weight before I sketch rooms. Bathroom, kitchen, and any water tank are the heaviest zones, and where they sit decides whether the finished house tows straight.
Draw the plan at scale on graph paper, then build a cardboard mockup of the kitchen and bath. Two hours of mockup saves two weeks of rework.
Lofts, Stairs, and Ceiling Height
Appendix Q allows loft ceiling heights as low as 3 feet over at least half the loft area, with stairs permitted at 6-inch minimum tread depth and 12-inch maximum riser height.
Ladders save floor space and cost nothing. Stairs with integrated storage cost square footage and thousands of dollars, and almost everyone who skips them regrets it by year two.
Tongue Weight and Axle Balance
Tongue weight should land between 10 and 15% of total trailer weight for stable towing. Below that range, the trailer sways; above it, the tow vehicle’s rear suspension overloads.
Position the center of gravity slightly forward of the axle centerline. Then weigh the finished house at a certified scale before the first long tow.
Choosing and Preparing the Trailer Foundation
The trailer is the foundation of a tiny house on wheels, and its gross vehicle weight rating sets the hard ceiling on everything built above it. A purpose-built tiny house trailer with a drop axle and integrated deck-over frame is worth the premium over a converted utility trailer.
I have never regretted spending more on a trailer. I have regretted saving on one.
Order the trailer with the build in mind: outriggers spaced to your stud layout, anchor points welded before delivery, and a flat deck height that preserves interior ceiling room.
Trailer Types and GVWR Ratings
This table shows how trailer capacity maps to build size and axle configuration.
| Trailer length | Axles | Typical GVWR | Suits build up to |
| 16 ft | 2 | 10,000 lb | Minimalist single-loft |
| 20 ft | 2 | 14,000 lb | Standard single-loft |
| 24 ft | 2–3 | 14,000–16,000 lb | Two-loft with full bath |
| 28 ft | 3 | 21,000 lb | Full kitchen, ground-floor bed |
| 34 ft | 3 | 21,000–24,000 lb | Two-bedroom, heavy finishes |
Finished tiny houses commonly weigh 500 to 700 pounds per linear foot. Budget your GVWR against the high end of that range.
Rust Prep, Decking, and Anchor Points
Strip mill scale, treat any surface rust, and apply a rust-inhibiting primer plus a topcoat before a single stud goes down. Trailer steel that rusts under a finished house cannot be repaired without demolition.
Bolt or weld anchor points at every corner and at 4-foot intervals along the frame. These tie the wall framing to the chassis and resist the uplift and racking forces of highway travel.
Framing the Walls, Roof, and Loft
Tiny house framing follows standard stick-built practice with two changes: members are often 16 inches on center for strength, and every connection is engineered for the dynamic loads of towing. Walls are typically built flat on the deck and stood up in sections.
Build in this order: floor system and subfloor, then wall sections front to back, then roof rafters or trusses, then loft joists.
Sheath and square each wall section on the deck before standing it. Correcting a racked wall after it is up costs an entire day.
Wood vs. Steel Framing
Wood framing is cheaper, easier to modify, and workable with standard tools. Steel framing is lighter for the same strength, immune to rot and insects, and unforgiving of measurement errors.
Most owner-builders should choose wood. Steel makes sense when weight is critical or when a fabricator is already involved.
Hurricane Ties and Road-Travel Bracing
Every rafter-to-wall and wall-to-floor connection needs a metal tie. Highway towing subjects a tiny house to sustained wind loads comparable to a 60 to 70 mph storm, applied repeatedly.
Add diagonal let-in bracing or full sheathing on every wall. Racking is the single most common structural failure in first builds.
Sheathing, Weatherproofing, and the Building Envelope
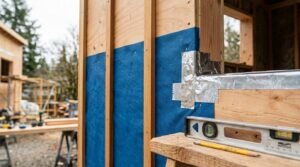
The building envelope is the continuous barrier of sheathing, weather-resistive barrier, flashing, and siding that keeps water out of the wall assembly. On a house that moves at highway speed, envelope failure happens faster than on a static home.
Install in strict sequence: sheathing, then house wrap lapped shingle-style bottom to top, then window and door flashing, then rain screen furring, then siding.
Never reverse that order to save time. Water finds every reversed lap.
House Wrap and Rain Screens
House wrap sheds bulk water while allowing vapor to escape from the wall cavity. A rain screen is a ventilated gap, usually 3/8 to 3/4 inch of furring strip, between the wrap and the siding.
The rain screen is not optional on a tiny house. It gives trapped moisture a drainage path and a drying path, and it dramatically extends siding life.
Flashing at Windows and Doors
Flash every opening with a sill pan first, then jamb flashing lapped over the pan, then head flashing lapped over the jambs and under the house wrap.
That specific lap order is what makes flashing work. Get it backward and the flashing funnels water directly into the framing.
Installing the Roof
The roof on a tiny house on wheels must shed water, resist uplift at towing speed, and add minimal weight. Standing seam metal is the most common choice because it delivers all three.
Install underlayment across the full deck before any roofing goes down. Ice-and-water shield at eaves, valleys, and penetrations is cheap insurance.
Every roof penetration, vent, flue, or solar mount needs a proper boot and sealant rated for movement. Penetrations are where tiny house roofs leak.
Metal, Membrane, and Shingle Options
This table compares the three roofing systems most used on tiny houses on wheels.
| Roofing system | Weight per sq ft | Lifespan | Best for |
| Standing seam metal | 1–1.5 lb | 40–60 yr | Most builds, gable or shed roofs |
| Corrugated metal | 0.7–1.2 lb | 25–40 yr | Budget builds, rustic finish |
| EPDM/TPO membrane | 0.4–0.8 lb | 20–30 yr | Flat or very low-slope roofs |
| Asphalt shingle | 2.5–3.5 lb | 15–25 yr | Rarely, weight penalty is high |
Metal wins on nearly every tiny house. Shingles add several hundred pounds and flap loose at towing speed.
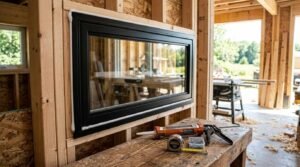
Windows and Doors: Selection and Installation
Windows and doors on a tiny house on wheels must meet egress requirements, seal against sustained road vibration, and minimize thermal bridging in walls that are only 3.5 to 5.5 inches thick. RV-rated units and residential units both work, with different trade-offs.
Residential vinyl or fiberglass windows insulate better and cost less. RV windows are lighter and designed for vibration but perform poorly thermally.
I use residential double-pane windows on nearly every build, then over-fasten and over-seal them for travel.
Egress and Ventilation Requirements
At least one operable window in every sleeping area must provide an egress opening of 5.7 square feet with a minimum 20-inch clear width and 24-inch clear height, per standard residential code.
Lofts need egress too. A skylight or gable window sized for escape is not a nice-to-have; it is a life safety requirement.
Sealing Against Road Vibration
Set every window in a full bed of high-quality sealant, fasten at closer intervals than the manufacturer specifies, and add corner sealant after installation.
Then re-check every window after the first tow. Vibration finds the weak seal, and finding it in the driveway beats finding it in a rainstorm.
Rough-In Plumbing for Off-Grid and Hookup Builds
Plumbing rough-in for a tiny house on wheels covers three water systems: fresh water supply, grey water drainage from sinks and showers, and black water from a flush toilet. PEX tubing is the standard supply line because it flexes with the structure and resists freeze damage better than rigid pipe.
Run all supply and drain lines inside the insulated envelope, never in the floor cavity below insulation. Exterior-facing lines freeze.
Rough in during framing, before insulation and before any wall covering goes up. Pressure-test the system and leave it under pressure overnight.
Fresh Water, Grey Water, and Black Water
Fresh water arrives either through a city hookup with a pressure regulator or from an onboard tank with a 12V demand pump, typically 30 to 60 gallons.
Grey water can often be discharged to a landscape system where permitted. Black water requires either a sewer connection, a holding tank, or elimination entirely by choosing a composting toilet.
Freeze Protection and Winterizing
Heat tape on exposed hose connections, skirting around the trailer to trap ground heat, and insulated tank compartments handle most cold-climate risk.
For unoccupied winter storage, drain everything and blow the lines with compressed air. A single freeze split costs more than a season of heat tape.
Rough-In Electrical and Power Systems
Electrical rough-in for a tiny house on wheels centers on choosing between shore power, solar with battery storage, or a hybrid of both. Most builds use a 30-amp or 50-amp RV-style inlet feeding a small residential load center.
Wire to residential standards even in an RV-classified build. Romex in the walls, standard boxes, GFCI in wet locations, AFCI on bedroom circuits.
Hire a licensed electrician for the panel, the inlet, and the grounding. This is the one system where a mistake is genuinely dangerous.
30A/50A Shore Power vs. Solar
A 30-amp inlet delivers 120V single-phase at roughly 3,600 watts, enough for lights, outlets, a mini-split, and one major appliance at a time. A 50-amp inlet delivers 120/240V at up to 12,000 watts.
Solar sizing starts with a load audit. A typical full-time off-grid tiny house needs 1,200 to 2,400 watts of panels and 5 to 10 kWh of battery.
Panel Sizing and Grounding
A 100-amp main lug panel with eight to twelve circuits covers almost every tiny house. Oversizing costs little and prevents a rebuild later.
Grounding follows the power source. On shore power, the grounding path returns through the cord; on a standalone solar system, the chassis and a bonding jumper carry it.
Insulation, Air Sealing, and Moisture Control
Insulation in a tiny house on wheels must deliver high R-value in shallow cavities while controlling moisture in a space that generates heavy indoor humidity relative to its volume. Air sealing matters more than raw R-value at this scale.
Cooking, showering, and breathing in 200 square feet produces the same moisture load as a full house in a fraction of the air volume. That is why tiny houses mold, not because of poor insulation.
Seal every penetration, seam, and top plate with caulk or spray foam before insulating. Then verify with a blower door test if you can access one.
Spray Foam, Mineral Wool, and Rigid Board
This table compares the insulation systems that work in shallow tiny house cavities.
| Insulation | R-value per inch | Air seals? | Weight | Notes |
| Closed-cell spray foam | R-6.5 to R-7 | Yes | Moderate | Adds structural rigidity, highest cost |
| Rigid polyiso board | R-6 to R-6.5 | With taped seams | Light | Good for continuous exterior layer |
| Mineral wool batt | R-4.2 | No | Heavy | Fire- and moisture-resistant, needs separate air barrier |
| Sheep wool | R-3.5 to R-4 | No | Light | Buffers humidity, natural, expensive |
Closed-cell spray foam is the most common choice because it insulates, air seals, and stiffens the frame in one step.
Vapor Retarders and Condensation Risk
The vapor retarder goes on the warm side of the insulation, which means the interior side in most US climates. Doubling up with a vapor barrier on both sides traps moisture and rots the wall.
Closed-cell foam is its own vapor retarder at 2 inches or more. Adding plastic sheeting over it is a common and damaging mistake.
Heating, Cooling, and Ventilation in a Tiny Space
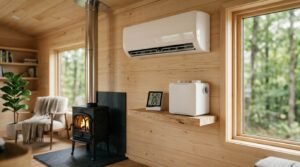
Climate control in a tiny house on wheels needs a heat source, a cooling source, and mechanical ventilation, because a well-sealed 200-square-foot building cannot breathe passively. A ductless mini-split handles heating and cooling in one unit and is the default recommendation.
Size conservatively. A 9,000 BTU mini-split is oversized for most tiny houses, and oversized units short-cycle and fail to dehumidify.
Ventilation is the piece people skip. Without it, indoor humidity climbs and condensation forms inside the walls.
Mini-Splits, Propane, and Wood Stoves
This table compares the practical heating and cooling options for a tiny house on wheels.
| System | Heats | Cools | Power source | Best for |
| Ductless mini-split | Yes | Yes | 120V/240V electric | Grid-tied or large solar |
| Propane wall furnace | Yes | No | Propane, small 12V draw | Off-grid, cold climates |
| Marine diesel heater | Yes | No | Diesel, 12V | Extreme cold, off-grid |
| Small wood stove | Yes | No | Wood | Off-grid, requires clearances and flue |
Wood stoves need certified clearances, a listed flue, and a fresh-air intake. Insurers ask about them, so document the installation.
Exhaust Fans and Fresh-Air Intake
Install a bathroom exhaust fan rated for at least 50 CFM and a kitchen range hood vented outside, not recirculating. Both need a dedicated fresh-air inlet, or they simply depressurize the house.
A small energy recovery ventilator running continuously at low speed solves the whole problem. It is the best few hundred dollars in the build.
Interior Finishes: Walls, Ceilings, and Flooring
Interior finishes in a tiny house on wheels must stay light, resist cracking under road flex, and reflect light in a small volume. Tongue-and-groove pine, thin plywood panels, and lightweight drywall alternatives all outperform standard half-inch drywall.
Standard drywall cracks at every seam after two or three tows. If you want the drywall look, use quarter-inch board with flexible joint compound and accept some maintenance.
Finish in order: ceiling, then walls, then trim, then flooring last so it stays undamaged.
Lightweight Wall and Ceiling Materials
Quarter-inch birch or maple plywood panels with battens are the fastest, lightest, and most forgiving interior wall system. Tongue-and-groove boards look warmer and hide movement well.
Light colors matter more than material. A 200-square-foot room in dark wood reads as a closet.
Flooring That Survives Road Flex
Luxury vinyl plank and engineered hardwood both handle the flex and humidity swings of a mobile structure. Solid hardwood cups and gaps; ceramic tile cracks unless installed over a decoupling membrane.
Choose click-lock floating systems over glue-down. They move with the structure instead of fighting it.
Kitchen, Bathroom, and Built-In Storage
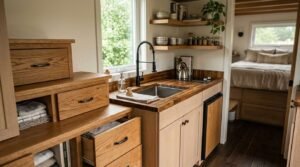
Kitchen and bathroom layout in a tiny house on wheels is driven by plumbing runs, weight placement, and the reality that every square inch serves more than one purpose. Wet rooms and combined shower-toilet spaces are common and effective.
Build storage into the structure rather than adding furniture. Stair treads, loft edges, bench seats, and toe kicks are all volume that already exists.
Measure appliances before framing, not after. Cabinet openings built on guesswork are the most common redo in tiny house interiors.
Compact Appliances and Counter Layout
Select the appliances first, then design around them.
- Refrigeration: 5 to 10 cu ft under-counter or compact upright; 12V DC units for off-grid builds
- Cooking: two-burner induction for grid-tied, two-burner propane for off-grid, both with an outside-vented hood
- Sink: single deep basin over a double, with a pull-down faucet
- Counter: 4 to 6 linear feet minimum for comfortable daily cooking
- Laundry: a 2.0 cu ft ventless washer-dryer combo where space allows
Composting vs. Flush Toilets
A composting toilet eliminates the black water system entirely, needs no plumbing connection, and requires manual emptying every few weeks. A flush toilet needs a sewer hookup or a black tank plus a dump routine.
Composting wins for off-grid and for regulatory simplicity. Flush wins for resale and for anyone who will not maintain a system daily.
Safety Systems, Inspection, and Final Certification
Every tiny house on wheels needs interconnected smoke alarms, a carbon monoxide alarm where any fuel-burning appliance or attached garage exists, a fire extinguisher, and clear egress from every sleeping area. These are non-negotiable regardless of how the unit is classified.
Certification is optional but valuable. A third-party inspection unlocks insurance, financing, and parking options that an undocumented owner-build cannot access.
Photograph every stage before it is covered. Framing, plumbing, electrical, and insulation photos are the documentation an inspector will ask for.
Smoke, CO, and Fire Egress
Install a smoke alarm in each sleeping area, one outside sleeping areas, and one on each level including the loft. Hardwire with battery backup where 120V is available.
A CO alarm is mandatory with any propane appliance, diesel heater, or wood stove. Place it at breathing height, not on the ceiling.
Third-Party Inspection and Documentation
Third-party programs inspect against recognized standards at defined build stages and issue documentation on completion. The common paths are NOAH certification, RVIA certification for units built by registered manufacturers, and state-level modular or park model inspection.
Keep a build binder: receipts, product data sheets, electrical diagram, plumbing diagram, weight ticket, and stage photos. That binder is what makes the house insurable and sellable.

Towing, Moving, and Long-Term Maintenance
Towing a tiny house on wheels requires a vehicle rated above the trailer’s gross weight, a properly rated hitch, and functioning trailer brakes on every axle. Most finished tiny houses weigh 10,000 to 20,000 pounds, which puts them squarely in three-quarter-ton and one-ton truck territory.
Weigh the house at a CAT scale before the first real trip. Estimated weight is always wrong, and usually wrong in the heavy direction.
Then treat every move as a planned event: route check for bridge heights, permit check for width, and a full pre-trip inspection.
Tow Vehicle Match and Pre-Trip Checks
Run this checklist before every tow.
- Confirm tow vehicle GCWR exceeds combined loaded weight
- Verify hitch, ball, and safety chains are rated above trailer GVWR
- Test brake controller and trailer brakes at low speed
- Check tire pressure and tread on all trailer and tow vehicle tires
- Torque lug nuts to spec, then re-torque after the first 50 miles
- Secure and latch all interior items, doors, drawers, and loft contents
- Confirm running lights, brake lights, and turn signals function
- Measure total height and compare against the planned route
Annual Maintenance Schedule
Inspect the roof and all penetrations twice a year, re-seal caulked joints every two to three years, repack wheel bearings annually or every 12,000 miles, and check the trailer frame for rust each spring.
Interior maintenance is mostly moisture management: run the ventilation, watch for condensation on window frames, and address any staining immediately.
Common Build Mistakes and How to Avoid Them
The most expensive tiny house mistakes happen in the first three decisions: the trailer, the layout, and the parking plan. Every mistake after that is cheaper to fix.
- Buying the trailer first. Design the house, calculate the weight, then buy the trailer rated for it
- Skipping the parking plan. Confirm legal parking before spending a dollar on materials
- Underestimating weight. Finished houses run 500 to 700 lb per linear foot; plan against the top of that range
- Using standard drywall. It cracks at every seam after the first few tows
- Doubling vapor barriers. One vapor retarder, on the warm side, always
- Ignoring ventilation. Air sealing without mechanical ventilation guarantees a moisture problem
- Wiring or plumbing after insulation. Rough-in comes first, always
- No contingency budget. Add 15 to 20% to whatever number feels right
Conclusion
Building a tiny house on wheels means sequencing trailer, structure, envelope, systems, and finish correctly, then documenting the result for legal parking and insurance.
Each stage above connects to deeper guides on framing, plumbing, electrical, insulation, roofing, and inspection, so you can go further wherever you need detail.
We handle the parts you would rather not, and Mr. Local Services connects you with vetted pros for every trade in your build.
Frequently Asked Questions
How long does it take to build a tiny house on wheels?
A first-time owner-builder working weekends typically needs nine to eighteen months. Full-time work with prior construction experience cuts that to three to six months.
Do I need a permit to build a tiny house on wheels?
Usually, no building permit is required to construct one, because it sits on a trailer. Permits become necessary for parking, utility connections, and full-time occupancy.
What size truck do I need to tow a tiny house?
Most finished tiny houses need a three-quarter-ton or one-ton pickup rated above the trailer’s gross weight. Combined loaded weight commonly reaches 18,000 to 25,000 pounds.
Can a tiny house on wheels be financed?
Financing is available through RV loans for certified units and personal or builder loans for owner-builds. Third-party certification significantly widens lender options.
What is the best insulation for a tiny house on wheels?
Closed-cell spray foam performs best because it delivers R-6.5 per inch, air seals the cavity, and stiffens the frame simultaneously. Rigid polyiso is the strong second choice.
How much does a tiny house on wheels weigh?
Finished tiny houses average 500 to 700 pounds per linear foot of trailer. A 24-foot build commonly weighs 12,000 to 16,000 pounds fully loaded.
Can I live in a tiny house on wheels full time?
Full-time living is legal in tiny house communities, many RV parks, and jurisdictions with accessory dwelling unit allowances. Local zoning, not construction quality, decides it.