Deck refinishing is the structured process of stripping, sanding, and recoating an existing wood or composite deck to restore its appearance and weather protection without rebuilding the structure. For homeowners, landlords, and property managers across the USA, refinishing is the most cost-effective way to extend a deck’s life by another five to ten years — often for one-fifth the cost of full replacement. A neglected deck loses both visual appeal and structural integrity faster than most owners realize.
Letting weathering, UV damage, and moisture penetration compound past the refinishing window forces homeowners into expensive board replacement or full teardown, often at the worst possible time.
This guide covers what refinishing actually involves, when it’s the right call, every step in the process, stripping, sanding, product selection, composite-specific rules, DIY versus professional considerations, costs, and aftercare.
What Deck Refinishing Actually Is
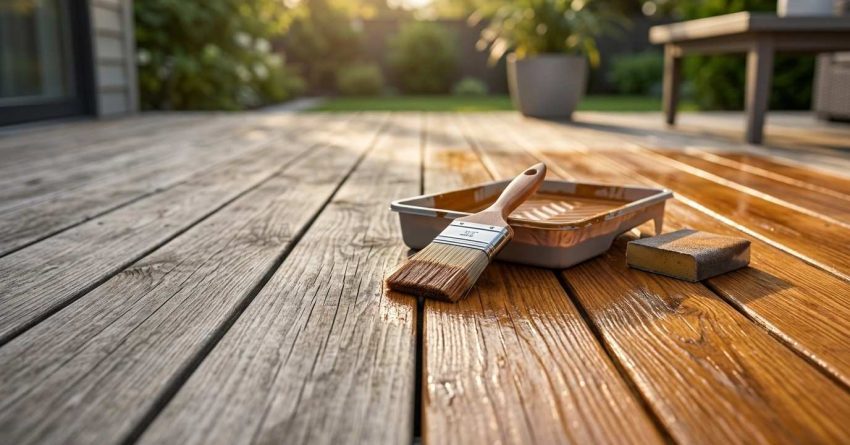
Deck refinishing is a targeted cosmetic and protective process — not a repair, not a rebuild. It assumes your deck’s framing, joists, and boards are structurally sound and focuses entirely on the surface layer: removing failed finish, preparing bare wood or composite, and applying a new protective coating.
The three key components of any refinish are strip, sand, and seal. Each step has consequences for the next. A poorly stripped deck won’t accept stain evenly. An over-sanded board can blotch when finished. A wrong-product final coat can peel within twelve months.
Refinishing differs from three related services that homeowners often confuse it with: restoration addresses structural damage and rebuilds compromised wood; resurfacing typically refers to thick acrylic coatings that hide damage rather than restore it; and replacement removes the entire deck and starts over.
Refinishing sits between cosmetic touch-ups and full-scale replacement, and our definitive deck refinishing guide walks through every distinction — including how refinishing differs from restoration and resurfacing — so you can confidently identify which service your deck actually needs.
When to Refinish Your Deck (and When Not To)
Most wood decks need refinishing every three to five years, though pressure-treated lumber in dry climates can stretch closer to seven. The decision isn’t calendar-driven though — it’s condition-driven. Five reliable warning signs tell you the window has opened.
The first is water penetration failure: sprinkle water on the deck surface, and if it soaks in rather than beading, the sealer is gone. The second is visible greying or silvering of the wood, which signals UV damage to the lignin. The third is flaking, peeling, or cracking finish, which means the previous coating has failed mechanically. The fourth is rough, splintering surfaces that catch socks or bare feet. The fifth is deep staining or blotching that washing cannot remove.
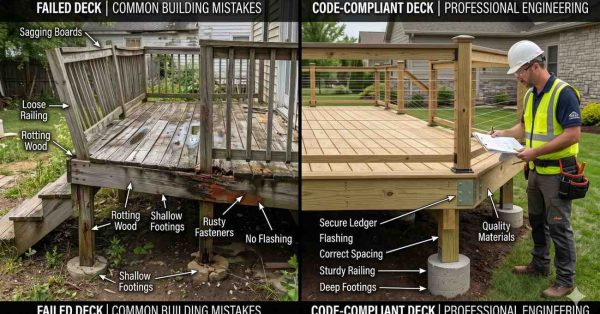
What disqualifies a deck from refinishing is structural damage — soft, spongy boards, rotted joists, failed ledger attachments, or significant cupping and warping. These need addressing before any finish work begins, or refinishing becomes wasted money. If the wood damage runs deeper than surface weathering, restoration becomes the right call instead, and our complete guide to deck restoration explains exactly when boards, joists, or structural elements need rebuilding before any finish can succeed.
The warning signs of a deck that needs refinishing follow predictable patterns by wood type and climate, and our breakdown on when to refinish your deck details every visual cue, water-test result, and seasonal timing window homeowners use to make the call with certainty.
The Step-by-Step Deck Refinishing Process
Professional deck refinishing follows a consistent six-stage sequence, and skipping or shortening any stage produces the early failures that give DIY refinishes a bad reputation.
Stage 1: Inspection and prep. Walk every square foot. Mark loose boards, popped fasteners, soft spots, and structural concerns. Anything that needs repair gets addressed before stripping begins.
Stage 2: Cleaning. Remove organic debris, mildew, algae, and embedded dirt using a deck cleaner appropriate for the wood species. Pressure washing is acceptable at the right PSI — typically under 1,500 for softwoods — but soft washing is safer for older boards.
Stage 3: Stripping. Remove the failed previous finish using chemical strippers, sanding, or a combination. This is where most projects derail because incomplete stripping leaves adhesion problems for the new coat.
Stage 4: Brightening and neutralizing. After stripping, the wood needs a brightener (typically oxalic acid based) to restore pH, remove iron stains, and reopen the wood’s pores so finish can penetrate.
Stage 5: Sanding. Light sanding smooths raised grain caused by water and stripper exposure. The grit progression matters — typically 60 to 80 to 100 grit for floors, with finer finishes on railings.
Stage 6: Finish application. Apply stain, sealer, or combined product in conditions that meet manufacturer specs — usually 50–90°F, low humidity, no rain for 24–48 hours.
The full process typically takes three to five days from start to finish, with cure time extending another 24 to 72 hours before furniture returns.
Each phase of refinishing has technical requirements that determine whether the final coat lasts two years or eight, and our complete deck refinishing process walks through every stage — from initial inspection through final cure — with the exact steps professionals follow on every job.
Stripping Old Stain, Paint, and Sealer
Stripping is where refinishing projects most often go wrong. The previous finish dictates the approach. Penetrating stains often only need light sanding. Film-forming stains and sealers usually require chemical stripping. Painted decks demand the most aggressive removal — typically a combination of chemical stripper, scraping, and sanding.
Chemical strippers fall into three categories. Sodium hydroxide (caustic) strippers are most aggressive and best for film-forming finishes, but they darken wood and require thorough neutralization. Sodium percarbonate strippers are milder, oxygen-based, and safer for both the user and the wood — best for penetrating finishes and general weathering. Citric acid and biodegradable strippers are eco-friendly options that work slower but reduce environmental and respiratory concerns.
Dwell time matters as much as product choice. Most strippers need 15–30 minutes of contact while staying wet — never let stripper dry on the surface, which locks residue back into the grain.
After stripping, the deck must be neutralized with a brightener and rinsed thoroughly. Skipping neutralization is one of the most common causes of new-finish failure because residual stripper continues attacking the new coat from below.
Stripping is the most error-prone phase of refinishing because chemical choice, dwell time, and rinsing all affect how new finish bonds, and our guide on how to strip an old deck finish covers every stripper type, application method, and neutralization step needed to prep wood correctly.
Sanding a Deck for Refinishing
Sanding has two jobs: smoothing the raised grain that stripping causes and creating a uniform surface that accepts finish evenly. Skip it, and even premium finishes look blotchy.
For deck boards, the standard progression is 60-grit for heavy weathering removal, 80-grit to smooth, and 100-grit to finish. Going finer than 120 actually hurts — too smooth a surface won’t accept penetrating finishes well.
Sander selection matters by zone. Random-orbit sanders are the workhorse for board surfaces — fast, predictable, low risk of swirl marks. Belt sanders remove material aggressively but require experience to avoid gouging. Drum sanders are for severe cases where boards need significant material removal. Detail sanders and sanding sponges handle railings, spindles, and tight corners.
Softwoods like cedar and redwood need a lighter touch — they sand quickly and over-sanding leaves dished spots that telegraph through the finish. Hardwoods like ipe and cumaru need more aggressive grits and slower passes.
Always sand with the grain on the final pass. Cross-grain swirl marks show clearly through transparent and semi-transparent finishes.
Sanding determines how evenly your new finish penetrates and how smooth the surface feels underfoot, and our complete walkthrough of sanding a deck before refinishing explains grit progression, sander selection, and the technique adjustments needed for railings, spindles, and softwoods.
Choosing the Right Refinishing Products
Product selection drives every other downstream decision: how long the finish lasts, how much prep the next refinish requires, what color options remain available, and whether you can change finish types later.
The major categories break down by transparency, base chemistry, and film behavior.
Transparency options range from clear sealers (show all wood grain, last 1–2 years, allow easiest refinishing) to transparent stains (slight color, 2–3 years), semi-transparent (medium color, hide minor flaws, 3–4 years), semi-solid (heavy pigment, 4–5 years), and solid stains (paint-like, hide everything, 5–7 years but flake when failing). The trade-off is permanence — once you go solid, going back to transparent is extremely difficult.
Base chemistry splits into oil-based, water-based, and hybrid. Oil-based finishes penetrate deeper and weather more naturally but have longer dry times, stronger VOCs, and increasing regulatory restrictions. Water-based finishes dry faster, clean up with water, and are more environmentally friendly but require more meticulous prep.
Film behavior matters most. Penetrating finishes soak into the wood and wear gradually — easy to refinish later. Film-forming finishes sit on top of the wood and create a visible coating — they last longer but eventually peel, requiring full stripping to refinish.
Picking the wrong product can lock you into a finish type for years, since solid stains and film-formers limit your future options, and our guide on choosing the right finish for refinishing breaks down compatibility rules, color-change limits, and the trade-offs between every major finish category.
Refinishing product selection overlaps heavily with new-deck staining principles, and our complete guide to deck staining and sealing covers the chemistry of every stain category — oil-based, water-based, penetrating, and film-forming — in deeper technical detail.
Refinishing Composite vs Wood Decks
Composite decking plays by different rules. Most modern capped composite boards — the kind made since roughly 2013 — cannot and should not be refinished in the traditional sense. The polymer cap is designed to resist exactly the kinds of finishes you’d apply.
First-generation uncapped composites (early Trex, early Fiberon, and similar products from the 1990s and early 2000s) are different. These boards absorb moisture, fade significantly, and can sometimes be brought back with specialty composite refinishing products designed to restore color and add UV protection. Products from brands like Behr, Olympic, and Restore-A-Deck offer composite-specific formulations.
For modern capped composites, refinishing options are limited to deep cleaning, sometimes painting (which voids most warranties), or accepting the fading and waiting for warranty claims if defects are involved.
When composite refinishing makes sense: badly faded first-gen boards, decks where replacement isn’t financially viable, and situations where a color refresh extends usable life by another five years.
When it doesn’t: structurally damaged composite, mushroomed first-gen boards (a known defect with several brands), or modern capped composites where the cap is intact.
Composite refinishing follows entirely different rules than wood because adhesion, fading, and warranty implications change everything, and our guide on refinishing composite decking explains exactly which composite generations can be refinished, which products work, and when refinishing simply isn’t worth attempting.
DIY vs Professional Deck Refinishing
The DIY-or-pro decision usually comes down to four factors: deck size, finish type, time availability, and tolerance for risk on a single-attempt project.
DIY makes sense when the deck is under 300 square feet, the existing finish is a penetrating stain (no stripping required), and you have a full weekend plus a backup weekend in case weather delays occur. Tool costs run $200–$500 for sanders, brushes, and prep equipment.
Hiring a professional makes sense when the deck exceeds 400 square feet, the current finish is film-forming or painted (requiring full strip), the deck has complex railings or multi-level features, or you’re refinishing as part of a home sale where finish quality affects sale price.
The realistic time investment for DIY on a 400-square-foot deck is 30–50 labor hours spread across 4–7 days, depending on cure times. A professional crew of two typically completes the same project in 2–3 days.
Quality outcomes also differ. Professionals apply finish more consistently, recognize compatibility issues before they cause failures, and stand behind their work with warranties. DIY can equal pro quality but typically does so only after one or two failed attempts.
The decision between handling refinishing yourself and hiring a contractor comes down to deck size, finish type, and how much you value your weekends, and our analysis of DIY vs professional refinishing compares time investment, total cost, and finish quality outcomes side by side.
How Much Deck Refinishing Costs
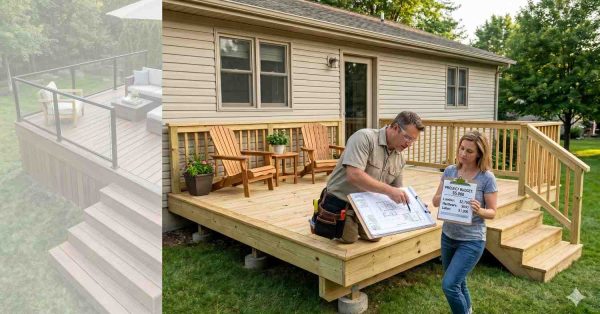
Professional deck refinishing in the USA typically runs $2 to $6 per square foot for standard projects, with most homeowners paying between $700 and $2,500 for a 200–500 square foot deck.
The price range reflects several variables. Prep complexity is the largest factor — a deck needing only cleaning and stain runs $2/sq ft, while one needing full strip, sand, and refinish runs $5–6/sq ft. Existing finish type matters because film-forming and painted surfaces require significantly more labor to strip than penetrating stains. Wood species affects both prep and product cost — hardwoods like ipe demand specialty oils that cost two to three times more than standard stains. Railing and stair complexity can double labor hours, and ornate spindles or cable rails add significant time. Regional labor rates swing prices 30–40% between markets like rural Midwest and coastal California.
DIY material-only costs typically run $150–$500 for a 400-square-foot deck — stripper, brightener, sandpaper, brushes, and stain — but the time investment is significant.
Hidden costs to expect: minor board replacement ($5–$15 per board), fastener replacement, and any structural repairs surfaced during inspection. Always budget a 15% contingency.
Refinishing costs vary widely based on prep complexity, board condition, and regional labor rates, and our breakdown of the cost to refinish a deck details current per-square-foot pricing, hidden cost factors, and what to expect on quotes from professional contractors.
Aftercare, Longevity, and Warranties
The first 30 days after refinishing determine how the finish performs for the next several years. Cure time is non-negotiable — most finishes need 24–72 hours of light foot traffic restriction and 7–14 days before furniture returns. Putting heavy furniture on uncured finish creates permanent indentations.
A properly refinished deck lasts 3–5 years with semi-transparent stain in moderate climates, 5–7 years with solid stain, and 2–3 years with transparent finishes that prioritize wood-grain visibility over protection. Climate extremes shorten these windows significantly — desert sun, coastal salt, and northern freeze-thaw cycles all accelerate finish breakdown.
Annual maintenance dramatically extends finish life. The routine: gentle wash every spring, full inspection in fall, immediate spot-treatment of any peeling or wear areas, and re-coating high-traffic zones (stairs, doorways, dining areas) every 1–2 years even when the rest of the deck looks fine.
Professional refinishing warranties typically run 1–3 years on labor and follow manufacturer specifications on product. Reputable contractors guarantee against peeling, flaking, and adhesion failure when their prep work is the cause.
Long-term deck health depends on consistent seasonal upkeep beyond the refinish itself, and our complete guide to deck maintenance and care covers the year-round cleaning, inspection, and preventive routines that protect your finish investment.
The first thirty days after a refinish determine how long the new finish lasts, and our complete guide on caring for your deck after refinishing covers cure-time rules, furniture timing, cleaning protocols, and the annual maintenance routine that doubles finish lifespan.
Hiring a Trusted Refinishing Contractor
For homeowners and property managers without the time, tools, or risk tolerance for DIY refinishing, hiring a qualified local contractor delivers the consistent, warranty-backed results that protect your deck investment. The right contractor handles inspection, repair callouts, prep, product selection, application, and cure-time guidance as a single coordinated service.
Look for three credentials when evaluating contractors: verifiable insurance and liability coverage, manufacturer training certifications from major finish brands, and at least five years of refinishing-specific experience (not just general carpentry). Always request three local references from projects completed 2–3 years prior — finish quality only reveals itself after a full weather cycle.
When a project’s scope exceeds what a weekend allows, working with professional deck refinishing services from a vetted local contractor delivers warranty-backed prep, manufacturer-approved product application, and the consistent finish quality that protects your investment for years.
Conclusion
Deck refinishing combines stripping, sanding, and finishing into one structured service that restores both appearance and weather protection without the cost or disruption of replacement.
Done correctly — at the right time, with the right products, and with proper prep — refinishing extends your deck’s useful life by five to ten years for a fraction of replacement cost.
We help homeowners and property managers across the country find vetted, insured deck refinishing professionals who deliver lasting results. Connect with Mr. Local Services to get matched today.
Frequently Asked Questions
How often should a deck be refinished?
Most wood decks need refinishing every 3–5 years, though pressure-treated lumber in dry climates can extend to 7 years. The actual timing depends on finish type, sun exposure, and water-bead test results.
Can I refinish a deck without sanding?
Sometimes — penetrating stains over previously stained wood can be cleaned, brightened, and recoated without sanding. But film-forming finishes, painted surfaces, and rough or weathered wood almost always require sanding for proper adhesion.
Is it worth refinishing an old deck?
Yes, if the structure is sound. Refinishing typically costs one-fifth of replacement and adds 5–10 years of life. If joists, ledger boards, or footings are compromised, repair or replace those first.
How long does deck refinishing take?
A typical 300–500 square foot deck takes 3–5 days for professionals, including prep, application, and cure time. DIY projects usually stretch to 5–10 days across multiple weekends.
Can you refinish a deck in one day?
For small decks with minimal prep, a single-day refinish is possible — clean, brighten, and apply stain. Full strip-sand-refinish projects require multiple days due to drying and cure requirements.
What is the best time of year to refinish a deck?
Late spring and early fall are ideal in most regions — moderate temperatures, low humidity, and minimal rain risk. Avoid hot summer afternoons when finishes flash-dry and winter months when temperatures fall below product minimums.
How much does it cost to refinish a 400 square foot deck?
Professional refinishing of a 400 square foot deck typically runs $800–$2,400 depending on prep complexity and regional labor rates. DIY material costs range $200–$500 plus 30–50 hours of labor.