Deck installation is the complete, ground-up process of constructing a deck — encompassing site preparation, footing and foundation work, structural framing, surface board installation, railing and stair assembly, and all finishing details — typically completed over one to three weeks depending on size and site conditions.
Installing a deck correctly from the very start prevents structural failures, code violations, and premature deterioration — mistakes made during the foundation or framing phase are rarely inexpensive to correct later.
This complete guide covers every phase of deck installation: planning, site preparation, footings, framing, board installation, railings, final finishing steps, material selection, cost estimates, permits, contractor hiring, and long-term care.
What Is Deck Installation? Understanding the Full Process
Deck installation is the construction of an entirely new deck structure from the ground up. It is distinct from deck repair (addressing specific component failures), deck replacement (demolishing an existing structure and rebuilding), and deck restoration (refinishing an existing surface). Installation always starts from bare ground and ends with a complete, code-inspected structure.
Every deck installation shares the same fundamental three-layer architecture: the foundation system (footings, posts, and post bases), the structural frame (ledger board, beams, and joists), and the surface system (decking boards and fasteners). Railings, stairs, lighting, and fascia form the fourth layer — the safety and finishing layer installed last. Each layer depends on the accuracy of the one beneath it, which is why installation always proceeds in a fixed sequence and why errors at foundational phases are so costly to correct.
The scope and complexity of any installation varies significantly based on several key variables:
- Attachment type: Attached decks connect to the house through a ledger board; freestanding floating decks are structurally independent, sitting on their own foundation without any connection to the structure.
- Height above grade: Ground-level decks (under 30 inches) carry different code requirements than elevated decks. Second-story decks require engineered structural plans and more robust framing systems throughout.
- Material selection: Pressure-treated lumber, composite, PVC, cedar, and tropical hardwoods each install with different techniques, fastener systems, gap requirements, and substructure compatibility rules.
- Site conditions: Flat lots, sloped terrain, rocky or expansive soil, high water tables, and urban setbacks each introduce distinct preparation and engineering requirements before framing can begin.
Freestanding floating decks follow a distinct installation sequence — one that eliminates the ledger attachment phase but introduces its own surface footing and structural layout considerations; our forthcoming floating deck installation guide will cover the full process for freestanding builds, including surface footing placement, joist sizing for unattached structures, and the key differences from attached construction.
For a complete orientation to the installation process — including a glossary of essential terms, a week-by-week project timeline, and a phase-by-phase overview of what to expect at each stage — our guide to the deck installation process and fundamentals covers every element in depth so you can approach your project fully informed.
Before You Start: Planning Your Deck Installation
No deck installation succeeds without sound pre-construction planning. Before any site work begins, homeowners need three things in place: a finalized deck design, a confirmed material specification, and all required permits secured — or at minimum, the permit application submitted and under review.
Design decisions made before construction begins cost nothing to change. The same decisions made during active construction can cost thousands of dollars in rework. The deck’s size, shape, height, feature list, and how it connects to the house directly determine the scope of every installation phase that follows — how many footings are required, what beam and joist sizes are appropriate, which railing system integrates with the chosen layout, and how stairs work with the existing grade elevation.
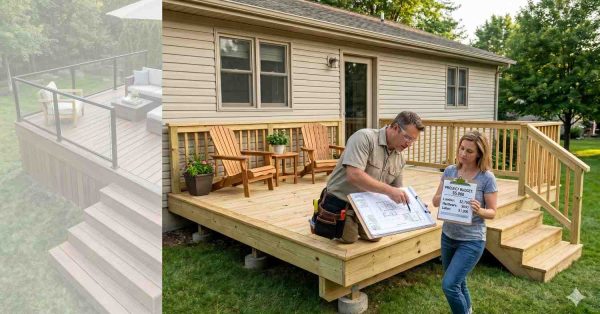
Budget planning is equally foundational. NADRA (the North American Deck and Railing Association) consistently identifies deck construction as one of the top-returning home improvement investments in the country, with material selection representing the single largest driver of total project cost. Setting a realistic budget ceiling before the design is finalized prevents the most common planning mistake: designing more deck than the project budget can support, then having to value-engineer it downward under contractor pressure.
A professional design consultation, a detailed DIY sketch with confirmed square footage, or a digital deck design tool are all valid starting points. What matters is that key decisions — deck shape, height, orientation, material type, and feature list — are locked in before contractor bids are solicited. Changing scope after bids are received typically doubles the cost of every change.
For homeowners who haven’t yet finalized their design, our deck design and planning guide covers how to establish a realistic scope, select the right shape and layout for your property, work with deck designers or design-build firms, and make decisions that hold up through every phase of the build.
Step 1 — Site Preparation for Deck Installation
Site preparation is the first physical phase of any deck installation — and one of the most consistently underestimated. Done thoroughly, it ensures the entire build proceeds on stable, properly measured, safely prepared ground. Done poorly, the problems that emerge — unexpected utility conflicts, inadequate drainage, imprecise footing placement — compound through every subsequent phase of the project.
Utility locates always come first. Before any ground is broken, contractors are legally required to call 811 — the national one-call service that coordinates underground utility marking across all 50 U.S. states. Gas lines, water mains, electrical conduit, communication cables, and irrigation lines all run below grade on most developed residential properties. A utility strike creates dangerous emergencies, regulatory violations, and expensive delays. This step is non-negotiable regardless of how well you think you know your property.
Layout strings establish the project’s precision. After utility marks are set and reviewed, batter boards and mason’s line strings are used to establish the exact deck footprint on the ground — pinpointing precisely where every footing hole will be excavated. Errors introduced at this stage compound through every subsequent phase: a footing placed two inches off marks a post position off, which marks beam bearing off, which affects board alignment at the surface. Checking diagonals before excavation begins confirms the layout is square.
Grading and drainage protect the structure’s long-term integrity. Ground beneath a deck should slope away from the house at a minimum of 1/8 inch per foot. Standing water under a deck accelerates decay in the substructure, undermines soil stability around footings, and creates conditions that attract insects and mold. Sites that don’t drain naturally may require grading work, French drain installation, or compacted gravel base preparation before construction is appropriate.
Vegetation clearance and soil assessment complete the preparatory work. Organic material — tree roots, sod, mulch, decomposing fill — beneath a deck settles unevenly over time. Expansive clay soils, loose fill zones, and soft spots all affect how footings must be sized and positioned. A brief visual soil assessment — or a formal test for larger or elevated projects — identifies site conditions that require engineering input before work begins.
During this phase, it’s also worth considering the safety protocols that govern groundwork activities — including awareness of overhead electrical clearances during post-setting, proper trenching practices, and tool safety for excavation work; our upcoming deck installation safety guide addresses these safety considerations for both homeowners overseeing projects and contractors working on site.
For a complete, step-by-step breakdown of every site preparation task — from utility locates and layout string setup to grading, soil testing, vegetation removal, and the pre-installation inspection checklist — our full guide to site preparation for deck installation explains each task in enough detail that nothing is overlooked before the first footing is poured.
Step 2 — Footings and Foundation Installation
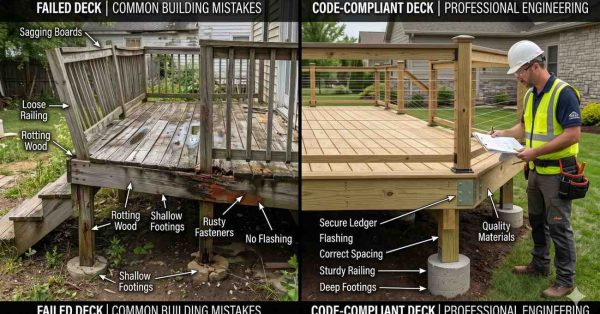
Footings are the most structurally critical components of any deck. They transmit the total load of the structure — surface boards, framing, railings, furniture, occupants, and environmental loads including snow — downward through posts and into stable soil below frost depth. Undersized, improperly spaced, or shallowly placed footings are the primary structural cause of serious deck failures.
Frost depth governs footing depth in all freeze climates. When soil freezes in winter, the expanding ice generates powerful upward forces called frost heave, which are capable of lifting and displacing foundations. To prevent this, deck footings must extend below the local frost line — the depth at which soil freezes in that jurisdiction. This depth ranges from 0 inches in southern coastal states to 48 inches or more in northern regions. Your local building department specifies the required depth; it is a mandatory engineering dimension that cannot be estimated or compromised.
The two dominant residential footing systems each have distinct applications:
- Concrete footings in tube forms (Sonotubes): Round cardboard tube forms are set in excavated holes, filled with poured concrete, and allowed to cure before post bases are installed. This is the most widely used system for residential deck construction — cost-effective, code-compliant when properly sized, and adaptable to the vast majority of residential soil conditions. Footing diameter and depth are calculated based on the tributary load area and the soil’s bearing capacity.
- Helical screw piles: Galvanized steel piers are mechanically screwed into the ground without excavation or poured concrete. Preferred for difficult-access sites, steeply sloped terrain, expansive soils, or projects where minimizing ground disturbance is a priority. Faster to install than concrete footings but typically more expensive per pier; they are increasingly common in regions with challenging site conditions.
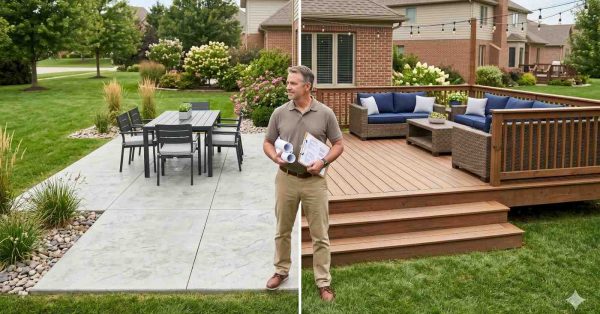
Surface footings — precast concrete deck blocks placed on compacted gravel without deep excavation — represent a distinct and limited category. These are only appropriate for freestanding, low-to-grade, lightly loaded decks in climates with minimal frost depth, and only where local codes expressly permit them. They are never appropriate for attached decks, any elevated deck, or any deck requiring a building permit for structural work.
Post base hardware is now the standard practice for connecting posts to footings, replacing the older method of embedding post wood directly into concrete. Post bases keep the wood above the footing surface, allow for air circulation at the post base, and permit post replacement without disturbing the footing — a significant long-term maintenance advantage.
For everything from concrete footing sizing tables, helical pile installation details, sonotube selection guidelines, frost-line depth by state, and the most common footing installation mistakes to avoid, our comprehensive guide to deck footings and foundation installation is the definitive technical reference for this phase of the build.
Step 3 — Deck Framing Installation
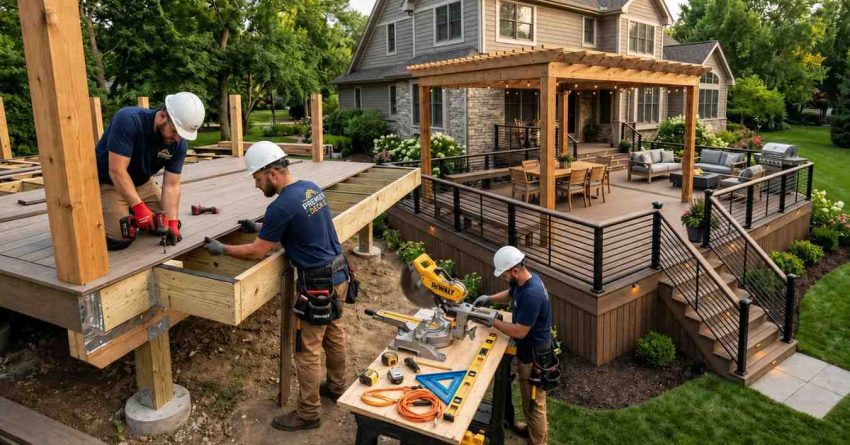
With footings cured and post bases set, framing begins — the structural skeleton that carries every load above it down to the foundation system. The framing consists of the ledger board (for attached decks), posts, beams, joists, blocking, and metal connector hardware. Built correctly, framing is invisible beneath the finished deck surface but determines how the deck performs, feels underfoot, and holds up through decades of seasonal movement.
The ledger board is the most failure-prone component in residential deck construction. It is the horizontal structural member that attaches the deck frame to the house — fastened through the home’s rim joist or band joist and into the structural framing behind it. Improper ledger attachment is the leading documented cause of catastrophic deck collapse incidents in the U.S. The failures are almost always traceable to one of three causes: insufficient fasteners, missing or incorrectly installed flashing, or attachment to inadequate structure such as fascia boards rather than solid structural framing.
Ledger flashing is the water management membrane installed between the ledger and the house. Without it, water infiltrates the house framing at the junction, causing concealed rot that can spread for years before detection. Proper flashing must be installed before the ledger is bolted in place, must lap over the sill plate, and must extend beneath the siding above the ledger. It is both a code requirement and the most important moisture protection detail in any attached deck build.
Beams span between posts and carry the joists. Beam sizing is determined by the span between posts, the tributary joist span, and the expected structural load. Most residential beams are either built-up from multiple 2x lumber members or engineered LVL (laminated veneer lumber) for longer spans. Beams are set in post-beam connector hardware rather than notched into post tops — a practice that creates a positive, code-compliant connection.
Joists span between the ledger and the opposite beam, typically spaced 12 or 16 inches on center. Joist span tables in the IRC specify the maximum joist span for each combination of lumber species, dimensional size, and on-center spacing. Joist hangers — metal connectors that support joist ends at ledger and beam connections — are required at every joist connection point. Blocking (perpendicular pieces installed between joists at mid-span) prevents lateral rotation called joist buckling and is code-required for most spans.
Some of the most significant — and most expensive — installation mistakes occur in this framing phase, particularly around ledger attachment, joist hanger installation, and the failure to install required blocking; our upcoming deck installation mistakes to avoid catalogs the most common structural, code, and workmanship errors in detail, explaining exactly how each one happens and how to prevent it before it becomes a structural or inspection failure.
For complete technical guidance on ledger board attachment protocols, flashing installation step by step, beam sizing, joist spacing, hanger selection, blocking requirements, cantilever limits, and post plumbing techniques, our deck framing installation guide covers every structural connection in the detail this phase demands.
Step 4 — Decking Board Installation
With framing complete, the most visible phase of the installation begins. Decking board installation transforms a bare structural skeleton into a usable outdoor surface — and the decisions made at this stage (material, board pattern, fastener system, and gap spacing) determine what homeowners see and experience for the life of the deck.
Material selection shapes the entire installation approach. The surface material must be confirmed before any decking-phase decisions are made, because pressure-treated lumber, composite, PVC, cedar, and tropical hardwoods all install with different techniques, different gap specifications, and different hardware requirements:
- Pressure-treated boards should be allowed to dry after installation before staining; they may shrink as moisture content equalizes, so initial spacing must account for this movement. Face screwing is the standard fastening method.
- Composite boards require manufacturer-specified joist spacing (typically 12 or 16 inches depending on the product line), precise gap dimensions for drainage and thermal expansion, and compatible hidden fastener systems to maintain warranty validity.
- PVC decking expands and contracts more than composite per degree of temperature change; gap calculations must account for air temperature at the time of installation and the product’s published thermal coefficient.
- Tropical hardwoods such as Ipe, Cumaru, and Tigerwood require pre-drilling at every fastener location to prevent splitting, and often benefit from end-sealing and oil treatment before or during installation to control checking.
Hidden fasteners vs. face screwing is the primary fastener decision:
- Face screwing drives screws through the visible top face of each board. Faster and less expensive to install, but leaves visible fastener heads on the walking surface. Countersunk screws with color-matched plugs can partially reduce their visibility.
- Hidden fastener systems use clips or biscuit-style connectors that attach boards from their grooved side edges, creating a completely fastener-free surface. Most composite and PVC boards are manufactured with compatible grooved edges. Hidden fasteners typically add $1–$3 per square foot to installation cost but significantly improve the finished appearance.
Board layout and run direction affect appearance, material yield, and installation time. Parallel runs (boards running perpendicular to the house) are the default orientation. Diagonal patterns add visual energy but increase material waste by 15–20% and require additional cuts. Picture-frame borders require mitered corner joints and additional perimeter stock.
Gap spacing is a critical and material-specific requirement. Wood boards need approximately 1/8-inch gaps for drainage and seasonal movement. Composite and PVC boards follow manufacturer-specified gaps — typically 3/16 to 1/4 inch. Installing boards with no gap traps moisture, restricts drainage, and leads to premature deterioration regardless of material type.
For material-specific installation instructions, fastener system comparisons, pattern layout calculations, and detailed guidance on working with composite, hardwood, pressure-treated, and PVC boards, our complete resource on decking board installation methods covers every technique needed for a clean, long-lasting surface.
Step 5 — Railing and Stair Installation
Railings and stairs are the final major structural systems in a deck installation — and among the most strictly regulated by building codes. Getting them right is simultaneously a legal obligation, a safety requirement, and one of the primary visual statements the finished deck makes.
When guardrails are required by code. Under the International Residential Code (IRC), a guardrail is required on any deck surface 30 inches or more above adjacent grade. Required minimum height is 36 inches for decks below 30 feet in elevation and 42 inches above that threshold. Baluster spacing must prevent passage of a 4-inch sphere — a child safety standard that governs infill selection across all railing systems. Any railing post connection must resist a 200-pound lateral load applied at the top of the post.
Railing systems for residential decks span from traditional wood construction to contemporary engineered options:
- Wood post-and-rail: Cedar, redwood, or pressure-treated posts with horizontal rails and wood balusters. The most cost-effective and customizable system; requires regular maintenance to prevent finish deterioration.
- Cable rail: Stainless steel cables tensioned horizontally or at angles between posts. Preserves views, meets code when properly designed and tensioned, but requires periodic re-tensioning as cables relax after initial installation.
- Glass panel railing: Tempered glass panels in aluminum or structural wood frames. Maximum sightline preservation; requires precisely engineered post connections and appropriate glass specification for the application.
- Composite railing systems: Pre-engineered kits from composite manufacturers (Trex, TimberTech, Fiberon) that coordinate aesthetically with matching deck boards and arrive with engineered post connections.
- Aluminum railing: Powder-coated aluminum posts and rails. Highly durable, dimensionally stable across temperature ranges, low-maintenance, and available in a wide range of profiles and colors.
Stair construction is the most mathematically precise element of any deck installation. Stair stringers — the diagonal structural members that support treads — must be calculated to produce IRC-compliant rise-and-run dimensions (maximum 7-3/4 inch rise, minimum 10-inch run per tread), then cut precisely from 2×12 stringer stock. Stringers are anchored at the top to the deck frame and at the bottom to a concrete landing pad or grade-level footing. Consistency between treads matters: even a 3/8-inch variation in rise between steps is a tripping hazard and a code violation.
Newel post anchoring is a frequently underbuilt detail. Newel posts at stair tops and bottom landings must resist significant lateral loads from occupants gripping handrails. Through-bolting into the deck frame or stringer structure — rather than toe-screwing to the rim joist — is the code-appropriate connection method in most jurisdictions.
For complete guidance on cable rail tensioning specifications, glass panel system requirements, composite railing assembly, stair stringer layout calculations, newel post anchoring methods, code-compliant handrail requirements, and ADA-compliant ramp installation options, our full guide to deck railing and stair installation addresses every component of this phase in detail.
Final Installation Steps: Finishing Touches and Inspection
Once structural work is complete and all boards, railings, and stairs are installed, the finishing phase covers the details that define how the project looks from the exterior, how well it performs through weather cycles, and whether it satisfies the final building inspection.
Fascia boards wrap the exposed rim joists and perimeter framing, giving the deck a clean, finished appearance when viewed from grade level. Fascia is typically the same material as the deck surface — composite fascia with composite builds, matching wood with wood builds. Properly installed fascia includes small gaps at outside corners to allow for thermal expansion and to prevent moisture trapping at end-grain contact points.
Skirting fills the open gap between the deck frame and the ground. Options include lattice panels, horizontal or vertical boards, composite panels, or solid material. Whatever the material, skirting must include ventilation provisions — typically gaps or louvered sections — to allow air circulation that prevents moisture buildup in the under-deck cavity.
Post caps and trim finish exposed post tops and framing end grain. Post tops are particularly vulnerable moisture entry points on wood decks; properly installed post caps redirect water off the top of the post and provide a finished decorative detail.
Under-deck drainage systems redirect rainwater from the deck surface away from the under-deck space, allowing a covered, dry area beneath elevated decks. Installed beneath the decking boards and integrated with a perimeter channel, these systems are an increasingly popular upgrade for elevated decks. They must be planned and installed before or during the framing phase, not added retroactively.
Deck lighting — stair riser lights, post cap fixtures, recessed in-deck floor lights, or pathway lighting — is installed during the finishing phase. Low-voltage transformer systems are the most common approach; any hardwired circuits require coordination with an electrical permit and must be covered under the building inspection.
The final inspection and punch list represent the last opportunity to verify every element of the installation before final payment is released. A complete punch list covers: fastener heads flush and consistent across all surfaces, board gaps at specification, railings passing the 4-inch sphere test, all joist hanger flanges properly nailed, stair rises and runs consistent, ledger flashing lapped correctly, and all post bases properly torqued. The building department’s final inspection certifies all structural work and closes the permit.
For detailed guidance on fascia installation, skirting options, under-deck drainage system comparisons, deck lighting installation, the complete pre-payment punch list, and what inspectors verify during the final structural walkthrough, our full guide to final deck installation steps ensures no finishing detail is missed at project closeout.
Choosing the Right Materials for Your Deck Installation
Material selection is one of the most consequential decisions in any deck installation project — it directly determines cost, maintenance requirements, expected lifespan, installation complexity, and the aesthetic character of the finished deck. The right choice depends on your climate, budget, design goals, and realistic assessment of how much ongoing maintenance you will actually perform year after year.
Primary surface material comparison:
| Material | Typical Lifespan | Installed Cost / Sq Ft | Maintenance Level | Best Application |
| Pressure-Treated Lumber | 15–25 years | $15–$25 | Moderate — annual sealing | Budget-focused builds |
| Cedar or Redwood | 15–20 years | $20–$35 | Moderate | Natural wood aesthetics |
| Capped Composite | 25–30+ years | $25–$45 | Low — annual cleaning | Low-maintenance priority |
| PVC Decking | 30–50 years | $30–$55 | Very Low | Wet climates, pool decks |
| Tropical Hardwood (Ipe) | 40–50+ years | $30–$60+ | Moderate — periodic oiling | Premium durability builds |
Substructure material is equally important and frequently underestimated in project planning. Posts, beams, and joists that fail beneath composite boards create a structural crisis just as serious as failed boards. Most installations specify pressure-treated lumber for all substructure framing — ACQ, MCA, or CA treatments for above-ground applications, with ground-contact-rated lumber required for any wood in direct contact with concrete, masonry, or soil.
Hardware compatibility is a hidden performance variable. Modern ACQ and MCA pressure-treated lumber is corrosive to standard hot-dipped galvanized fasteners and connector hardware when moisture is present. For any deck built with these treatments — which represents the majority of modern residential substructure — stainless steel or hot-dipped galvanized hardware rated for treated lumber contact is the correct specification. Using incompatible hardware with treated lumber can produce accelerated corrosion and fastener failure within three to five years.
For comprehensive side-by-side comparisons of all major decking surface materials — including lifespan data, climate-specific recommendations, substructure compatibility guidelines, fastener specifications, railing choices by material tier, and per-square-foot cost benchmarks — our complete deck materials guide is the definitive reference before committing to your installation’s material specification.
Deck Installation Cost, Timeline, and Hiring a Contractor
Average Deck Installation Cost
Professional deck installation costs vary substantially based on material selection, project size, site conditions, deck height, and regional labor markets. According to cost data from Angi, the national average for professional deck installation ranges from approximately $4,000 to $11,000 for a standard 200–400 square foot residential project, with premium materials, complex designs, and elevated builds frequently exceeding $20,000–$35,000.
Approximate installed cost ranges by primary surface material:
- Pressure-treated lumber: $15–$25 per square foot installed
- Composite (capped): $25–$45 per square foot installed
- PVC decking: $30–$55 per square foot installed
- Tropical hardwood (Ipe, Cumaru): $30–$60+ per square foot installed
Labor consistently represents 40–60% of total project cost, with the balance in materials. Site access difficulty, deck height above grade, design complexity, and regional labor costs all influence the final number. Permits, utility locates, and demolition of an existing structure (if applicable) add additional line items that are sometimes omitted from early-stage budget estimates.
How Long Does Deck Installation Take?
Typical project timelines by scale:
- Ground-level floating deck under 200 sq ft: 2–3 days
- Standard attached deck, 200–400 sq ft: 1–2 weeks
- Multi-level or complex design, 500+ sq ft: 2–4 weeks or more
These estimates assume no weather delays, standard permit processing timelines, and readily available materials. Composite decking is typically available within days; specialty tropical hardwoods can carry 2–4 week lead times that must be built into project scheduling.
Hiring a Deck Installation Contractor
Selecting the right contractor is as consequential as any technical installation decision. Evaluating them properly protects both your investment and your safety.
- Verify licensing and insurance. Confirm state contractor licensing, general liability insurance at a minimum of $1 million per occurrence, and active workers’ compensation coverage before signing any agreement.
- Review a deck-specific portfolio. Ask to see completed projects comparable to yours in size, material, and complexity. General contractors without specific deck experience frequently miss material-specific installation details that affect long-term performance.
- Require a detailed written scope. A legitimate bid specifies materials by grade, treatment, and species; hardware specifications; framing dimensions; railing system details; and which party is responsible for pulling permits. Vague scopes produce disputes during construction.
- Confirm permit responsibility in writing. The contractor must pull all required building permits and manage all inspection phases. Any contractor who resists pulling permits for structural work should be disqualified immediately.
- Evaluate the payment schedule. A reasonable deposit is 10–30% of the contract total. Requests for 50% or more upfront before work begins are outside the norm for legitimate residential construction.
For a full breakdown of average labor rates by state, how to compare and evaluate multiple contractor bids, what a fair payment schedule looks like for projects of different sizes, and what a proper deck installation warranty should cover, our guide to deck installation cost and hiring provides everything you need to make confident, well-informed financial decisions from the first contractor call.
Deck Permits, Codes, and Safety Requirements
Deck installation is a permitted construction activity in virtually every jurisdiction across the United States. Building without the required permits creates serious, compounding long-term risks: mandatory disclosure obligations when selling the property, homeowner’s insurance complications in the event of a deck-related claim, municipal correction or demolition orders, and — most critically — structural risk from work that was never independently inspected by a licensed building official.
When a permit is required. Any attached deck, any deck 30 inches or more above grade, and most structural modifications to an existing deck require a building permit. Some jurisdictions exempt very small, ground-level, freestanding decks that fall below specific size thresholds, but those thresholds vary significantly by municipality. When there is any uncertainty, the correct answer is to apply for the permit.
The permit application typically requires a site plan showing the deck’s location relative to property lines and required setback distances, structural drawings showing footing depth and diameter, framing member sizes, hardware specifications, and railing details, plus an electrical plan for any hardwired lighting. Most jurisdictions process residential deck permits in two to six weeks; some offer expedited review tracks for an additional fee.
Key IRC requirements applicable to most residential deck installations:
| Requirement | IRC Specification |
| Footing depth | Must extend below local frost line |
| Ledger attachment | Code-approved lag screws or through-bolts at IRC-specified intervals |
| Joist span | Per published span tables by species and on-center spacing |
| Railing height | 36 inches minimum (below 30 ft elevation); 42 inches above |
| Baluster spacing | 4-inch sphere must not pass through any infill opening |
| Stair rise/run | Maximum 7-3/4 inch rise; minimum 10-inch run per tread |
| Lateral load connection | Deck must provide code-compliant lateral load transfer to house |
Building inspections typically occur at three required phases: before footing concrete is poured (to verify depth and diameter), before decking boards are installed (framing inspection), and after all work is complete (final inspection). All three must pass for the permit to be formally closed.
For a complete explanation of the permit process from application to final approval, what belongs in a complete permit application package, how to navigate the three inspection phases, state-by-state permit cost ranges, and the legal and financial risks of unpermitted deck construction, our guide to deck permits and building codes explains the full regulatory framework every homeowner should understand before installation begins.
After Installation: Caring for Your New Deck
A professionally installed deck is a significant property investment — and like any investment, its return is directly tied to how consistently it is maintained after construction. Maintenance requirements vary by material, but foundational care practices apply to every deck regardless of what it is built from.
Composite and PVC decks require the least maintenance of any surface material. Annual cleaning with a composite-safe deck cleaner removes accumulated dirt, mildew film, and tannin staining from leaf and pollen debris. Most composite manufacturers recommend an annual fastener and hardware inspection to identify any connections that may have worked loose through seasonal movement.
Pressure-treated wood decks require more consistent attention to reach their potential lifespan. New pressure-treated decks should be allowed to dry for 60–90 days before the first stain or sealer is applied — premature staining over unseasoned wood traps moisture inside the lumber. After the initial curing period, a quality semi-transparent or solid stain protects the surface from UV degradation and moisture infiltration, and should be reapplied every two to three years depending on sun exposure and climate intensity.
All decks, regardless of material, benefit from an annual inspection of the ledger flashing and post-to-footing connections for signs of moisture infiltration, a verification that all railing posts remain secure under lateral loading, and confirmation that the deck surface is draining properly without any areas of persistent standing water. Ignoring early signs of fastener loosening, surface checking, or drainage issues allows small problems to compound into costly repairs over time.
For a complete seasonal maintenance calendar, material-specific care guidelines, recommended cleaning products by surface type, staining and sealing frequency guidance, and an annual structural inspection checklist that catches small issues before they become expensive repairs, our deck maintenance and care guide is the complete resource for protecting your installation investment over the long term.
Conclusion
Deck installation is a connected sequence of phases where precision at every stage determines the safety, longevity, and value of the finished structure.
Understanding the full installation sequence — from site prep and footings through framing, board installation, railings, and finishing — helps homeowners evaluate contractors and protect their investment.
When you’re ready to move forward, Mr. Local Services connects you with vetted deck installation professionals who deliver quality workmanship, transparent pricing, and dependable results.
Frequently Asked Questions
How long does it take to install a deck?
A standard 200–400 square foot attached deck typically takes one to two weeks from start to final inspection. Complex or larger projects can take three to four weeks.
Do you need a permit to install a deck?
In most U.S. jurisdictions, a permit is required for any attached deck or any deck 30 or more inches above grade. Confirm requirements with your local building department before starting.
What is the most durable material for deck installation?
Capped composite and PVC decking offer the longest low-maintenance lifespan at 25–30+ years. Tropical hardwoods like Ipe can last 40+ years with proper periodic oiling and care.
How much does professional deck installation cost?
Professional installation costs $15–$25 per square foot for pressure-treated wood, $25–$45 for composite, and $30–$60+ for hardwood. A standard 200–400 square foot project typically runs $4,000–$11,000.
What is the most important part of deck installation?
The footing system is most structurally critical. Undersized, improperly spaced, or shallowly placed footings are the leading cause of serious deck structural failures and are difficult to correct after construction.
Can I install a deck myself, or should I hire a professional?
Experienced DIYers can build simpler ground-level decks. Elevated, attached, or complex designs that require permits, engineered footing plans, or ledger attachment are best handled by licensed professionals.
What should I look for when hiring a deck installation contractor?
Verify licensing, general liability insurance, and workers’ compensation. Ask for a detailed written contract, deck-specific references, and confirmation that the contractor will pull all required permits and manage inspections.