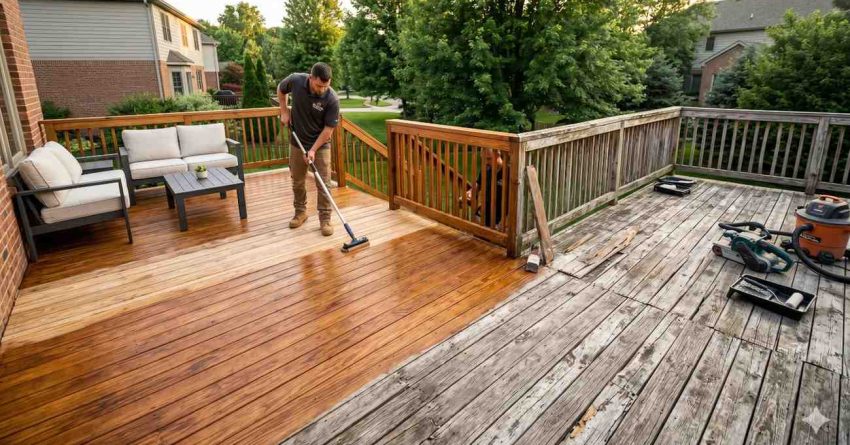
Deck restoration is the structured process of cleaning, repairing, sanding, and refinishing a weathered deck to extend its lifespan and restore its appearance — without rebuilding the structure. For homeowners, landlords, and property managers, it is often the most cost-effective way to recover years of outdoor living from an aging deck.
Ignoring a deteriorating deck does not just cost appearance; it accelerates rot, voids resale value, and creates real liability risks for property owners. Acting at the right moment matters.
This guide covers what restoration is, how it differs from refinishing and replacement, when a deck qualifies, the full process, cleaning, sanding, product selection, application, timelines, costs, and contractor decisions.
What Deck Restoration Actually Means
Deck restoration is a comprehensive rejuvenation process that returns a worn but structurally sound deck to a protected, attractive condition. It typically involves inspection, minor structural repair, deep cleaning, stripping old finish, sanding, and applying a new stain or sealer system.
Restoration sits between two extremes. On one side, simple cleaning and recoating handle decks that are only mildly weathered. On the other side, replacement is required when joists, ledgers, or framing have failed. Restoration captures everything in between — and that is where most aging residential decks land.
What restoration is not: it is not a quick power wash, not a single coat of stain over old finish, and not a cosmetic patch over structural problems. Skipping the prep stages or restoring a deck with hidden rot wastes both labor and product. To go deeper on terminology, scope, and what each phase actually accomplishes, our dedicated guide on what deck restoration involves breaks down every stage, terminology, and decision point in full detail.
Restoration vs. Refinishing vs. Replacement
These three terms get used interchangeably, but they describe very different projects with very different costs and outcomes.
Refinishing is the lightest option. It usually means cleaning the deck and applying a fresh coat of stain or sealer over the existing finish. It works only when the current finish is intact and the wood beneath is sound. Cost is low, and the project often completes in a weekend.
Restoration is the middle path. It strips, sands, and rebuilds the surface protection system from bare wood up. It also includes board-level repairs, fastener replacement, and addressing localized damage. Cost is moderate, and results typically last 3–7 years depending on product choice and climate.
Replacement removes the deck entirely — boards, frame, or both — and rebuilds from new materials. It is the only option when structural members are compromised. Cost is highest, but the result is a deck with a new full lifespan.
Each option serves a different stage of deck wear and a different budget reality, and our complete breakdown comparing restoration, refinishing, and replacement walks through cost ranges, lifespan gains, and the decision framework homeowners use to choose confidently.
Signs Your Deck Is Worth Restoring
A deck qualifies for restoration when the structure is sound but the surface has aged. The clearest indicators are graying or blackened boards, faded or peeling stain, surface splinters, minor cupping, and mildew that returns after cleaning. These are surface problems with surface solutions.
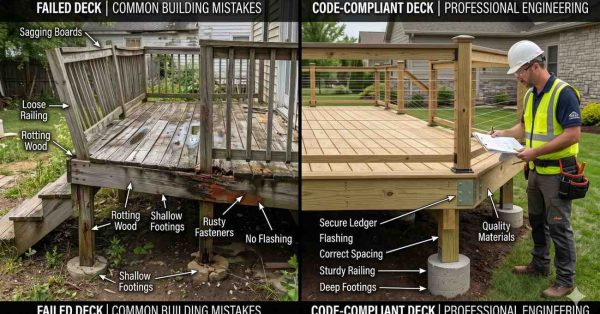
What disqualifies a deck is structural failure. Soft, spongy joists, rotted ledger boards, separated rim joists, footings that have shifted, or hardware that has corroded through all signal replacement territory. A useful threshold: if more than roughly 30–50% of the structural framing shows damage, restoration is the wrong investment.
Age alone is not a disqualifier. Decks built with quality pressure-treated lumber can often be restored after 15–20 years if maintenance has been reasonable. Conversely, a five-year-old deck installed without flashing or proper drainage can be beyond restoration. Not every aged deck is a good restoration candidate, which is why our resource on signs a deck is still worth restoring covers the inspection checkpoints, damage thresholds, and structural red flags that separate restorable decks from replacement-only ones.
The Deck Restoration Process Explained
A professional-grade restoration follows a predictable sequence, and each stage builds on the previous one.
Stage 1 — Inspection and Repair. Probe joists, ledger, posts, and beams for rot. Replace failed boards, tighten or replace fasteners, and address any structural concerns before any surface work begins. Restoring over hidden rot is a waste of money.
Stage 2 — Cleaning and Stripping. Remove dirt, mildew, tannin stains, and any failed finish. This often involves a percarbonate cleaner, a chemical stripper if film-forming stain is present, and a wood brightener to neutralize the surface and restore pH balance.
Stage 3 — Sanding. Once the deck is clean and dry, sanding removes raised grain, surface fuzz, and any remaining finish patches. Grit progression matters: too coarse leaves scratches that show through stain; too fine prevents penetration.
Stage 4 — Staining and Sealing. Apply the chosen finish system in proper conditions — temperature, humidity, and dryness all matter. Multiple thin coats outperform single heavy applications.
A successful restoration follows a predictable sequence, and the full deck restoration process explained step by step covers each phase with timing, tools, common mistakes, and what to inspect before moving to the next stage.
Cleaning and Stripping Your Deck
The cleaning stage removes years of biological and environmental buildup: mildew, algae, tannin bleed, iron stains, and weathered surface fibers. The right approach depends on what is currently on the deck.
For decks with no film-forming finish, a standard percarbonate or oxygenated deck cleaner is usually sufficient. For decks with intact stain or paint, a chemical stripper is required to break the bond and lift the existing coating. After either step, a wood brightener — typically oxalic acid — restores the wood’s natural color and prepares the surface for finish penetration.
Pressure washing is where most DIY restorations go wrong. Too much pressure (above roughly 1,500 PSI on softwoods), the wrong nozzle, or holding the wand too close gouges fibers and creates permanent damage that shows through any finish. Pressure washing is the most misused step in deck restoration, and our guide on pressure washing a deck the right way covers PSI limits, nozzle selection, tip distance, and the surface damage patterns that ruin otherwise solid wood.
Surface Preparation That Determines Success
Stain only performs as well as the surface beneath it. Sanding after cleaning and drying serves three purposes: it knocks down raised grain caused by water exposure, removes remaining finish residue, and creates a uniform texture that accepts stain evenly.
Most deck surfaces sand best at 60–80 grit. Finer grits close the wood pores and reduce stain absorption — a counterintuitive but well-documented effect. Spindles, balusters, and railings often need a finer grit (100–120) because they are touched more often.
Moisture content is the silent killer of restoration projects. Wood needs to dry to roughly 12–15% moisture content before finish application, which usually means 48–72 hours after cleaning in good weather. Applying stain to damp wood causes peeling within a single season. A pin-style moisture meter is a small investment that prevents large failures. Stain only performs as well as the surface beneath it, and our complete walkthrough on sanding a deck before restoration details grit progression, sander selection, dust management, and how to avoid the swirl marks that show through finish.
Choosing the Right Restoration Products
Product choice shapes both appearance and longevity. The first decision is opacity: transparent stains show the most wood grain but offer the least UV protection; semi-transparent stains balance grain visibility and protection; solid stains hide grain entirely and last longest but feel more like paint.
The second decision is chemistry. Oil-based stains penetrate deeply and weather gradually by fading rather than peeling, making future restoration easier. Water-based stains dry faster, clean up with water, have lower VOCs, and offer modern color stability — but film-forming versions can peel if applied incorrectly.
Thick deck resurfacers (sometimes called restore-it coatings) are a separate category. They fill cracks and create a textured surface, which can rescue badly worn decks cosmetically. They carry trade-offs: trapped moisture and difficult future maintenance. Product selection drives both appearance and longevity, and our annual review of the top deck restoration products reviewed compares performance data, coverage rates, and real-world durability across leading stain, sealer, and resurfacer brands.
Applying Stain and Sealer Correctly
Application is where good prep gets rewarded or wasted. Three application tools dominate: brushes work stain into the wood best, rollers cover quickly, and sprayers move fastest on large surfaces but always need to be back-brushed for even penetration.
Sequencing matters. Start with vertical surfaces — railings, spindles, posts — so drips fall onto unfinished decking that gets sanded or coated later. Then move to the deck surface, working in the direction of the boards and maintaining a wet edge to prevent lap marks. Apply thin coats; two thin coats outperform one heavy coat almost universally.
Weather conditions make or break the final result. Temperatures between 50°F and 90°F, humidity below 70%, no direct sun on the application surface, and at least 24–48 hours of dry weather afterward are the standard windows. Application technique determines whether a stain lasts two seasons or six, and our resource on proven deck stain application best practices covers brush vs. sprayer strategy, lap mark prevention, coat counts, and the wet-edge discipline professionals rely on.
Timeline, Tools, and What to Expect
A typical residential deck restoration runs 3–7 days from start to finish, including drying windows. A 300-square-foot deck might break down as one day for inspection and repair, one day for cleaning and stripping, two days of drying, one day for sanding, one day for first-coat application, and one day for the second coat and cleanup.
Essential tools include a moisture meter, random-orbit sander with multiple grits, stiff scrub brushes, garden pump sprayer for cleaners, pressure washer (used carefully), drop cloths, painter’s tape, application brushes and rollers, and adequate ventilation gear for chemical stripping.
Weather extends timelines more than any other factor. A single rainstorm during the dry-down phase can add 48 hours, and unexpected humidity can delay finish application by another day. Restoration timelines vary widely with deck size, weather, and finish type, and our breakdown of how long deck restoration actually takes provides realistic day-by-day schedules for DIYers and professional crews alike.
Cost of Deck Restoration and When to Hire a Pro
Professional deck restoration in the U.S. typically runs $3–$8 per square foot, putting a standard 300-square-foot deck in the $900–$2,400 range. DIY costs are lower in dollars — usually $200–$600 in materials — but higher in time, with weekend-warrior projects running 4–6 full working days.
Cost drivers include deck size, height (raised decks cost more), railing complexity, the condition of the existing finish, repair scope, product tier chosen, and regional labor rates. Stripping a heavily painted deck costs significantly more than restoring one with worn semi-transparent stain.
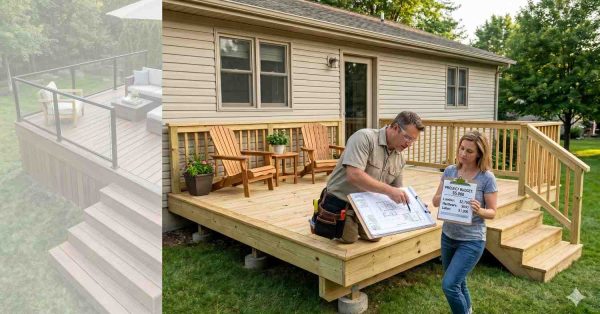
The DIY-versus-professional decision usually comes down to time, equipment access, and tolerance for redo risk. Restoration is forgiving of moderate skill but unforgiving of skipped steps. For homeowners and property managers who need consistent results, want warranty-backed work, or manage multiple properties, professional restoration delivers reliability that pays back over the deck’s remaining lifespan. Pricing varies more than most homeowners expect, and our detailed deck restoration cost per square foot guide breaks down labor rates by region, material costs, complexity surcharges, and the line items that drive quote differences.
Conclusion
Deck restoration brings together inspection, cleaning, surface preparation, product selection, and disciplined application into one structured process that extends a deck’s life by years.
Done at the right moment with the right approach, restoration is one of the highest-ROI projects in property maintenance — preserving curb appeal, protecting structural investment, and avoiding premature replacement costs.
We help homeowners and property managers restore decks the right way. Connect with Mr. Local Services to match with vetted local deck professionals who deliver quality results on schedule.
Frequently Asked Questions
How long does a deck restoration last?
A properly executed restoration typically lasts 3–7 years before recoating is needed. Premium oil-based stains and protected exposures last longest; transparent finishes and sunny southern exposures need attention sooner.
Can I restore a deck myself?
Yes, most homeowners can restore a deck with rented equipment and standard supplies. Plan on 4–6 working days and follow each prep stage carefully — skipped prep is the top cause of early failure.
What time of year is best for deck restoration?
Late spring and early fall are ideal. Look for several consecutive days of dry weather, temperatures between 50°F and 85°F, and humidity below 70% for the application window.
Do I need to strip the deck or just clean it?
If a film-forming stain or paint is peeling, stripping is required. If the finish has worn evenly and absorbed into the wood, deep cleaning followed by light sanding is usually enough.
How do I know if my deck is too far gone to restore?
Probe the joists, ledger, posts, and beams with a screwdriver. Soft, spongy wood, separated framing, or shifting footings indicate replacement territory. Surface damage alone is almost always restorable.
Will restoration change my deck’s color?
Yes, within limits. You can deepen tone, shift slightly warmer or cooler, or go from transparent to semi-transparent. Going significantly lighter usually requires stripping or solid-color stain.
Is restoration cheaper than replacement?
Almost always — typically 20–40% of replacement cost. Restoration is only the wrong financial choice when structural members have failed and require rebuilding.