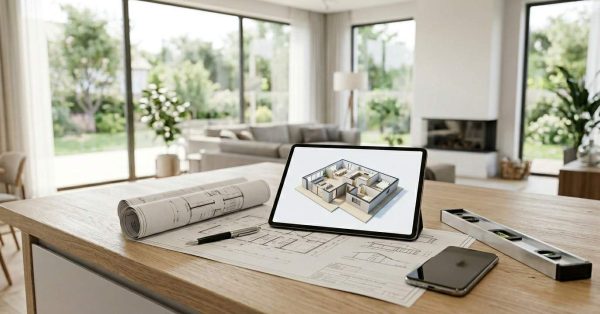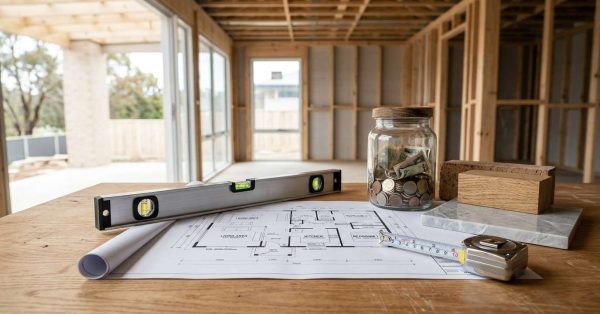

Remodeling planning and design is the structured process of translating your vision into detailed drawings and critical decisions, all made before any tool touches your home. It determines whether a project succeeds on time, on budget, and to your lasting satisfaction.
Skipping or rushing the planning and design phase is the costliest mistake any homeowner can make; every unclear decision made at design becomes a costly change order, delay, or dispute.
This guide covers the planning process, choosing your design team, reading drawings, defining style, building a material palette, lighting design, spatial flow, future-proofing, and the tools that keep decisions organized.
What Is Remodeling Planning and Design? Why It Comes First
Remodeling planning and design is the complete body of work that takes place before demolition begins. It includes defining your goals, selecting your design team, producing construction documents, making all material and finish selections, and securing the required permits. It is not a single meeting or a rough sketch on a napkin. At its full scope, the planning and design phase typically consumes 10 to 25 percent of the total project timeline, with larger and more complex remodels occupying the higher end of that range.
Why Planning Always Precedes Construction
The reason planning must come first is straightforward: decisions made on paper cost nothing to change. The same decision made in the field, after walls are framed and rough plumbing is in, can cost thousands of dollars and days of schedule. Every week invested in thorough planning returns multiple times that value in construction efficiency.
Industry research consistently demonstrates that projects with well-documented pre-construction planning experience far fewer change orders, schedule delays, and cost overruns than those where planning is compressed or treated as secondary to construction speed. For residential remodels, this principle applies at every scale, from a single bathroom update to a whole-home transformation.
The Planning-to-Design Continuum
Planning and design are not separate activities; they are a continuum. Planning starts with goal-setting and site analysis. Design translates those goals into drawings, specifications, and schedules. Both inform each other repeatedly throughout the pre-construction phase. A homeowner who treats them as one integrated process, rather than two sequential boxes to check, consistently achieves better outcomes and spends less money resolving conflicts that could have been anticipated in the design room.
The sections that follow cover each major component of this continuum in the sequence they occur during a well-run project.
The Remodeling Planning Process, Step by Step
The remodeling planning process begins well before any designer is hired. It starts with the homeowner doing internal work: defining what is driving the project, what the household genuinely needs versus what it wants, and what success looks like in concrete, measurable terms.
Setting Goals and Establishing Priorities
Every remodel starts with a trigger. It might be a growing family, an outdated kitchen that no longer serves how the household cooks, a desire to age in place comfortably, or a planned sale within three years. Whatever the trigger, it must be translated into specific, actionable goals. “We want a more functional kitchen” is a starting point. “We need a dedicated workspace for two cooks simultaneously, seating for six at the island, and a pantry system that replaces the current inadequate cabinet storage” is a goal a designer can work with.
Once goals are defined, they must be ranked. Not everything on the wish list will fit within the available budget, the project timeline, or the physical constraints of the existing structure. Knowing which outcomes are non-negotiable and which are aspirational prevents the budget conflicts and design paralysis that derail projects partway through.
The Wish List vs. Must-Have Method
One of the most effective tools in early planning is the formal separation of wish list items from true must-haves. A wish list captures every desire without filter. A must-have list distills that into the minimum set of outcomes that would make the project worthwhile. The gap between the two is where budget negotiation and phasing decisions happen.
This separation also gives the designer essential information. When a designer knows which elements are truly essential and which are flexible, they can engineer creative solutions that deliver maximum value within the available budget, rather than designing to an impossible brief and revising repeatedly.
Pre-Design Research and Existing Conditions Documentation
Before any design work begins, the existing conditions of the home must be thoroughly documented. This means measuring every room in the project scope, recording ceiling heights, identifying load-bearing walls, noting the locations of existing plumbing stacks, electrical panels, and duct chases, and understanding what local zoning regulations allow for the parcel.
Skipping this step produces designs that cannot be built as drawn. A kitchen layout that ignores the location of a plumbing stack requires a costly and time-consuming reroute. An addition that ignores setback requirements cannot receive a permit. Existing conditions documentation is the physical reality check that every design decision must pass before it moves forward.
The step-by-step remodeling planning process, covering goal-setting, the wish list method, site documentation, and the full pre-design research checklist, is covered in comprehensive detail in our dedicated remodeling planning process guide, which walks homeowners through every decision and task that must be completed before a single contractor is hired.
Choosing Your Design Team: Architects, Designers and Design-Build Firms
The design team is the most consequential hire of any remodeling project. The right professional does not simply produce drawings; they translate your goals into buildable solutions, anticipate problems before they arise, navigate code and permit requirements on your behalf, and coordinate with contractors to protect your interests throughout construction. Choosing the wrong professional, or choosing no professional at all for a scope that requires one, is among the most expensive errors a homeowner can make.
Architect vs. Interior Designer vs. Design-Build Firm
These three roles are distinct, and homeowners frequently confuse them. An architect is a licensed professional qualified to design structural changes, produce permit-ready drawings, and take professional liability for the structural integrity of their work. An interior designer focuses on spatial planning, finishes, furnishings, and the aesthetic experience of a space, but typically does not produce structural drawings. A design-build firm combines design and construction services under one contract, simplifying coordination but reducing the independent oversight a homeowner has over the contractor’s work.
The right choice depends on scope. Structural changes, additions, and whole-home remodels typically require an architect. Cosmetic and finish-focused remodels may be well-served by an interior designer or a design-build team. Many successful projects combine both, with an architect producing structural documents and an interior designer handling finishes and material specifications.
Understanding Design Fees and Contracts
Design professionals charge in three primary ways: a percentage of construction cost (typically 8 to 15 percent for full architectural services), an hourly rate (ranging from $75 to $300 per hour depending on experience and market), or a flat fee for a defined scope of services. Understanding what is and is not included in a design fee prevents costly surprises when the scope evolves during the design phase.
What to Expect During the Design Phase
A well-managed design phase moves through defined stages: schematic design, design development, and construction documents. Each stage requires homeowner review and approval before proceeding. The design phase is also when finish selections are made, product specifications are written, and permit documents are prepared.
Three-dimensional rendering and virtual walk-through technology have fundamentally changed how homeowners evaluate design options before construction begins, and our dedicated guide to remodel 3D rendering and virtual walk-throughs explains how to use these tools effectively during the design phase to validate spatial decisions before they are built.
Whether you are weighing an architect against a design-build firm or trying to understand when an interior designer adds real value, our complete guide to choosing a remodeling designer breaks down fee structures, service scopes, and the questions every homeowner should ask before signing a design agreement.
Construction Drawings and Project Documentation
Construction drawings are the legal and technical language of a remodeling project. They define what is to be built with enough precision that any qualified contractor can price and execute the work accurately. Understanding the documents your designer produces, and knowing what to look for in them, protects your interests throughout design review, bidding, and construction.
Floor Plans, Elevations and Sections
Floor plans show the layout of a space from above, indicating room dimensions, wall locations, door and window positions, and fixture placements. Elevations show the vertical face of a wall, cabinet bank, or exterior facade, capturing height dimensions and design details that a floor plan cannot convey. Sections cut through the building vertically to show how floors, walls, and roofs relate to one another structurally and spatially. Together, these three drawing types give a complete three-dimensional picture of the project that is interpretable by any trained contractor.
Beyond the graphic drawings, a complete construction document set includes schedules (tables listing every door, window, fixture, and finish by specification) and a written specification that supplements the drawings with material standards, installation requirements, and quality benchmarks.
Schematic Design vs. Construction Documents
Schematic design is the early-stage, approximate representation of a design idea. It establishes layout and spatial relationships but does not include the precision required for permitting or competitive bidding. Construction documents are the final, fully detailed drawings produced at the end of the design phase. Permit-ready plans meet the minimum technical requirements of the local building department. Bid-ready plans contain the additional specification detail that contractors need to produce accurate and comparable pricing.
Understanding what you are looking at, including floor plans, elevations, schedules of finishes, and permit-ready sets, is the focus of our in-depth resource on remodeling construction drawings, which explains every document type you will encounter from schematic design through to final permit submittal.
Defining Your Remodel Style and Aesthetic Vision
Design style is the visual language that gives a remodel coherence and longevity. It determines the proportions of mouldings, the choice of cabinet door profiles, the warmth or coolness of finishes, and the balance between ornamentation and restraint. Getting clear on your style before design work begins prevents the most common aesthetic problem in residential remodeling: an inconsistent mix of influences that feels unresolved and dates quickly.
How to Identify Your Style
Most homeowners start with inspiration images: saved photos, magazine clippings, or curated digital boards that capture spaces they respond to emotionally. The designer’s job is to analyze those images for common visual threads. Is the homeowner consistently drawn to warm wood tones and natural textures, or to crisp whites and clean geometries? Do the images feature ornate mouldings and layered textiles, or minimal hardware and unadorned surfaces?
Building a well-curated inspiration board before meeting with a designer is one of the highest-leverage activities in early planning, and our guide to remodel inspiration board best practices explains how to analyze and communicate your visual preferences in a way designers can translate directly into actionable design decisions.
Popular Remodeling Styles at a Glance
The dominant residential remodeling styles in the United States include modern farmhouse, transitional, traditional, mid-century modern, coastal, Japandi, minimalist Scandinavian, and industrial. Each carries defining material palettes, proportion rules, and spatial principles. Transitional is the most broadly appealing, blending traditional architectural detail with contemporary restraint; it consistently performs well in resale contexts across most markets. Modern farmhouse commands strong buyer attention in suburban settings. Mid-century modern suits open-plan layouts with generous glazing and low horizontal forms.
Timeless vs. Trendy Design Choices
The most durable remodeling advice is to build a timeless foundation and introduce current trends through accessories and easily replaced elements. Cabinet door profiles, flooring materials, and architectural mouldings should reflect enduring style principles. Hardware finishes, paint colors, and decorative lighting can express current trends without committing the structure to a look that will feel dated in five years.
From modern farmhouse to Japandi to transitional, every major design style applicable to residential remodeling is profiled with visual principles, key material choices, and practical guidance in our remodel style and aesthetic guide, giving you the vocabulary and framework to lock in a cohesive direction before design work begins.
Building a Cohesive Color and Material Palette
A cohesive material palette is what separates a remodel that looks professionally designed from one that feels assembled room by room. It means that the flooring, cabinetry, countertops, tile, paint, and hardware all feel like they belong to the same visual family, even as they vary appropriately from space to space throughout the home.
Whole-House Color Strategy and LRV
Whole-house color strategy begins with light reflectance value (LRV), a measurement on a 0-to-100 scale that indicates how much light a color reflects. Spaces with low natural light require higher-LRV paints to feel open and livable. Spaces with abundant natural light can carry lower-LRV colors without feeling dark or oppressive. Coordinating LRV across adjoining rooms creates a sense of visual continuity even when colors shift from space to space.
Most successful whole-house palettes operate within a limited range of hue families rather than attempting to match colors exactly from room to room. Warm whites, warm greiges, and muted earth tones dominate the most timeless residential interiors. Cool whites and blue-grays suit coastal and contemporary schemes. The consistent application of a chosen color temperature across a floor creates unity without monotony.
Coordinating Wood Tones and Metal Finishes
Wood tones and metal finishes must be coordinated rather than matched. A space with a single wood tone can feel monotonous; two or three complementary tones at different scales add depth and visual interest. The critical rule is to stay within a single temperature: mix warm wood tones (golden oak, honey maple, walnut) together, or cool wood tones (ash, white oak, painted maple) together, but avoid placing warm and cool woods in the same unbroken field of view.
Metal finishes follow the same logic. A cohesive metal palette typically employs one dominant finish applied to plumbing, cabinet hardware, and primary lighting, with one secondary accent finish used sparingly for contrast. Matte black as a dominant finish with unlacquered brass as an accent is a currently effective combination. Brushed nickel as a dominant finish with satin brass as an accent is a more broadly neutral pairing.
Coordinating paint colors, wood tones, tile selections, and metal finishes into a single cohesive story is one of the most underestimated skills in remodeling, and our comprehensive guide to building a whole-house color and material palette explains the LRV framework, warm-cool balance, and finish coordination strategies that professionals use on every project.
Lighting Design: The Layered Approach
Lighting is the element of remodeling design most commonly treated as an afterthought and most consistently responsible for disappointing results. Rooms that photograph beautifully and feel flat in person are almost universally under-designed in lighting. A professional lighting plan addresses three distinct layers: ambient, task, and accent, each delivered by different fixture types and placed on independent switching circuits.
Ambient, Task and Accent Lighting
Ambient lighting provides the general illumination of a space and is typically delivered through recessed downlights, surface-mounted fixtures, or indirect cove lighting. Task lighting provides focused light for specific activities: under-cabinet LED strips for kitchen prep surfaces, a well-placed vanity fixture at eye level for grooming, a reading sconce beside a bed. Accent lighting highlights architectural features, artwork, and textures through adjustable spotlights, picture lights, shelf lighting, and landscape lighting.
The most common lighting mistake in residential remodeling is relying on a single layer of recessed ambient downlights for all three functions. This approach produces a flat, uniformly bright space with no visual depth, no warmth, and no ability to shift the mood of the room for different activities and times of day. A properly layered plan assigns each layer to independently controlled circuits, allowing the same kitchen to feel bright and efficient during breakfast preparation and warm and intimate during a dinner party.
Color Temperature and CRI Basics
Color temperature, measured in Kelvin, determines whether a light source reads as warm (2,700 to 3,000K) or cool (4,000 to 6,500K). Residential living areas, bedrooms, and dining rooms almost universally benefit from 2,700K. Kitchens and bathrooms, where visual acuity for tasks matters more, work well at 3,000K. Color rendering index (CRI) measures how accurately a light source reveals the true colors of materials and finishes; any residential fixture should meet a minimum CRI of 90.
The full layered lighting design system, covering ambient, task, and accent placement, Kelvin color temperature choices by room, CRI standards, and dimmer compatibility, is covered in practical depth in our guide to layered lighting design for homeowners planning a remodel at any scale.
Planning for Flow, Function and Spatial Privacy
A remodel that looks beautiful but moves poorly is a daily frustration. Flow and function planning ensures that the way spaces are arranged serves the actual patterns of daily life in the household, rather than an idealized or photographically appealing version of how a home might theoretically be used.
Circulation Patterns and Clearances
Circulation planning maps the physical paths household members travel through the home during daily routines. The route from the garage entry to the kitchen. The connection between the master bedroom and its bathroom. The path from the back yard to the laundry room. Each path should be clear, logical, and wide enough to feel comfortable under actual conditions, including when carrying groceries, laundry, or furniture.
Building code requires a minimum of 36 inches for residential hallways and 42 inches for primary kitchen work aisles. In kitchens used by more than one person simultaneously, 48 inches should be the minimum target. Door swings, appliance clearances, and furniture zones all intersect with circulation paths. A design that ignores any one of these creates conflicts that will persist for the entire life of the renovation.
Indoor-Outdoor Connection
In climates that allow it, the relationship between interior living spaces and outdoor areas is one of the highest-value design considerations in residential remodeling. Wide sliding or folding door systems that open living rooms directly to covered patios or decks dramatically expand usable square footage and the perceived scale of the home, particularly for entertaining. The decision about where and how to create an indoor-outdoor connection must be made during the planning phase, not as a late addition, because it affects structural systems, flooring transitions, exterior waterproofing, and HVAC load calculations.
Acoustic and Visual Privacy
Open-plan layouts, which have become a default expectation in residential remodeling over the past two decades, sacrifice the acoustic and visual privacy that compartmentalized plans provide naturally. A successful open-plan design compensates through deliberate placement of visual buffers, the strategic use of partial-height walls or built-in cabinetry to define zones, material choices that absorb rather than reflect sound, and mechanical ventilation strategies that mask sound transfer between spaces.
From mapping the daily movement patterns of your household to designing acoustic buffers between living and sleeping zones, our guide to home flow and function planning addresses every spatial question that must be resolved at the design stage, before walls come down and framing locks you in.
Future-Proofing Your Remodel
A remodel that serves your household well today but requires significant modification in ten years delivers only partial value. Future-proofing means making structural, mechanical, and design decisions during the remodel that extend the useful life of the finished work and reduce the need for costly revisitation as circumstances change.
Aging-in-Place Design Principles
The demographic reality for most homeowners planning a significant remodel is that they will be older, and potentially have different physical capabilities, the next time they undertake a major renovation. Aging-in-place principles, when incorporated early, add minimal cost to a project but dramatically improve its long-term livability.
Key elements include no-step entries wherever they can be designed, wider doorways at a minimum of 36 inches clear at key locations throughout the home, blocking built into bathroom walls at the time of framing for future grab bar installation, comfort-height toilets, curbless shower thresholds in at least one bathroom, and lever-style hardware on doors and plumbing fixtures throughout. None of these features appear visually different from standard construction when executed by a skilled designer. They simply extend the home’s usability across a wider range of physical ability without compromising aesthetics.
Pre-Wiring for Future Technology
The single highest-leverage future-proofing investment in any remodel is conduit and pre-wiring infrastructure for technology. Running Cat6a ethernet to every room, installing conduit through which future wiring can be pulled without wall demolition, and providing a properly sized and accessible structured wiring panel costs a fraction of what retrofitting the same infrastructure would cost after walls are closed and finished.
Pre-wiring extends well beyond conduit and Cat6a runs; it encompasses the full ecosystem of smart lighting, HVAC zoning, security, and energy monitoring, which is why our smart home remodeling guide is essential reading during the design phase, when infrastructure decisions are easiest and least expensive to make.
Designing With Resale in Mind
Even homeowners who plan to remain in their home indefinitely benefit from considering resale implications during the design phase. Design choices that are highly personal, highly niche, or highly market-specific carry risk when the home eventually sells. Neutrality in foundational choices, such as flooring species, cabinet colors, and countertop materials, preserves broad market appeal without requiring the homeowner to sacrifice personal expression in the elements that matter most to them. The strategic question is always: which elements are easiest for a future buyer to change, and which are expensive to undo?
Designing for the next 20 years, incorporating aging-in-place principles, infrastructure pre-wiring, resale-neutral choices, and multi-generational adaptability, is the focus of our spoke page on future-proofing remodel decisions, which gives homeowners a practical framework for making choices today that will serve them well tomorrow.
Integrating Budget Into the Design Process
Budget and design are inseparable disciplines. A design that ignores cost produces drawings that cannot be built within financial reality. A budget that ignores design priorities produces a project that meets cost targets while failing to deliver the intended result. The most successful remodeling projects treat budget planning as an active and ongoing part of the design process from the first goal-setting conversation through the final construction document submission.
The Cost Implications of Design Decisions
Every design decision has a direct cost implication. Relocating plumbing to achieve a preferred kitchen layout adds significant labor cost beyond the materials alone. Specifying custom cabinetry versus semi-custom can double the cabinet line item. Selecting natural stone versus engineered quartz affects both material cost and installation labor. A designer who prices decisions as they are made, rather than delivering a cost surprise at the end of the design phase, keeps the project within reach of the available budget.
The most effective approach is to establish a unit-cost mental model for key categories early in design: what does a square foot of tile installation cost in your market? What does a linear foot of custom cabinetry cost? What does a new bathroom rough-in add to the plumbing budget? These reference figures allow real-time calibration as design options are explored and compared.
Hard Costs, Soft Costs and Contingency
A complete remodeling budget consists of three categories. Hard costs cover construction labor and materials, which is what most homeowners budget for when they begin planning. Soft costs cover design fees, permit fees, structural engineering fees, and project management, which are frequently omitted in early budget estimates and then create a funding shortfall when invoices arrive. Contingency is a reserve for unforeseen conditions discovered during demolition, typically set at 10 to 20 percent of the total construction budget. A budget that excludes any of these three categories is a budget that will be exceeded.
Every design decision carries a direct cost implication, and materials, labor, permit fees, and lead times all interact, which is why we recommend reviewing our remodeling budget and financing guide in parallel with the design process to ensure your aesthetic vision aligns with financial reality before construction documents are completed.
Understanding Permits and Code in the Design Phase
Permit requirements and building codes are not obstacles to good design; they are the framework within which sound design must operate. A designer who understands the applicable codes in your jurisdiction produces drawings that pass plan review on the first submission. A designer who does not understand them produces a frustrating and costly cycle of revision requests and resubmittals that delays construction and adds to the project’s soft cost total.
How Code Influences Design
Building codes establish minimum standards for ceiling heights, stair geometry, egress window sizes, ventilation rates, electrical circuit requirements, plumbing rough-in dimensions, and structural member sizing. Design decisions that conflict with code create unforeseen cost impacts when the conflict is discovered during permit review or, more expensively, during a field inspection after the work is already in place.
In many jurisdictions, significant remodeling work triggers code upgrade requirements that extend beyond the immediate scope of the project. The “50 percent rule” embedded in many building codes means that when the cost of a remodel exceeds 50 percent of the assessed value of the existing structure, the entire structure may be required to be brought into compliance with current energy codes, accessibility standards, and fire separation requirements, regardless of whether those areas are part of the renovation.
Zoning and the Design Envelope
Zoning regulations define the physical envelope within which any construction on a parcel can occur. Setback requirements determine how close to property lines a structure can extend. Floor area ratio (FAR) limits the total buildable square footage relative to the lot size. Height restrictions limit the maximum allowable elevation of any structure. All of these constraints must be understood and documented before design begins, because a design that violates zoning cannot receive a building permit regardless of how technically well it is drawn.
Because permit requirements, setback rules, egress standards, and energy codes all directly influence what your designer can draw, our remodeling permits and code guide covers every compliance consideration from zoning to final inspection that affects your design options.
Design Brief Templates, Tools and Decision Timing
Even the most well-planned remodel can stall if the decision-making process is unstructured. Decision fatigue is a documented risk in any project that requires hundreds of individual choices across weeks or months of pre-construction planning and active construction. The antidote is a structured decision-making system that assigns every choice a category, a deadline, and a clear owner.
Building Your Design Brief
A design brief is the foundational document of any remodeling project. It captures the household’s goals, non-negotiable requirements, budget parameters, style direction, timeline constraints, and any specific needs the design must accommodate. A well-written design brief reduces the risk of misalignment between the homeowner and the designer, because it makes expectations explicit before design work begins rather than allowing conflicts to surface partway through.
A design brief template tailored specifically for residential remodeling, capturing every category of decision from goals and style to budget and timeline constraints, is available in our design brief template for homeowners resource, which makes the brief-writing process systematic and complete regardless of a project’s scope.
The design brief is a living document. It should be reviewed and updated at each major design milestone to reflect decisions that have been finalized and goals that have evolved as the design progresses.
The Wish-List vs. Budget Reconciliation Process
One of the most valuable exercises in the pre-design phase is a formal reconciliation of the wish list against the available budget. This process assigns a rough cost estimate to each wish list item, stacks the totals against the budget, and forces prioritization before design hours are spent on items that will ultimately be cut. Items that do not survive the first prioritization can be deferred to a future phase or eliminated entirely, with agreement from all household stakeholders before design work begins in earnest.
When to Lock In Design Decisions
Decisions have a cost to reverse that increases exponentially as the project advances. Changing a paint color before walls are primed costs nothing. Changing it after the final coat has been applied costs a day of labor and materials. Changing a plumbing fixture specification before rough-in is complete costs a phone call. Changing it after tile is installed and trim is in can cost thousands of dollars.
A selections schedule assigns each decision category a deadline relative to the construction schedule. Cabinet hardware must be ordered before cabinet installation begins. Countertop templates cannot be cut until cabinets are fully set. Tile must be on-site and acclimated before tile installation starts. The selections schedule prevents the last-minute choices that disrupt contractor workflow and drive up change order costs.
The remodeling design FAQ and templates hub, including a full design brief template, wish-list vs. budget reconciliation worksheet, inspiration board guidance, and common decision-timing mistakes, is available in our dedicated remodeling design FAQ and templates resource, which is the practical companion to this planning guide.
Partner With Professionals Who Make Planning Work
Every principle in this guide depends on the quality of the team that executes it. Homeowners who engage experienced professionals navigate the planning and design process with greater efficiency, make better-informed decisions under pressure, and achieve outcomes that hold up over years of daily use. Mr. Local Services connects homeowners, landlords, and property managers with skilled remodeling professionals who bring structure, expertise, and accountability to every phase of a project, from initial goal-setting through final walk-through.
Conclusion
Remodeling planning and design integrates goal-setting, team selection, documentation, style, palette, lighting, flow, and future-proofing into a single pre-construction system.
Each section of this guide links to a dedicated spoke resource covering its subtopic in the depth that a complete remodel planning effort requires.
When ready to move from planning to action, Mr. Local Services connects you with skilled remodeling professionals who deliver results from design through completion.
Frequently Asked Questions
How long does the remodeling planning and design phase typically take?
For most residential remodels, the planning and design phase runs 4 to 16 weeks, depending on scope, permit review timelines, and how quickly the homeowner makes selections. Complex whole-home remodels often require 3 to 6 months of pre-construction planning.
What is the difference between an architect and an interior designer in a remodeling project?
An architect is licensed to design structural changes and produce permit-ready construction drawings. An interior designer focuses on spatial planning, finishes, and furnishings. Many remodeling projects benefit from both professionals working together in defined roles.
How much should homeowners budget for design fees alone?
Architectural fees typically range from 8 to 15 percent of construction cost for full service. Interior design fees range from $75 to $300 per hour depending on market and experience. Both are legitimate project costs that belong in the total budget from day one.
What should a design brief include before hiring a designer?
A design brief should capture project goals and non-negotiable requirements, budget parameters, preferred style direction, timeline constraints, and any household-specific needs. It is the foundational document that sets clear expectations before design begins.
When should homeowners make final material selections?
Material selections must follow a project-specific selections schedule. Most long-lead items, including cabinetry, tile, and plumbing fixtures, must be specified and ordered 8 to 16 weeks before installation. Final selections should be locked in before construction documents are issued.
What does it mean for plans to be “permit-ready” versus “bid-ready”?
Permit-ready drawings meet the minimum technical requirements of the local building department for plan review and permit approval. Bid-ready drawings include additional specification detail that contractors need to produce accurate, comparable pricing during the competitive bidding process.
Can homeowners use online design tools instead of hiring a professional designer?
Online design tools are useful for early ideation and basic space planning experiments. However, they do not produce permit-ready structural drawings, do not carry professional liability, and cannot navigate code requirements or coordinate with contractors the way a licensed architect or experienced designer can on a substantive remodeling project.