Plumbing system design for custom homes is the engineering and layout plan that decides how water enters, moves through, and exits a house. I treat it as the invisible skeleton of the build. Get it right, and the home works quietly for decades.
Most plumbing failures I see trace back to design decisions, not bad parts. Repiping a finished custom home costs many times what thoughtful planning costs upfront.
This guide covers system fundamentals, layout planning, supply sources, pipe materials, water heating, drainage, fixtures, codes, efficiency upgrades, costs, hiring, mistakes, and long-term maintenance.
What Plumbing System Design Means in a Custom Home Build
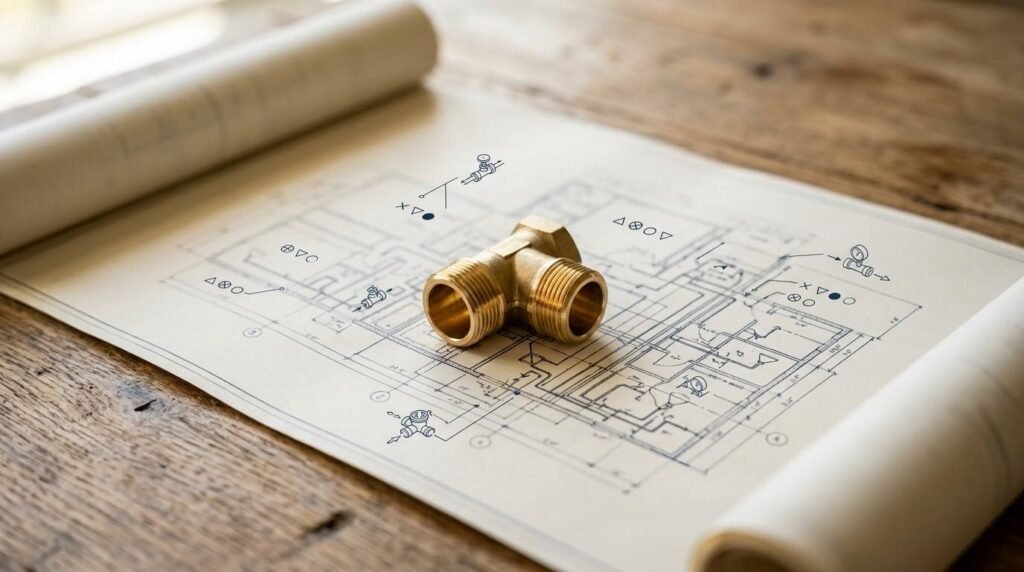
Plumbing system design is a documented plan that maps every pipe, fixture, valve, drain, and vent in a house before construction begins. It sets pipe sizes, routing paths, slope angles, and equipment locations. And it ties all of that to the architectural drawings.
I think of it as three questions answered on paper. Where does clean water come from, where does it need to go, and how does used water leave safely?
Design vs. Installation: Where Each Begins
Design happens on the drawing. Installation happens in the walls.
A designer or engineer produces the plumbing plan, riser diagrams, and fixture schedules. A licensed plumber then executes that plan in the field, adjusting for real framing conditions. Both roles matter, and confusing them creates gaps nobody owns.
Why Custom Homes Need Custom Plumbing Plans
Production builders reuse the same plumbing layout across hundreds of homes. Custom homes throw that repeatability out.
Vaulted ceilings, freestanding tubs, outdoor kitchens, wine rooms, and split primary suites all move water demand into unusual places. Each of those choices changes pipe sizing, venting routes, and hot water travel distance. So the plan gets built around your floor plan instead of the reverse.
The Core Components of a Residential Plumbing System
Every residential system contains the same building blocks. A service line and main shutoff bring water in. Distribution piping carries cold and hot water to fixtures.
A water heater conditions the hot side. Drain lines, traps, and vents carry waste out while protecting the house from sewer gas. Everything else is refinement on top of those six parts.

The Three Systems Inside Every Plumbing Design
I break every plumbing plan into three interacting systems. The supply system delivers pressurized water. The drain-waste-vent system removes waste by gravity. The fixture layer is where people actually touch the system.
Designing these as one integrated whole is what separates a good plan from a set of disconnected pipes.
Supply System: Pressure, Sizing, and Delivery
The supply side runs under pressure, so sizing controls performance. Undersized pipe starves fixtures when two showers run at once.
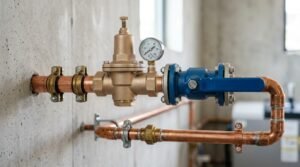
Most homes perform well between 40 and 60 psi of static pressure, and pressures above 80 psi violate code in jurisdictions following the International Plumbing Code. A pressure-reducing valve solves high street pressure. Fixture unit calculations then set trunk and branch diameters.
Drain-Waste-Vent (DWV) System
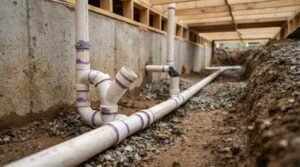
Drainage runs on gravity, not pressure, which makes slope non-negotiable. Standard practice puts horizontal drain lines at a quarter inch of fall per foot.
Vents do the quiet work. They let air into the pipe so water flows freely, and they keep trap seals intact so sewer gas stays outside. A skipped vent shows up later as a gurgling drain nobody can diagnose.
Fixture and Appliance Connection Points
Every sink, toilet, shower, tub, washer, dishwasher, ice maker, and hose bib is a connection point with its own supply and drain requirement. I count them early because the total drives water heater size, meter size, and pipe diameter.
Appliance rough-in heights and stub-out locations get locked here too. Moving a stub-out after tile goes on is expensive and ugly.
Planning the Plumbing Layout Before the Slab Is Poured
Layout planning is the highest-leverage moment in the entire process. Once concrete cures around your drain lines, options narrow dramatically.
I map wet areas against structural framing first, then resolve conflicts on paper. That single habit prevents most field change orders.
Wet Wall Stacking and Fixture Grouping
Stacking bathrooms vertically and backing them onto shared wet walls shortens pipe runs. Shorter runs mean less material, faster hot water, and fewer failure points.
Grouping the kitchen, laundry, and a powder room near one plumbing core does the same thing on a single level. Spread fixtures across four corners of a house and cost climbs with every foot of pipe.
Rough-In Sequencing With Framing and Concrete
Plumbing rough-in happens in defined windows. Under-slab drainage goes in before the pour, and above-grade supply and DWV go in after framing and before insulation and drywall.
Coordinating that sequence with your general contractor’s build schedule keeps trades from stacking on each other. Missed windows cause the most expensive delays in a custom build.
Slab, Crawlspace, and Basement Considerations
Foundation type changes everything about routing and future access. Slab-on-grade buries drain lines in concrete, so accuracy at layout is critical and later access means cutting.
Crawlspaces and basements keep pipes reachable, which simplifies repairs and remodels. They also introduce freeze exposure and require insulation planning in cold climates.
Water Supply Sources and Main Line Design
Your water source sets the starting conditions for the whole design. Municipal supply arrives treated and pressurized. Well water arrives raw and needs equipment to pressurize and condition it.
I settle this question before sizing anything downstream, because the two paths need different hardware.
Municipal Connection vs. Private Well
City connections mean a meter, a tap fee, and a service line from the street. Well systems mean a drilled well, submersible pump, pressure tank, and often filtration or softening.
Roughly 13% of U.S. households rely on private wells according to the U.S. Environmental Protection Agency, and those homeowners own their own water quality testing. That responsibility belongs in the design conversation, not after move-in.
Service Line Sizing and Pressure Regulation
Service line diameter sets the ceiling on total flow into the house. Larger homes with many simultaneous fixtures typically need a one-inch or larger service rather than the older three-quarter-inch default.
A pressure-reducing valve, main shutoff, and expansion tank sit near the entry point. Those three parts protect the entire system from pressure spikes and thermal expansion.
Shutoff Valve and Access Point Placement
I place the main shutoff somewhere a panicked homeowner finds in ten seconds. Buried behind storage shelving in a mechanical room fails that test.
Individual fixture shutoffs matter just as much. Isolating one bathroom instead of the whole house turns a crisis into a scheduled repair.
Pipe Materials and Where Each One Belongs
Material choice affects cost, longevity, water taste, freeze behavior, and repair difficulty. No single material wins everywhere, so most custom homes use a mix.
I match material to job rather than picking one product for the whole house.
| Material | Typical Use | Strengths | Watch-Outs |
| PEX | Hot and cold distribution | Flexible, freeze-tolerant, fast to install, fewer joints | UV sensitive, needs protection from rodents |
| Copper | Mains, exposed runs, recirculation | Long service life, rigid, heat tolerant | Higher material cost, pinhole risk in acidic water |
| CPVC | Hot and cold distribution | Lower cost, corrosion resistant | Brittle with age, solvent-welded joints |
| PVC | Drain, waste, vent | Inexpensive, easy to slope and vent | Not rated for pressurized hot water |
| Cast Iron | Drain stacks in quiet zones | Excellent sound dampening | Heavy, costlier labor |
PEX, Copper, CPVC, and PVC Compared
PEX dominates new residential distribution because it bends around framing and cuts joint count. Copper still earns its place on main runs and anywhere pipe stays exposed.
CPVC offers a middle cost path. PVC and ABS handle drainage. Cast iron shows up when a client wants silent drain stacks behind a media room or primary suite wall.
Manifold vs. Trunk-and-Branch Distribution
Trunk-and-branch runs one large line with smaller taps off it. It uses less pipe and costs less.
A home-run manifold sends a dedicated line to each fixture from a central distribution block. That design delivers steadier pressure, faster hot water, and per-fixture shutoff at the manifold. I recommend it for larger homes where several fixtures run at once.
Insulation, Expansion, and Freeze Protection
Hot water lines get insulated to cut standby loss and shorten wait times. Cold lines in unconditioned space get insulated against freezing and sweating.
Long copper runs need expansion loops or offsets. Exterior hose bibs need frost-proof designs in freezing climates, and irrigation lines need proper backflow prevention. Skipping any of these creates a predictable winter burst pipe and water damage event.
Water Heating Design and Hot Water Delivery
Hot water is the part of the system homeowners judge daily. Design decides whether a shower runs out, arrives slowly, or fluctuates when a toilet flushes.
I size the equipment to peak simultaneous demand, not to square footage.
Tank, Tankless, and Hybrid Systems
Storage tanks deliver a fixed reserve at low upfront cost. Tankless units heat on demand with no standby loss and no reserve limit.
Heat pump water heaters run two to three times more efficiently than standard electric resistance models, and the U.S. Department of Energy notes they can cut water heating bills substantially for a family of four. Space, fuel type, and climate decide which fits.
Sizing for Bathroom and Fixture Count
A three-bath home with a soaking tub and a rain shower demands far more than a two-bath home with standard fixtures. Sizing runs on gallons per minute at peak, plus recovery rate.
Large homes often perform better with two smaller units placed near demand than one oversized unit at the far end. That layout choice also cuts pipe run length.
Recirculation Loops and Wait-Time Control
A recirculation loop keeps hot water near the fixture so it arrives in seconds. Dedicated return lines perform best, and demand-controlled pumps avoid wasting energy around the clock.
I plan the loop during design because retrofitting a return line into finished walls is invasive. Timers and motion triggers keep operating cost low.
Drainage, Venting, and Sewer or Septic Connection
The waste side gets less attention and causes more misery. Gravity, slope, and air movement do all the work here.
I design drainage backward from the connection point, whether that is a city sewer tap or a septic field.
Slope, Trap, and Vent Fundamentals
Horizontal drains need consistent fall. Too flat and solids settle; too steep and water outruns solids, leaving them behind.
Every fixture needs a trap holding a water seal, and every trap needs a vent within code-specified distance. Air admittance valves solve island sinks and remodel constraints where a full vent stack cannot reach.
Sewer Line vs. Septic System Design
A sewer connection means a lateral line from the house to the municipal main, with cleanouts at accessible points. A septic system means a tank, distribution box, and drain field sized by soil percolation and bedroom count.
More than one in five U.S. households depends on onsite septic treatment per the EPA’s septic systems overview. Septic design constrains where you can build, park, and landscape, so it belongs early in site planning.
Sump Pumps, Ejector Pumps, and Low-Level Drainage
Fixtures below the sewer line need mechanical help. A sewage ejector pump lifts waste from a basement bathroom up to the main drain.
Sump pumps handle groundwater around the foundation, not sewage. Both need a backup power plan, because they fail exactly when storms knock out electricity.
Fixture Selection and Room-by-Room Plumbing Needs
Fixture choices drive rough-in dimensions, so selections need to land before rough-in, not during finish work. A wall-mounted faucet, a floor-mounted tub filler, and a wall-hung toilet each demand different framing and pipe placement.
I build a room-by-room fixture schedule and treat it as a design deliverable.
Kitchens, Pantries, and Bar Sinks
Kitchens carry the highest fixture density outside bathrooms. A main sink, prep sink, dishwasher, pot filler, refrigerator ice line, and instant hot dispenser all need connections.
Pantry sinks and bar sinks add drains that need venting. Coordinating these with kitchen remodeling and cabinetry layouts prevents a sink base cabinet landing where a vent stack needs to rise.
Primary Baths, Guest Baths, and Powder Rooms
Primary baths often include double vanities, a freestanding tub, and a multi-head shower. Those shower systems can demand well above standard flow, which affects both pipe sizing and water heater capacity.
Guest baths and powder rooms stay simpler. Grouping them near existing wet walls keeps cost down without compromising the design.
Laundry, Utility, Outdoor, and Garage Points
Laundry needs hot and cold supply, a standpipe drain, and a pan with drainage on upper floors. Utility sinks, water softener loops, and boiler feeds live in the mechanical room.
Outdoor points include hose bibs, outdoor kitchens, pool fills, and irrigation stubs. Garage sinks and floor drains round out the list. Each one is cheap during rough-in and expensive afterward.
Codes, Permits, and Inspections in Custom Plumbing Design
Plumbing is one of the most heavily regulated trades in residential construction, and for good reason. Bad plumbing contaminates drinking water.
I design to code from the first sketch rather than fixing violations at inspection.
IPC and UPC Model Codes
Most U.S. jurisdictions adopt either the International Plumbing Code or the Uniform Plumbing Code, then amend it locally. The two differ on venting methods, material approvals, and sizing tables.
Local amendments always win. So the design has to reflect the code edition your specific building department enforces, not a generic national standard.
Permit Stages and Inspection Checkpoints
Permits get pulled before work starts, usually by the licensed plumbing contractor. Inspections then happen at fixed stages: under-slab or groundwork, top-out rough-in with pressure test, and final with fixtures installed and operational.
Each inspection has to pass before the next trade covers the work. Failing top-out after drywall goes up is the expensive version of this lesson.
Documentation and As-Built Plans
I insist on as-built drawings at project close. They record where lines actually run after field adjustments.
That document saves thousands during a future remodel or leak repair. Photographs of open walls before drywall serve the same purpose and cost nothing.
Efficiency, Water Quality, and Smart Plumbing Add-Ons
Modern plumbing design does more than move water. It manages consumption, treats water quality, and monitors for failure.
These systems are far cheaper to install during construction than to add later.
WaterSense Fixtures and Flow Rates
WaterSense labeled fixtures use at least 20% less water than standard models while meeting performance criteria, according to the EPA WaterSense program. Low-flow toilets, showerheads, and faucets cut both water and water heating costs.
Efficiency and performance no longer trade off the way they did a decade ago. Pressure-compensating showerheads deliver a strong spray at reduced flow.
Filtration, Softening, and Treatment
Hard water shortens appliance life and scales fixtures. A softener loop planned at rough-in keeps installation clean and serviceable.
Whole-house filtration, carbon systems, UV treatment, and point-of-use reverse osmosis all need dedicated space, power, and drainage. Well systems especially need water testing to drive equipment selection.
Leak Detection and Automatic Shutoff Devices
Water damage remains one of the most frequent and costly home insurance claims, and the Insurance Information Institute reports water damage and freezing account for roughly a quarter of all homeowner’s claims. A smart main shutoff valve closes automatically when it detects abnormal flow.
Point sensors under sinks, behind toilets, and near water heaters add a second layer. Wiring and plumbing both need planning, so this belongs in the design phase.
Plumbing Design Costs and Budget Planning
Plumbing typically lands in the mid single digits as a share of total custom home cost, though fixture selections swing that number hard. A tile shower with three valves costs multiples of a standard tub and shower.
I separate the budget into design, rough-in, and finish so clients see where money actually goes.
Design Fees vs. Rough-In vs. Finish Costs
Design fees cover drawings, calculations, and coordination. Rough-in covers labor and material for pipe, drains, and vents inside walls and under slab.
Finish covers fixtures, trim, valves, and the water heater. Rough-in cost stays fairly predictable. Finish cost is where selections drive the total, and it is the line item clients control most directly.
Where Budgets Usually Overrun
Late fixture changes cause the most overruns I see. Moving a shower valve after tile means demolition, repair, and re-inspection.
Site surprises come second. Rock, high water tables, and long service line runs all add cost that no drawing predicted. A contingency line for underground work protects the schedule and the relationship.
Choosing the Right Plumbing Professional for a Custom Build
Custom plumbing involves several roles, and clarity about who does what prevents finger-pointing later. I define scope in writing before anyone touches a pipe.
Licensing, insurance, and permit history matter more than the lowest bid.
Designer, Engineer, and Licensed Plumber Roles
A plumbing designer or mechanical engineer produces the plan, sizing calculations, and riser diagrams. Larger or more complex homes justify stamped engineered drawings.
A licensed plumbing contractor pulls permits and installs the system. On simpler builds, an experienced plumbing contractor handles design and installation together. Working with a coordinated network of licensed plumbing services keeps those handoffs clean.
Questions to Ask Before Hiring
I ask for license number, insurance certificates, and recent custom home references. Then I ask how many similar builds they completed in the past two years.
Three more questions matter. Who pulls the permits, who provides as-built drawings, and what warranty covers rough-in workmanship. Clear answers signal a professional operation.
Common Plumbing Design Mistakes in Custom Homes
The same errors repeat across projects, and every one of them is preventable on paper. I keep a running checklist and review it before rough-in.
Undersized supply lines top the list. Two showers running at once expose the problem immediately, and the fix means opening walls.
Scattered fixtures come next. Long pipe runs waste water, delay hot water, and add cost with no benefit. Then there is skipped venting, missing cleanouts, hidden shutoffs, no recirculation plan in a large home, and forgotten outdoor or garage connections.
Ignoring future needs is the quiet mistake. Stubbing for a future bathroom, a pool, or an accessory building costs very little during construction. Adding it later costs a great deal, which is also true for accessibility and mobility upgrades planned into bathrooms from the start.
Maintaining and Future-Proofing Your Plumbing System
A well-designed system still needs upkeep. I hand every homeowner a short annual routine rather than a thick manual nobody reads.
Test the main shutoff once a year so it does not seize. Flush the water heater, check the expansion tank, and inspect supply hoses on the washer and dishwasher.
Watch for the early signals. Slow drains, water hammer, fluctuating pressure, and rising bills all point to specific causes. Catching them early keeps a small repair from becoming a water damage restoration project.
Future-proofing means leaving room. Accessible manifolds, labeled shutoffs, as-built drawings, and capped stubs for later additions all make the next decade cheaper and calmer.
Conclusion
Plumbing system design ties supply, drainage, venting, water heating, fixtures, and code compliance into one coordinated plan built around your specific floor plan.
Every section here connects to deeper resources on pipe materials, water heating, fixture planning, and permitting as your project moves forward.
We help you plan and execute it right the first time. Talk to Mr. Local Services and get your plumbing design handled by proven professionals.
Frequently Asked Questions
When should plumbing design start in a custom home project?
Plumbing design starts alongside architectural drawings, well before permits. Early coordination locks wet wall locations and fixture positions while changes still cost nothing.
How much does plumbing design add to a custom home budget?
Plumbing usually represents a mid-single-digit percentage of total build cost. Fixture selections and bathroom count move that figure far more than pipe material does.
Is PEX or copper better for a new custom home?
PEX suits most interior distribution because it flexes and resists freezing. Copper still performs best on main lines and exposed runs. Many homes use both.
How many water heaters does a custom home need?
Large homes with distant bathrooms often perform better with two units placed near demand. Sizing depends on peak simultaneous fixture use, not square footage.
Can plumbing layouts be changed after the slab is poured?
Under-slab drain lines require concrete cutting to relocate. Above-grade supply lines move more easily before drywall. Both changes cost real money and time.
Do I need a plumbing engineer or just a licensed plumber?
Straightforward homes work fine with an experienced licensed plumbing contractor. Complex layouts, multiple water heaters, or recirculation systems justify engineered drawings.
What plumbing inspections happen during a custom build?
Three main checkpoints apply: underground groundwork before the pour, top-out rough-in with a pressure test, and final inspection with all fixtures operational.